
Restoring Older Washers with Drainage Problems
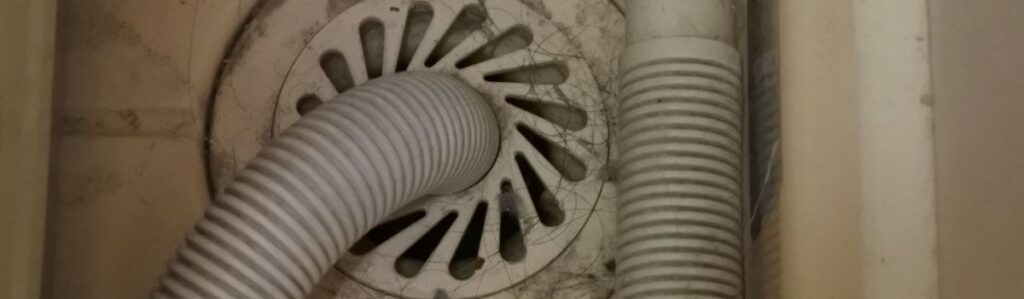
Fix Old Washers: How To Restore Machines With Drainage Problems
It always happens at the worst time you’re catching up on laundry, your washer hums to life, fills up, agitates, and then suddenly… nothing. The cycle ends, but the water doesn’t drain. You’re left staring at a drum full of soggy clothes and wondering whether your trusted machine is on its last legs.
If you’ve owned a washer for over a decade, this isn’t an unfamiliar scenario. Drainage problems are one of the most common issues affecting older washing machines, especially in households that do laundry frequently. It’s a slow build-up lint, hair, detergent residue, and mineral scale from hard water gradually clog hoses and filters. In many cases, all you need to do is unclog a washer drain to get things running again. At the same time, mechanical parts such as the pump or lid switch wear out due to years of use.
In British Columbia, where homeowners often prioritize sustainability and maximizing the lifespan of household appliances, it’s common to see older washers still in use well past the 10-year mark. While some people might rush to replace an older machine at the first sign of trouble, many of these drainage issues are entirely fixable often without professional help.
This expert guide will walk you through the entire restoration process, from understanding how your washer’s drainage system works to diagnosing common issues, making necessary repairs, maintaining optimal performance, and determining when it’s time to replace the unit. Whether you’re in Vancouver, Victoria, Kelowna, or anywhere in BC, this guide is tailored to help you get the most from your older washer without jumping straight to replacement.
How Washing Machines Drain: A Quick Refresher
To solve any drainage problem, it’s important to understand how your washing machine is designed to drain in the first place. The process is straightforward, but once you grasp it, you’ll be far more confident diagnosing and fixing problems when something goes wrong.
Here’s a simplified breakdown:
- The final spin begins. The drum spins to extract water from your laundry.
- The drain pump activates. A motor-driven pump kicks in to push water out.
- Water travels through the drain hose. This hose usually exits from the rear of the machine.
- Water empties into the home’s standpipe or utility sink.
Key Components Involved
- Drain Pump: This is the heart of the drainage process. It draws water from the washer drum and forces it out through the drain hose. In older models, these pumps are often belt-driven and prone to mechanical failure after years of use.
- Drain Hose: This flexible hose connects the washer to your home’s plumbing. It can become kinked or clogged with lint, debris, or even forgotten items, such as socks and baby clothing.
- Lid Switch or Door Lock: Modern washers have safety interlocks that prevent the machine from spinning or draining if the lid or door isn’t fully closed. In older washers, these switches often break due to repeated use.
- Standpipe/Wall Drain: The location where the washer expels the drained water. If your plumbing backs up here, it can appear to be a washer failure even when the machine is functioning correctly.
Understanding how these parts work together helps you troubleshoot methodically. Most issues occur when one of these components is blocked, worn out, or disconnected.
What Causes Drainage Problems in Older Washers?
Drainage problems don’t happen all at once. They build over time, making them hard to notice until they suddenly become a major inconvenience. Below are the most common causes of washer drainage issues, along with how to identify them.
Clogged or Kinked Drain Hose
Even a small blockage can stop water from draining. Over time, lint, dirt, pet hair, and even small articles of clothing can collect inside the drain hose. If the washer is pushed too close to the wall, the hose may kink, cutting off the water flow like a garden hose pressed under a rock.
Symptoms:
- Water pooling inside the drum after a cycle
- Gurgling noises during draining
- Washer stops mid-cycle
Check the hose visually first. If there’s a kink or obvious buildup at the exit point, you may have found the problem. Unplug the washer, detach the hose, and flush it with warm water.
Failing or Jammed Drain Pump
Drain pumps wear out over time especially in machines that handle large family-sized loads regularly. Coins, hair ties, and threads can jam the impeller, or the motor can burn out completely.
Symptoms:
- Loud humming without draining
- No sound at all during the drain phase
- Visible leaks around the pump area
You may need to remove the pump cover and inspect the impeller directly. Spin it with your finger it should turn freely. If it doesn’t, or the motor doesn’t engage during a cycle, it likely needs to be replaced.
Blocked Drain Filter or Trap
Some washers, especially front-load models, come with a filter to trap debris before it reaches the pump. This filter is crucial for protecting the system but must be cleaned regularly.
Symptoms:
- Slow drainage or complete stop
- Standing water after a spin cycle
- Moldy smell or leaking from the front
Locate the filter, which is usually located behind a lower access panel. Have towels ready, as water may spill out. Clean out all collected debris and give the compartment a quick rinse.
Faulty Lid Switch or Door Lock
Older machines often fail to drain because the washer “thinks” the lid is open. This safety feature prevents water from being pumped out unless the lid is secured.
Symptoms:
- The washer won’t spin or drain
- Error codes on digital displays
- A loose or broken lid hinge
Test the lid switch with a pen or tool it should click when pressed. If not, it may need a simple replacement. These parts are inexpensive and relatively easy to install.
Plumbing or Standpipe Backup
Sometimes, the washer is fine but the plumbing isn’t. A slow or blocked standpipe can cause water to back up into the washer or overflow onto the floor.
Symptoms:
- Water spills out of the standpipe
- Strong sewer odor near the laundry area
- The washer drains, but water comes back
Try pouring a bucket of water into the standpipe. If it drains slowly, consider clearing the pipe or calling a plumber.
Step-by-Step Troubleshooting (With Tools & Safety Notes)
Before diving into repairs, gather all the necessary items: gloves, towels, a flashlight, a bucket, and screwdrivers. Always unplug the washer and turn off the water supply first. Lay down old towels to protect your floor.
Inspect the Drain Hose
- Pull the machine slightly forward.
- Look for bends or damage.
- Detach and flush the hose with warm water.
- Use a flexible drain brush if you see stubborn buildup.
Open and Inspect the Drain Pump
- Remove the back or bottom panel.
- Locate the pump near the front or base.
- Clear debris around the impeller.
- Try spinning the impeller with your hand.
Clean the Drain Filter or Trap
- Open the lower access panel.
- Place a towel and bowl beneath it.
- Unscrew and remove the filter.
- Rinse thoroughly before replacing.
Test the Lid Switch or Door Lock
- Use a multimeter if you have one; otherwise, test the switch manually.
- Look for loose wiring or signs of rust.
- Replace with a compatible part if needed.
Run a Test Cycle
- Plug the washer back in.
- Try a short cycle with no clothes.
- Observe whether it fills, spins, and drains.
Repair or Replace? What You Can Fix Yourself
If you’ve identified a single point of failure a clogged hose, a faulty lid switch, or a dirty filter you’re likely in great shape. These repairs cost little and don’t take much time. However, if you’re facing two or more problems or components, such as the pump motor or control board failing, you’ll need to weigh the repair costs against the cost of buying a new machine.
Ask yourself:
- Is this the first time it’s broken down?
- Can I get the part for under $100?
- Do I have the tools and time to do the job?
- Am I dealing with electrical or structural problems?
If the repairs involve multiple parts or seem overwhelming, obtaining a quote from a technician may help you make an informed decision.
Ongoing Maintenance to Prevent Future Clogs
Want to avoid this hassle again? Build simple washer maintenance into your routine.
Try the following:
- Once a month, run an empty hot cycle with vinegar or a washer cleaner.
- Every 3 months: Remove and rinse the drain filter.
- Twice a year: Check and flush the drain hose.
- After every load, Leave the door or lid open to let the drum air out.
- Annually, pull the washer out, inspect it for leaks, and check the standpipe.
Preventive care goes a long way toward protecting your washer and your laundry room from messy surprises.
When Restoration Isn’t Worth It: Time to Upgrade
Sometimes, despite your best efforts, the washer simply isn’t worth saving. Perhaps it’s 15 years old, showing signs of rust, or making strange grinding noises. Or maybe you’ve already replaced the pump, switch, and hose, and now the control board is failing.
When replacement makes more sense:
- The cost of repair is over 50% of the cost of a new washer.
- The washer is over 12 years old and has multiple recurring problems.
- Imouldy, rendering it unsafe foring or moldy beyond safe use.
- You want to save water and energy or upgrade to smart features.
If you’re in BC, check for appliance rebates on energy-efficient models. New washers often pay for themselves in savings over time.
Local Help in British Columbia
When you’ve hit a wall or simply prefer to leave it to a pro, you’re in good hands. BC has a wide range of experienced appliance repair professionals available in every major city.
Benefits of hiring a local technician:
- Quick diagnosis and repairs
- Access to genuine parts
- Warranty on labor and components
- Less risk of damaging electrical systems
Check reviews online, or ask your local hardware store or neighbors for recommendations. Whether you’re in Nanaimo, Richmond, or Kamloops there’s help nearby.
FAQs
Why won’t my washer drain at all?
Start with the drain hose and filter. If both are clear, the pump may have failed.
Are there reset buttons on older washers?
Most don’t have one, but unplugging the unit for 5 – 10 minutes can reset the control board.
Should I replace the washer if the pump fails again?
If it’s the second time within a few years and other issues are present, yes.
Is hard water a factor in drainage problems?
Absolutely. Hard water can lead to faster buildup of minerals in hoses and pumps.
Can a washer flood my laundry room if it doesn’t drain?
Yes. Especially if the standpipe is also blocked, backup can occur quickly.
Conclusion
Dealing with an older washer that refuses to drain can be frustrating but it doesn’t have to mean the end. With a little effort and the right guidance, many drainage issues can be diagnosed and fixed at home, often for a fraction of the cost of a new machine.
The key is knowing your washer, recognizing the signs, and taking a step-by-step approach. Whether you choose to repair it yourself, hire a professional, or finally upgrade you’re now equipped with the insight to make the best choice for your home.
Before sending your old washer to the landfill, give it a second chance. It might surprise you how much life it has left.