
Replacing a Washing Machine Belt (All Brands)
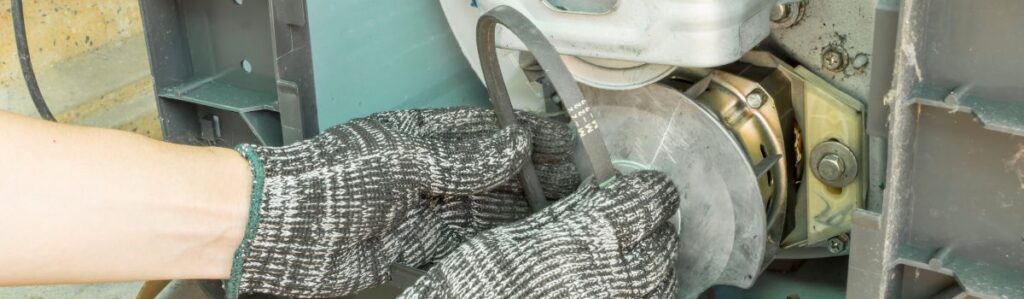
Step-by-Step Guide to Replacing Your Washing Machine Belt
A worn or broken belt can stop your washing machine from spinning or agitating properly. If your washer drum isn’t moving as it should, replacing the belt is often an easy, cost-effective repair. Washing machine performance can be greatly affected by a faulty belt, leading to inefficient cleaning and longer wash cycles. This guide will walk you through the steps to replace a washing machine belt, covering all major brands.
Signs Your Washing Machine Belt Needs Replacing
Before you tear your washer apart, make sure the belt is actually the problem. Here’s what to look for:
- Drum won’t spin or agitate: If the motor is running but the drum isn’t moving, the belt may be loose, stretched, or snapped.
- Burning rubber smell: A worn-out belt can slip, generating heat and that telltale burnt rubber odor.
- Slapping or squealing noises: A loose or frayed belt might make a thumping or high-pitched squeak as it struggles to grip.
- Belt on the floor: If you find a broken belt under or behind the washer, well, there’s your answer.
If you’re checking most of these boxes, it’s time to inspect and probably replace the belt.
Tools and Parts You’ll Need
Before starting, gather these tools:
- Replacement belt – Match it to your washer’s model number for a proper fit.
- Screwdrivers – A Phillips and a flathead screwdriver will handle most screws.
- Adjustable wrench or socket set – Needed for loosening and tightening bolts.
- Pliers (optional) – Useful for gripping and adjusting components.
- Work gloves – Protect your hands from sharp edges and grime.
- Towel or small container – To catch any water leakage when moving hoses.
Having everything ready before you begin makes the process smoother and faster.
Step 1: Disconnect the Washer
For safety, unplug the washing machine from the power outlet. Electricity and moving parts don’t mix. If it’s a top-load washer, also turn off the water supply valves and disconnect the hoses. Expect some water to spill have a towel ready or a small container to catch any drips.
If your washer is heavy, move it carefully to give yourself access to the back or underside. Enlist help if needed. Some machines have sharp edges inside, so wearing work gloves is a good idea. Once everything is powered down and disconnected, you’re ready to move on.
Step 2: Access the Belt
The belt is usually located at either the bottom or back of the washer, depending on the model. First, determine how your washing machine is designed:
- Top-Loading Washers – The belt is often underneath the machine. You may need to tilt the washer back or remove a lower panel for access. If tilting, have someone hold it steady or brace it securely to prevent tipping.
- Front-Loading Washers – The belt is typically behind the rear panel. You’ll need to unscrew and remove this panel to reach it.
Once you’ve identified where the belt is housed:
- Unfasten the access pane – Use a screwdriver or wrench, depending on your model, to remove the screws securing it in place. Keep the screws in a safe spot you’ll need them later.
- Locate the belt and pulleys – You should see the drive belt wrapped around a motor pulley and a larger drum or transmission pulley. If the belt has snapped, it might already be loose or lying in the bottom of the washer.
- Check the surrounding area – Look for signs of wear or residue rubber shavings or belt debris can indicate excessive friction or a misaligned pulley.
With the belt exposed, you’re ready to remove the old one and install the replacement.
Step 3: Remove the Old Belt
Once you locate the belt:
- Check its condition – If it’s cracked, frayed, or stretched, it’s definitely time for a replacement. A belt in bad shape can slip or snap, leaving your washer dead in the water.
- Release the tension – If the belt is still intact, spin the large drum pulley while pulling on the belt. It should start to work its way off. Some washers have a tensioner that may need to be loosened with a wrench before the belt can be removed.
- Remove the belt – If it’s already broken, this step is even easier just pull the remaining pieces off the pulleys. If the belt shredded inside the machine, check for and remove any leftover debris.
With the old belt out, you’re ready to install the new one.
Step 4: Install the New Belt
Now that the old belt is out, it’s time to install the new one.
- Loop the belt around the motor pulley first – This smaller pulley is closer to the bottom of the machine. Slide the belt over it, ensuring it sits snugly in the groove.
- Stretch the belt around the drum or drive pulley – This may require some force, as new belts can be stiff. Rotate the large pulley slightly as you work the belt into place.
- Manually turn the pulley – Spin the drum by hand a few times. The belt should track smoothly without slipping out of place. If it wobbles or pops off, double-check the alignment.
- Check the tension – Press lightly on the belt. It should have a little give about half an inch but not be overly loose. Too much slack means the belt may slip during operation.
Once the belt is secure and properly tensioned, you’re ready to button everything back up.
Step 5: Reassemble the Washer
With the new belt installed, it’s time to button everything back up.
- Reattach the access panel and secure it tightly with the screws. If you removed multiple panels, make sure each one is properly aligned before tightening.
- If you tilted the washer to access the bottom, carefully lower it back to its normal position. Avoid sudden movements that could strain the new belt or other components.
- For front-loading models, double-check that the back panel is flush and no wires or connections are caught in between.
- If you disconnected the water hoses, reconnect them securely, making sure the hot and cold lines are properly attached. Check for leaks by briefly turning on the water supply.
Before moving on, give the washer a slight shake to confirm stability. A misaligned washer can lead to excessive vibrations, especially during spin cycles.
Step 6: Test the Machine
Now that the new belt is installed, it’s time to see if the repair was successful. Follow these steps to ensure everything is working correctly.
1. Restore Power and Water
Plug the washer back in.
If you disconnected water hoses, reconnect them.
Turn the water valves back on.
2. Run a Test Cycle
Set the washer to a spin or agitation cycle.
Keep the washer empty for this test.
3. Observe the Drum
Watch to see if the drum rotates smoothly.
There should be no hesitation or unusual noises.
4. Listen for Issues
A properly installed belt should not:
- Squeal
- Thump
- Slip
If you hear anything unusual, turn off the power and inspect the belt for proper alignment.
5. Final Check
If everything runs smoothly, the washer is ready to use again.
6. Troubleshooting
If the drum doesn’t move or makes loud noises:
Recheck the belt’s fit and tension. A small adjustment may be needed.
If the issue persists, inspect other components like:
- The pulley
- The motor
- Additional hardware for wear or faults.
By carefully following these steps, you can confirm whether the repair was a success or if further adjustments are necessary.
Common Issues and Troubleshooting
Even with a properly installed belt, things don’t always go smoothly. Here’s how to handle some common problems:
- Belt is too loose – Check that you’re using the exact replacement for your model. Belts that are too long won’t provide enough tension and will slip.
- Belt slips off – A misaligned motor or drum pulley can cause the belt to come off during operation. Double-check that all pulleys are straight and that the belt grooves match up. If the belt still slips, inspect for worn or damaged pulleys.
- Washer still doesn’t spin – If the belt is installed correctly but the drum won’t move, the issue might be with the motor, tensioner, or a worn-out drive pulley. Listen for any unusual noises grinding or humming could indicate a failing motor.
If troubleshooting doesn’t solve the issue, the motor or another internal part may need replacing. At this point, it might be worth calling a professional or weighing the cost of repair versus replacement.