
How to Clean Washer Water Inlet Filters
Why Water Inlet Filters Matter
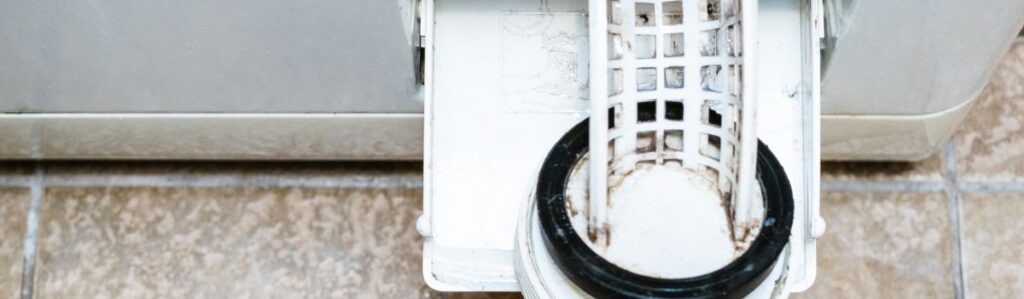
Washer water inlet filters are the small, nearly invisible layer of defense between your appliance and whatever your water supply is dragging along for the ride: sediment, rust, grit, and debris you don’t want anywhere near your clothes or machine. These mesh screens sit where the water hoses connect to the back of your washer, quietly filtering the incoming water every time you run a load. They’re one of the easiest performance hacks you can use to keep your washer running smoothly.
Why does that matter? Well, the more gunk those filters catch, the less ends up clogging the valve or getting flushed through your washer. Clean filters mean steady water flow, faster fill times, and fewer surprise maintenance issues. Let them clog up, and you’ll start to notice symptoms. Your washer might take forever to fill, or you might throw out an error code you have to Google. Worst-case: no water makes it in, and suddenly you’re staring at a half-done load with a machine that won’t budge.
Tools and Supplies You’ll Need
You don’t need a toolbox the size of your washer for this job. Just a few basic items:
- Pliers – A standard pair works fine. You’ll need them to loosen hoses that have been sitting tight for a while.
- An old toothbrush or a soft cleaning brush. Nothing fancy. You’re scrubbing tiny mesh screens, not detailing a car.
- Small bowl or cup – To soak filters in water or vinegar if there’s mineral buildup.
- Clean cloth or towel – For catching small spills and wiping things down.
- Optional: vinegar or mild dish soap – Only break these out if the filters are caked with gunk.
That’s it. Five minutes of prep, and you’re ready to dive in.
Getting Started: Safety First
Before you touch anything, pull the plug. Unplug the washer from the outlet. Water and electricity aren’t friends, and you don’t want to be the reason they meet.
Next, shut off both the hot and cold water supply valves. These are usually on the wall behind your machine, and you’ll want to twist them clockwise until snug. No need to overdo it just fully closed.
Finally, slide the washer a few feet away from the wall to give yourself room to work. It doesn’t have to move far, just enough that you can get behind it smoothly without turning into a contortionist. If it’s heavy, get help or use a towel under the feet to glide it more easily. You’re not going for a workout; you just need access.
Step-by-Step Guide to Cleaning the Filters
Cleaning the water inlet filters on your washer is a simple maintenance task that can prevent water flow issues and prolong the life of your machine. Follow these clear steps:
Locate the Water Inlet Filters
Find the connection points where the hot and cold water hoses attach to the back of your washing machine.
- Look for small mesh screens inside each hose connection.
- These mesh screens are the water inlet filters one for hot, one for cold.
Disconnect the Water Hoses
Before accessing the filters, safely disconnect the hoses.
- Unplug the washer and turn off the water supply.
- Use pliers to gently loosen the hose fittings, if needed.
- Place a towel or small bowl below to catch any remaining water.
- Detach the hoses and set them aside.
Remove the Inlet Filters
Access the filters for cleaning or replacement.
- Use needle-nose pliers or your fingers to carefully pull out the mesh screens.
- Avoid using excessive force; filters are delicate.
- Replace any filters that are worn, torn, or damaged.
Clean the Filters
Give the mesh screens a thorough cleaning.
- Rinse under warm running water.
- Use a soft toothbrush to dislodge buildup like dirt or mineral deposits.
- For stubborn debris, soak in a vinegar-water mix (equal parts) for 30 minutes, then scrub again.
Clean the Hose Connections
Don’t forget the hoses themselves.
- Check inside hose ends for sediment or grime.
- Give them a quick rinse and a wipe with a clean cloth.
Reinstall and Reconnect
Wrap up by reassembling everything carefully.
- Insert the clean (or new) filters back into the washer inlets.
- Reattach the hoses, hand-tighten them, then give a slight extra turn with pliers if needed.
- Slowly turn the water supply back on.
- Check for leaks, then plug the washer back in.
Your washer is now filter-clean and ready to go!
How Often You Should Do This
Regular maintenance of your washer’s water inlet filters keeps your machine running smoothly and extends its lifespan. Here’s how often you should perform this task based on your water conditions and washing machine behavior.
General Guidelines
Aim to clean the water inlet filters every:
- 6 to 12 months under normal conditions
- Annually, if your water is clean and soft
- Every 6 months or quarterly, if you have: hard water, a well water system, frequent sediment build-up
Watch for These Warning Signs
Occasionally, your washer may tell you it’s time for a cleaning before your regular schedule. Keep an eye (and ear) out for:
- Slow fill times
- Error codes or alerts
- Unusual noises during operation
If You’re Still Having Issues After Cleaning
So, you cleaned the filters, and your washer’s still acting like it’s on strike. Time to dig a bit deeper.
Start with the simple stuff: double-check the water pressure from your source. Weak pressure can mimic a clog. Then inspect the hoses, crimps, kinks, or internal blockages that can slow everything down.
Still no luck? Your machine might be throwing an error code. Look it up in the manual or on the manufacturer’s website. These codes are your washer’s version of Morse code; they’ll point you in the right direction.
If you’ve ruled out hoses and pressure, your inlet valve might be the problem. It’s an internal part that controls water flow; when it fails, the system can get weird. At this point, unless you’re handy with appliance repair, it might be time to call a pro. Think of it this way: a quick service visit now is better than buying a new washer later.
Simple Practices to Keep Filters Cleaner Longer
Cleaning the inlet filters isn’t hard, but doing it less often sounds even better. A few smart habits can keep those mesh screens cleaner for longer and your washer running smoothly.
First, get some if your hoses don’t already have built-in screens. They’re cheap and act like the first line of defense against sand, rust flakes, or any gunk hitching a ride in your water supply. Bonus: These are easier to check and clean than inside your washer.
Next-level move? Install a whole-house sediment filter. This catches debris at the source, before it reaches any of your appliances. Especially worth it if your home pulls from a well or if your water is hard and full of minerals.
Finally, don’t push the machine past its limits. Overloading your washer makes it work harder, which can strain internal valves and filters. Stick to proper load sizes, your clothes will come out cleaner, and your washer will thank you by not breaking down mid-cycle.
Simple tweaks, less hassle. That’s the goal.
Wrapping Up
That’s it. It doesn’t take long, doesn’t cost a dime, and your washer will run smoother. Cleaning the inlet filters is one of those boring-but-crucial maintenance moves like changing the oil in your car. Skip it, and things jam up. Do it regularly (every 6 to 12 months), and your machine stays happy, filling fast and avoiding breakdowns. Set a reminder. Add it to your spring or fall routine. Your future self with a working washer and zero plumbing drama will thank you.