
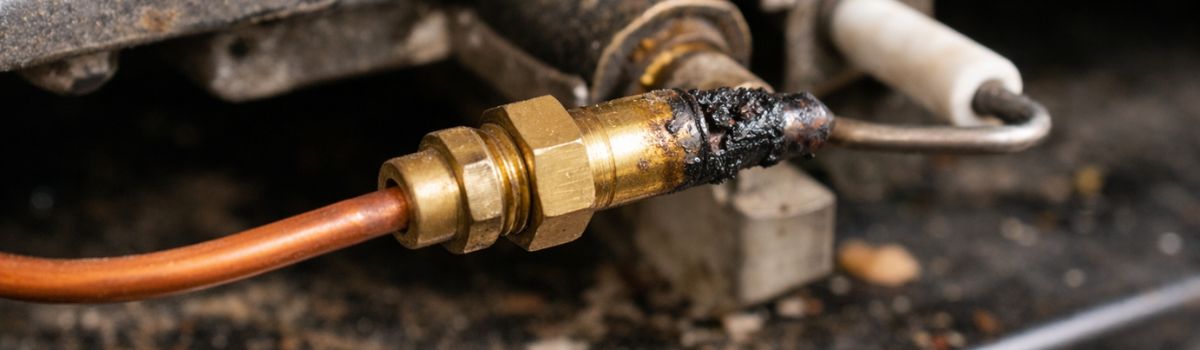
Replacing a Faulty Oven Thermocouple in Chilliwack Made Easy
A functioning thermocouple is essential for the safe and efficient operation of gas ovens. It acts as a safety device by detecting whether the pilot light is lit and allowing gas to flow only when it senses heat. Without a properly working thermocouple, the oven may fail to ignite or could pose a risk of gas leakage.
Common signs of a faulty thermocouple include the oven not heating up, the pilot light frequently going out, or the oven shutting off unexpectedly during use. These issues indicate that the thermocouple is not accurately detecting the flame and needs attention. Professional stove and oven repair services can quickly identify and replace the faulty component.
Timely replacement of a faulty thermocouple restores the oven’s safety and functionality. It ensures the gas supply is properly regulated, preventing potential hazards and allowing the oven to operate efficiently. Addressing the problem promptly can also save on costly repairs and extend the lifespan of the appliance.
Understanding the Thermocouple
What is a Thermocouple?
A thermocouple is a small but crucial component in gas ovens. It acts as a safety device that senses whether the pilot light is lit. The thermocouple generates a small electrical current when heated by the pilot flame. This current keeps the gas valve open, allowing gas to flow to the burner. If the pilot light goes out, the thermocouple cools down, the electrical current stops, and the gas valve closes. This prevents gas from leaking into the oven or kitchen, reducing the risk of fire or explosion.
Common Causes of Thermocouple Failure
Thermocouples can fail for several reasons, including:
Wear and tear: Over time, constant heating and cooling cycles can degrade the thermocouple’s materials, causing it to lose effectiveness.
Corrosion or dirt buildup: Dirt, grease, or corrosion on the thermocouple can interfere with its ability to detect heat accurately.
Electrical faults: Damage to the wiring or connections can prevent the thermocouple from generating the necessary electrical current, leading to malfunction.
Understanding these causes helps in diagnosing and properly replacing a faulty thermocouple to ensure your oven operates safely.
Safety Precautions Before Replacement
Before replacing a faulty oven thermocouple, it is crucial to take several safety precautions to avoid accidents and ensure a smooth repair process.
Turning Off the Gas Supply
First and foremost, turn off the gas supply to your oven. This step is essential to prevent gas leaks, which can lead to fires or explosions. Locate the gas valve connected to your oven and switch it off completely before proceeding.
Disconnecting Power Sources
Next, disconnect any electrical power sources linked to your oven. This includes unplugging the oven or turning off its circuit breaker. Handling electrical components while the oven is powered can cause electric shocks or damage to the appliance.
Proper Ventilation During Repair
Ensure the area is well-ventilated during the repair. Open windows or use fans to circulate air, especially if there was any gas leakage before you turned off the supply. Proper ventilation reduces the risk of inhaling harmful fumes.
Using Appropriate Tools and Protective Gear
Use the correct tools designed for oven repairs, such as screwdrivers, pliers, and a multimeter. Wearing protective gear like gloves and safety glasses is equally important to protect your hands and eyes from sharp parts or accidental sparks.
Tools and Materials Needed
To replace a faulty oven thermocouple in Chilliwack, you will need the following tools and materials:
Replacement Thermocouple: Ensure that the thermocouple you purchase is compatible with your specific oven model. Using the correct part is crucial for proper functionality.
Screwdrivers, Wrenches, and Pliers: These basic hand tools will help you remove the oven panels and disconnect the old thermocouple safely.
Cleaning Materials: Use cleaning cloths or brushes to clean the area around the thermocouple before installing the new one. This helps maintain proper contact and operation.
Multimeter: A multimeter is essential for testing the thermocouple to confirm it is faulty before replacement and to verify the new one is working correctly after installation.
Having these tools and materials ready will make the replacement process smoother and ensure you can complete the job efficiently.
Step-by-Step Guide to Replace a Faulty Oven Thermocouple
1. Diagnosing the Faulty Thermocouple
Before beginning the replacement, confirm that the thermocouple is the source of the problem. Use a multimeter to test for continuity, which will indicate if the thermocouple is functioning correctly. If the multimeter shows no continuity, the thermocouple is likely faulty and needs replacement.
2. Accessing the Thermocouple
Start by removing the oven panels or covers to gain access to the internal components. The thermocouple is typically located near the pilot light assembly. Carefully locate it, ensuring you have a clear workspace before proceeding.
3. Removing the Faulty Thermocouple
Loosen the mounting screws that secure the thermocouple in place. Then, carefully detach the thermocouple from the gas valve. Take special care when handling the wiring to avoid damage.
4. Installing the New Thermocouple
Position the new thermocouple correctly, ensuring it fits properly near the pilot light. Secure it by tightening the mounting screws. Connect the thermocouple to the gas valve and reconnect any wiring. Double-check that the installation is secure and aligned to function properly.
5. Testing the Installation
After installation, reconnect the power and gas supply to the oven. Light the pilot and observe its operation to ensure the flame remains stable. Verify that the oven heats correctly without interruption. Conduct safety checks to confirm the thermocouple is working as intended.
Purchasing a Replacement Thermocouple
When replacing a faulty oven thermocouple, it is crucial to select a replacement that matches your oven’s specifications to ensure proper function and safety. Thermocouples vary based on length, type of connection, and temperature rating, so check your oven’s manual or the old thermocouple for these details. Compatibility with your specific oven model is essential to avoid installation problems and ensure accurate temperature readings.
In Chilliwack, you can find replacement thermocouples at local hardware stores such as Home Hardware, Canadian Tire, and Rona. These stores often carry a range of thermocouples suitable for common oven brands. Alternatively, online retailers like Amazon or specialized appliance parts websites offer a broader selection and may provide user reviews to help you choose the right part.
Cost is an important factor to consider when budgeting for a replacement thermocouple. Prices typically range from $10 to $40, depending on brand, quality, and length. While cheaper options may seem attractive, investing in a reliable, compatible thermocouple can save you from repeated replacements or potential oven malfunctions. Always factor in any additional shipping or handling fees if ordering online.
Maintenance Tips to Extend Thermocouple Life
Proper maintenance of your oven’s thermocouple can significantly extend its lifespan and ensure safe, efficient operation. Here are some essential tips to keep in mind:
Regular Cleaning of Pilot Assembly
Over time, dirt and debris can accumulate around the pilot assembly, which may affect the thermocouple’s ability to detect the pilot flame properly. Regularly clean the pilot assembly using a soft brush or compressed air to remove any buildup. This simple step helps maintain a strong and consistent flame, preventing false readings or premature failure of the thermocouple.
Routine Safety Inspections
Conduct routine safety inspections to check the condition of the thermocouple and related components. Look for signs of wear, damage, or loose connections. Ensuring that all parts are secure and functioning correctly can prevent unexpected breakdowns and potential safety hazards.
Avoiding Moisture and Corrosion
Moisture and corrosion are common enemies of thermocouples. Keep the oven area dry and well-ventilated to minimize exposure to moisture. If you notice any rust or corrosion on the thermocouple or its connections, address it immediately by cleaning or replacing affected parts. Preventing corrosion helps maintain the thermocouple’s reliability and extends its operational life.
By following these maintenance tips, you can help ensure that your oven’s thermocouple remains in good working condition, reducing the need for frequent replacements and keeping your cooking appliance safe.
Troubleshooting Common Issues After Replacement
After replacing a faulty oven thermocouple, you might encounter some common issues. Here’s how to address them:
Pilot Light Not Staying Lit
If the pilot light keeps going out, the thermocouple may not be positioned correctly. Ensure that the tip of the thermocouple is directly in the flame of the pilot light. If it is, check for any dirt or debris on the thermocouple that might prevent it from heating properly. Cleaning or slightly adjusting the thermocouple can often resolve this issue.
Oven Failing to Heat
If your oven isn’t heating after replacement, verify that the thermocouple is securely connected to the gas valve. A loose connection can prevent the valve from opening. Additionally, confirm that the gas supply is turned on and there are no blockages in the burner assembly. If these steps don’t work, the replacement thermocouple might be defective or incompatible.
Gas Smells or Leaks (Immediate Action Steps)
If you smell gas or suspect a leak after replacing the thermocouple, act immediately:
- Turn off the gas supply at the source.
- Avoid using any electrical switches, open flames, or devices that could ignite the gas.
- Open windows and doors to ventilate the area.
- Contact a professional technician or your gas provider for inspection and repair.
Never ignore a gas smell, as it poses a serious safety hazard.
Conclusion
Replacing a faulty oven thermocouple promptly is crucial to ensure your oven operates safely and efficiently. Ignoring a malfunctioning thermocouple can lead to gas leaks or the oven failing to ignite properly, posing safety risks.
Always prioritize safety by following proper guidelines and precautions when handling gas appliances. If you are unsure or uncomfortable performing the replacement yourself, seek professional assistance.
Residents of Chilliwack have access to local resources and services that can provide expert support with thermocouple replacement and appliance repair. Utilizing these resources can help maintain your oven’s performance and safety standards.