
DIY Panel Removal for Accessing Refrigerator Parts
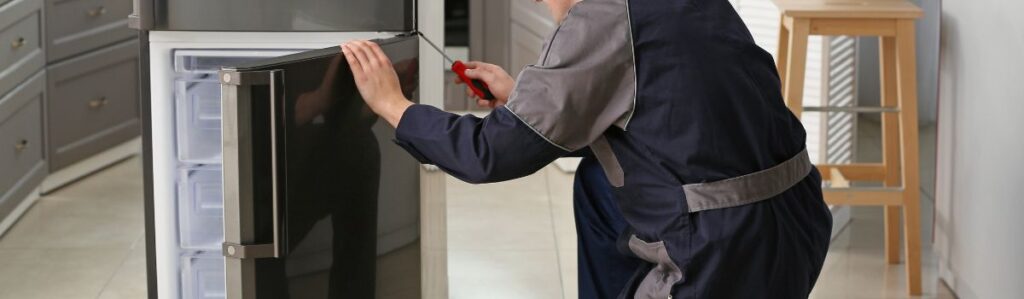
Easy DIY Panel Removal to Reach Refrigerator Parts
Fridges are among the hardest-working appliances in any home. They run 24/7, keeping your food safe, drinks cold, and leftovers ready to go. But when something starts to go wrong like weak cooling, odd noises, or an ice buildup you can’t explain, it usually means something is happening behind the scenes, more specifically, behind a panel. Troubleshooting refrigerator issues often starts with knowing what’s going on behind those panels.
Knowing how to remove a panel on your refrigerator can unlock access to crucial components, such as cooling fans, defrost heaters, ice maker motors, and even the control board. These are the parts responsible for doing the heavy lifting inside your fridge, and when one starts to fail, accessing them can make the difference between a quick fix and a costly replacement.
In this guide, we’ll walk you through the process of safely and confidently removing both interior and exterior panels. Whether you’re dealing with a standard freestanding unit or a built-in designer fridge with custom wood panels, this guide is tailored to BC homeowners who want to keep their appliances running without having to call in a pro for the basics.
But first let’s talk about safety.
Before You Begin: Safety & Setup
Before you so much as pick up a screwdriver, there’s one essential step that applies to every fridge, every model, every time: unplug the unit from the wall. Working with any electrical appliance especially one as large and powerful as a refrigerator requires full electrical isolation. Don’t rely on flipping a breaker or simply turning a dial; remove the plug from the outlet entirely.
Next, give yourself room to work. If your fridge is wedged between counters or cabinetry, gently slide it out to create a working area. Keep a towel underneath if you’re worried about scratching hardwood or laminate flooring.
Now’s a good time to find your fridge’s model number. You’ll usually spot it on a sticker inside the fridge (often along a side wall) or near the crisper drawer. If you still have the manual, check it for diagrams that indicate the layout of the internal components. These can help identify what’s behind a panel before you open it.
One important note before proceeding: If your refrigerator is still under warranty, be sure to check whether self-repair or panel removal voids the warranty coverage. Some manufacturers may consider even basic disassembly a breach of service terms, especially if the panel is part of a sealed or insulated unit.
Lastly, if your fridge is a built-in model or panel-ready style with a wood front, be aware that the removal process is more delicate. You’ll need to go slow and be especially mindful of brackets, edge trim, and cabinetry finish.
Tools You’ll Need
You don’t need a full-blown appliance repair kit to handle this task, but a few basic tools will make your job a lot easier. Gather the following before you get started:
- Flathead and Phillips screwdrivers – Most panels are secured with standard screws.
- Plastic pry tools or a putty knife – Ideal for loosening clips or lifting panels without scratching finishes.
- Work gloves – To protect your hands from sharp metal edges or insulation.
- Tray or small container – For storing screws, clips, and fasteners to prevent anything from going missing.
- Painter’s tape – Useful for labelling parts, marking screw locations, or preventing scratches on adjacent surfaces.
- Flashlight – To peer behind dark panel gaps or into narrow compartments.
- Support blocks or a sturdy stool – For tilting the fridge or supporting larger panels during removal.
- Hair dryer (optional) – Useful for loosening frost or ice behind a stuck interior panel.
Having everything on hand means fewer interruptions during the project and a smoother workflow from start to finish. Keep the area well-lit and ventilated if you’ll be working near the back of the fridge, especially around the compressor.
Step 1 – Clear Interior Obstructions (If Removing Internal Panel)
If the issue you’re investigating lies behind an internal rear panel which is often the case with fan defrost systems and sensors you’ll need to thoroughly empty the space.
Start by removing all the food in the section you’ll be working in. Transfer perishables to a cooler or backup fridge if you’ll be working for more than 15 – 20 minutes. Next, carefully remove the shelves, drawers, door bins, and glass inserts. Most of these are designed to slide or lift out easily, but double-check your manual or search online for your model if you encounter resistance.
If there’s visible frost buildup on the rear panel or in the corners, take this as a sign of poor airflow or a defrost failure something you’ll likely address once the panel is off. Place a shallow tray or absorbent towel beneath the area to catch any meltwater during the process.
Pro tip: label drawers and shelf positions if your fridge has tiered heights or unique arrangements. That’ll save time when reassembling everything later.
Step 2 – Locate the Panel You Need to Remove
Not every panel is created equal, and knowing which one to remove will depend entirely on what problem you’re trying to solve.
- If you’re troubleshooting poor cooling, frost buildup, or noisy fans, the likely culprit lies behind the interior rear panel inside the freezer or fridge section. This covers the evaporator coils, fan motor, defrost heater, and temperature sensors.
- If your fridge has stopped running altogether, or if you suspect a board or compressor issue, you’ll need to access the lower back panel on the exterior. This is typically where you’ll find the main control board and power connections.
- On built-in or panel-ready units, the outer wood panels are decorative facades. They’re often attached to the doors via internal mounting hardware or side brackets and may need to be removed if you’re upgrading, repairing handles, or inspecting door hinges.
Always double-check the manufacturer’s diagrams or videos for your specific model if you’re unsure. Knowing what lies behind the panel ensures you don’t open more than necessary or damage something unintentionally.
Step 3 – Identify Hidden Screws or Clips
Once you’ve zeroed in on the panel you need to remove, it’s time to find out how it’s attached. Some panels are held in place with obvious screws. Others may be more discreet, secured with plastic clips, slide tabs, or hidden fasteners designed to maintain a sleek appearance.
Start by inspecting:
- The corners and edges of the panel look for visible screw heads.
- Under trim strips, gently lift or pry the trim away to check for fasteners beneath.
- Behind the toe-kick panel at the bottom of the fridge many side or door panels use hardware accessed through this area.
- For wood panels, check the inside edge of the door, near the hinges or along the bottom rail.
Use a flashlight to scan for tiny screw holes or clip points you might miss at a glance. And before you remove anything, snap a quick photo. These visual references are incredibly helpful when you’re reinstalling everything later.
Step 4 – Gently Pry or Slide the Panel Loose
With screws and clips removed, gently begin prying the panel loose. This step demands patience and a light touch.
Use your plastic trim tool or a cloth-wrapped flathead screwdriver to start lifting one edge. Work your way around the perimeter, loosening each side gradually. If the panel doesn’t give easily, stop. Recheck for hidden screws or sticky frost that may be holding it in place.
For interior panels, frost buildup can create a vacuum-like seal. Use a hair dryer on low heat to gently warm the area, especially around the edges, which may help release it. Just don’t apply direct heat to wiring or plastic trim.
Resist the urge to yank or twist. Cracked panels and broken clips are common outcomes of impatience. Gentle wiggling usually wins the day.
Step 5 – Remove the Panel Safely
Once loosened, grip the panel with both hands (or one hand while the other supports it from the side) and pull it straight out or away from its mount. Large panels can be awkward; if needed, use a support block underneath to hold them level as you remove the last fastener.
Place the panel on a towel-lined floor or soft surface. Avoid setting it face-down on a hard floor, especially if it has insulation, tape, or wiring attached to the rear.
Inspect the back side of the panel for signs of moisture, mould, or insulation damage. If it’s dirty, clean it now while it’s out, you’ll thank yourself later.
Step 6 – Access, Diagnose or Replace Components
Congratulations, you’ve now got direct access to the inner workings of your fridge. Depending on the panel, you might now see:
- A circulating fan motor, which controls airflow over the coils
- A defrost heater, used to melt frost off evaporator coils
- A thermistor or sensor monitoring internal temperature
- A circuit board regulating power and component coordination
- An ice maker motor or switch, especially in freezer-side panels
Inspect wiring for burnt spots, loose connectors, or visible damage. Use a multimeter if you’re testing continuity or voltage. And before unplugging any wires, take a photo showing exactly how they were connected.
Avoid touching sealed copper coils or refrigerant lines. These components are pressurized and should only be handled by a licensed technician.
Step 7 – Reinstall the Panel
Once you’ve completed your inspection, cleaning, or part replacement, it’s time to put everything back in place.
Follow this reassembly checklist:
- Re-align the panel and fit it gently back into place
- Reinstall screws and clips exactly as removed
- Replace any trim strips or brackets
- Reinsert drawers, bins, and shelves in their original positions
- Plug the fridge back in and give it a few minutes to cycle on
Listen for the fan kicking in, the compressor humming, or the display lighting up. If everything powers on and runs smoothly, your DIY operation was a success.
Special Considerations for Built-In or Panel-Ready Fridges
If you’re dealing with a panel-ready fridge, the process may feel similar to furniture assembly. These units are designed to blend in with cabinetry and often use hidden mounting brackets or rail systems for the decorative wood panels.
Things to watch for:
- Screws may be hidden behind internal gaskets or inside the door
- Some panels attach via side rails or slide clips do not pry unless you’re sure
- Painter’s tape can protect cabinet edges from scratches while working
Take extra care not to over-tighten screws when reinstalling wood panels. Stripped holes or split trim can be difficult (and expensive) to fix.
Troubleshooting Panel Removal Issues
Even with preparation, things don’t always go smoothly. Here’s how to troubleshoot common hang-ups:
- The panel won’t budge – Double-check for hidden screws or use a hair dryer to soften the ice holding it in place.
- The screw is stripped – Try using a wide rubber band between the driver and the screw for extra grip.
- Panel flexes too much – You might be prying from the wrong side or missing a retaining clip.
When in doubt, stop and reassess. Forcing your way through is a recipe for breakage or accidental damage.
FAQ
Will removing my fridge panel void the warranty?
In some cases, yes. Always check your manufacturer’s policy before beginning any disassembly.
Can I remove the panel while the fridge is still running?
No. Unplug it completely before beginning any work.
What parts are typically behind the panel?
Cooling fans, evaporator coils, circuit boards, sensors, and sometimes the ice maker motor.
Is it safe to remove wooden front panels on my own?
Yes, but take it slow. Use non-metal tools and protect cabinet edges to prevent damage.
What if I remove the panel but still can’t diagnose the issue?
Reinstall it carefully and consider calling a professional. Not every issue is visible.
Conclusion
Panel removal is one of the most empowering DIY steps you can take as a homeowner. It provides direct access to the parts of your fridge that do the actual work. Whether you’re tracking down a strange noise, clearing ice buildup, or swapping out a faulty fan, the process is manageable when approached with care.
By staying organized, working patiently, and following each step with confidence, you’re well on your way to maintaining your refrigerator like a seasoned pro without the service call.