
Installing an Eco Garburator Step-by-Step
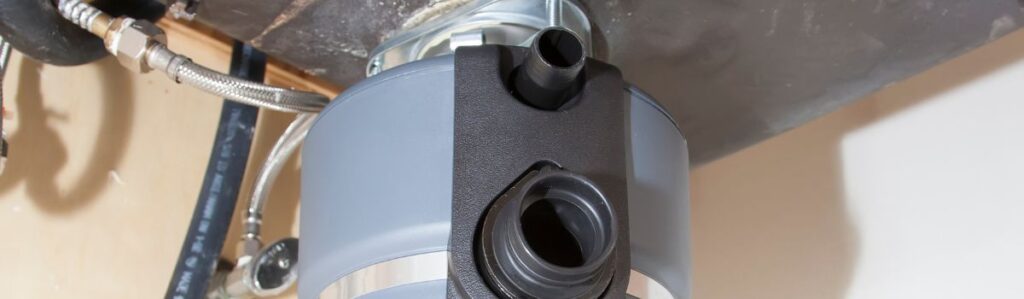
Simple Guide: Installing an Eco Garburator Step-by-Step
First things first, what exactly is an eco garburator? Unlike your standard food grinder, an eco garburator is designed to be more efficient and environmentally friendly. It typically uses less electricity and water, and some models even help reduce organic waste more effectively, for instance by pre-macerating scraps so they’re easier to process down the line at municipal treatment facilities. Same job, smarter impact.
Now, before you even look at a wrench, make sure you’ve got the basics on hand. Here’s your quick checklist:
- Screwdriver (flathead and Phillips)
- Adjustable wrench
- Plumber’s putty
- Bucket (for catching water from disconnections)
- Towels or rags (you’ll thank yourself)
- Flashlight (you’ll be under the sink, visibility helps)
- Safety gloves (optional, but good for tight spots)
If your current sink setup is modern and fairly standard, chances are you’ll be fine. That said, double-check two things before buying your eco unit: space beneath your sink (some of these are bulkier due to added features) and the type of mounting assembly your sink supports. And if your pipes are decades old and looking crusty, now’s the time to think about replacing some fittings. Limited space and outdated fittings are actually part of the top 10 garburator problems homeowners run into.
Plan. Take an extra five minutes now, save an hour of swearing later.
Remove the Old Unit (if There’s One Installed)
1. Shut Off the Power
- Kill the power at the breaker – not just the wall switch.
- You’ll be working under the sink near water and electrical wires, so take extra caution.
2. Prepare for Water Spills
- Place a bucket under the unit.
- Loosen the drain connections: one from the sink and possibly one from the dishwasher.
- Expect spills – keep a rag or towel handy to catch any murky water.
3. Disconnect the Unit
- Locate the mounting ring that secures the disposal to the sink flange.
- Depending on your model, you may need a wrench, a screwdriver, or just your hands.
- Support the disposal from below (it’s heavier than it looks).
- Rotate the mounting ring counter-clockwise to release the unit.
- Carefully lower the disposal and move it out of the way.
4. Clean the Mounting Area
- Scrape off any old plumber’s putty or gunk from around the sink flange.
- Wipe the area clean with a cloth; this ensures a tight seal for the new unit.
- Residue left behind can cause leaks later.
5. Inspect the Mounting Ring
- Check if your mounting ring is reusable and in good condition:
- If it is, you can keep it.
- If not, remove it, and a new one typically comes with your replacement unit.
This format breaks the process into clear, digestible steps, making it easier for users to follow along during the removal process.
Prep the New Eco Garburator
Time to meet your new waste-mashing sidekick. Unbox the eco garburator and do a quick inventory check, make sure all parts, gaskets, mounting components, and hardware are present. Nothing slows a Saturday DIY like a missing bracket.
If the mounting ring from your old unit doesn’t match the one in the box, swap it out. A little elbow grease here saves a lot of frustration later. Most eco garburators come with a universal or adjustable ring setup, but don’t force it metal on metal never ends well.
Next, grab your plumber’s putty. Take a small, even bead and roll it into a rope about the thickness of a pencil. Apply it around the underside of the garburator’s flange (the part that faces down into the drain). Press the flange firmly into the sink drain opening and let it seat in snugly. This putty barrier prevents water from sneaking where it shouldn’t go.
Quick tip: Wipe away any excess putty that squishes out now it’s easier than scraping dried blobs later.
Once that’s snug, you’re ready to tackle the mounting assembly. So far, so good. Keep moving.
Install the Mounting Assembly
This next part lives under the sink, so clear some space and have a towel handy it’s not glamorous, but it matters. Grab your mounting assembly pieces and figure out what goes where. Most systems use a twist-lock ring that secures to the bottom of the sink flange.
First, line up the mounting ring beneath the flange you installed earlier. It’ll likely come with a backup ring, fiber gasket, and a snap ring. Stack them exactly in the order listed in your manual do not freelance here. One wrong step and you’re back under the sink with a wrench and a headache.
Once everything’s lined up, use a screwdriver to tighten the mounting bolts evenly. Go in a triangle pattern tighten one, then move to the opposite one to keep the pressure even. The goal here is a rock-solid, leak-free connection. No need to crank down too hard; firm and flat is the name of the game.
Give the flange up top a gentle twist if it’s seated right; it won’t budge. Check for putty squeezing out; if you see a little, good. Wipe the excess.
Now your mounting assembly is set, sealed, and ready for the main event.
Connect the Garburator Unit
This part’s simple, but don’t let that fool you it needs to be done right. With the mounting ring secured and your flange sealed up like Fort Knox, it’s time to get the new eco garburator in place.
First, lift the unit into position underneath the sink. These things aren’t super heavy, but awkward? Absolutely. Get a good grip and align the top of the unit with the mounting ring. Most models thread into the mount with a twist, usually clockwise. If it’s not locking, don’t force it. Back off, line it up again, and try smoother.
Once it’s in, give it a solid but gentle tug downward. If it holds firm without shifting, you’re golden. A wobbly install now means trouble later; no one wants a half-hung garburator rattling like a dying engine every time it’s turned on.
And that’s it for this step. No wires, no hoses yet. Just a solid connection between the unit and the sink. Clean, tight, and ready for the next move.
Hook Up Power and Plumbing
Let’s bring the unit to life responsibly.
Step 1: Power Connection
Determine Your Unit Type:
Plug-in model:
Simply plug it into a standard outlet. You’re good to go.
Hardwired model:
Follow these steps:
- Turn off power at the breaker.
- Connect wires according to the manual: Black to black, White to white, Ground to ground
- Not sure about wiring? Call a licensed electrician.
Better safe than crispy.
Step 2: Dishwasher Hookup (If Applicable)
Locate the Connector:
- Look for a small inlet on the side of the garburator.
Install Process:
- Use a screwdriver and hammer to gently knock out the rubber plug inside the inlet.
- Attach the dishwasher hose using the clamp provided.
- Tighten the clamp securely no leaks allowed.
Step 3: Drain Connection
Connect the Discharge Tube:
- Use the included gaskets and screws.
- If alignment is off: Adjust the plumbing slightly, or use a flexible coupling.
Secure Everything:
- Tighten slip nuts until snug.
- Don’t overtighten plastic components can crack under pressure.
Final Checks
Before turning the power back on:
- All connections should be: Snug, Aligned, Dry
Take one last breath…
Flip the breaker, your unit should now be powered, sealed, and ready for a clean grind.
Test Everything
Flip the breaker back on, you’re live. Now, run cold water through the sink and turn on the garbage disposal. It should start with a clean hum, not a clunk or rattle. If it growls like a dying robot, shut it down and check the alignment. Light vibrations are normal; shaking cabinets are not.
Place a flashlight underneath the sink and scan for drips around the flange and drain connections. No leaks? Good. Give the unit one more look-over for anything loose or out of place. If the dishwasher’s connected, run a quick rinse cycle to test the side inlet.
Finally, toss in a few ice cubes or a citrus peel not just to test the grinding, but to freshen the chamber. Your eco garbage disposer should chew through it smoothly without complaint.
If everything sounds tight and stays dry, you’re done here.
Wrap It Up
Don’t call the job done just yet; these final steps can make all the difference between a good install and a great one.
Final Walkthrough
Take five minutes to double-check everything:
- Power connection – Make sure it’s secure and properly grounded.
- Plumbing joints – Check for leaks or loose fittings.
- Mounting bracket – Ensure everything is tight and aligned.
A half-turn on a loose fastener now beats a headache later.
Clean the Workspace
Keep things tidy so you’re not leaving a mess for your future self:
- Toss out used plumber’s putty, old gaskets, and packaging materials.
- Wipe down the under-sink area to remove dust, tools, and debris.
Quick Manual Check
Even if everything looks great, it’s worth it:
- Skimming the instruction manual for any final maintenance tips.
- Checking if there are model-specific quirks or usage recommendations.
Pro Tip: Freshen the Finish
Give your installation a clean, professional touch:
- Drop in a few ice cubes or lemon peels.
- Run cold water while you turn on the unit.
This helps clear any debris and leaves your drain smelling fresh, a solid finish to a solid install.
Keep It Working Smoothly
Your eco garburator isn’t a junk drawer; treat it with care, and it’ll run flawlessly. Here’s how to keep it in top shape:
What to Avoid
Certain materials spell trouble for your eco garburator. Steer clear of:
Fibrous Food Waste
Items like:
- Celery
- Corn husks
- Onion skins
These can wrap around the grinding parts and jam the system quickly.
Oils and Grease
While they go down smoothly when warm, they eventually:
- Coat your pipes like frosting
- Harden and create stubborn clogs
Best Practices
To keep everything running clean and odour-free:
Use Cold Water
Always run cold water:
- Before
- During
- After using the unit.
- Cold water helps solidify fats, allowing them to be chopped and flushed efficiently.
Flush with Cold Water After Use
Run for a minute or two to:
- Keep pipes clear
- Prevent unpleasant smells
Monthly Maintenance
Give it a refresh with:
- Ice cubes (to keep blades honed)
- Lemon peel (for a natural deodorizer)
The Bottom Line
Your eco garburator is a helpful tool, not a garbage-can replacement. Use it wisely, and it’ll stay clean and efficient for years to come.