
How to Maintain a Green Garburator
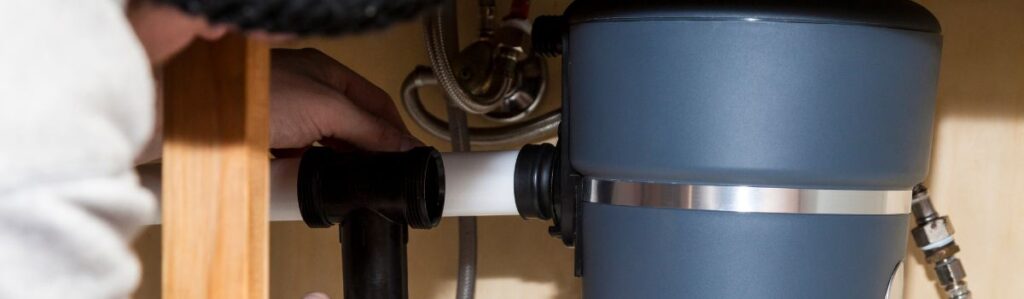
Simple Ways to Keep Your Garburator Green and Eco-Friendly
A garbage disposal, also known as a garburator, is the small but mighty unit tucked beneath your kitchen sink. Its job is simple: grind up food scraps so they can slide easily through your plumbing, reducing the volume of solid waste in your trash can. Think of it as a mini food processor that feeds your pipes instead of your stomach especially when you choose from top energy-efficient brands.
But just because it chews through leftovers doesn’t mean it’s immune to poor habits. Using it carelessly or neglecting regular upkeep can shorten its life, jam your pipes, or worse, turn your sink into a science experiment.
Here’s where the “green” part comes in. A well-maintained garburator uses less energy, manages waste more effectively, and keeps food particles out of landfills and off your plate figuratively speaking. It’s not just about performance, but about lowering your kitchen’s environmental footprint. So, if you’re using one, using it right matters. Let’s get into how.
Use It the Right Way
Treat your garburator like a tool, not a magic hole. Start by running cold water for a few seconds before you flip the switch. Keep it going while it’s grinding and for a little while after. Cold water solidifies grease and helps flush debris through the pipes instead of leaving it to gum up the works.
Next, don’t throw in a mountain of scraps and expect it to cope. Feed it gradually. Big chunks of food should be cut down think bite-sized pieces. Your garburator’s tough, but not invincible.
And here’s the dealbreaker: no bones, no grease, no plastic, no stringy stuff like corn husks or rubber bands (yes, it happens). Grease clogs your pipes, bones can jam the unit, and plastic doesn’t belong anywhere near your plumbing. If it didn’t come off a cooked plate or cutting board, it probably doesn’t belong down there.
Use common sense. If you wouldn’t chew it raw, don’t make the garburator do it either.
What You Can (and Should) Put Down There
Think of your garburator like a minimalist dietitian it thrives on a simple, soft menu and gets cranky with anything too heavy, greasy, or complex.
What’s Safe to Feed It
Here’s what your garburator can handle with ease:
- Soft vegetable scraps: e.g., carrot tops, zucchini ends
- Fruit peels: Minus tough citrus rinds
- Small amounts of cooked pasta or rice: Emphasis on small
- Biodegradable, non-fibrous leftovers: If it can be mashed with a fork and isn’t soaked in oil, it’s probably fine
Tip: When in doubt, think “fork-mashable and non-greasy.”
What to Avoid (The No-Fly List)
Your garburator is not a trash can in disguise. Keep these items out to avoid clogs, smells, and maintenance headaches:
- Grease and oil
Harden when cool, coat your pipes like artery plaque, and cause nasty clogs. - Coffee grounds
Smell great, but clump up like wet sand in a drainpipe. - Onion skins and garlic peels
Papery and slippery bad news for grinding components. - Fibrous veggies
Think celery, corn husks, asparagus. These wrap around the impellers and jam the motor. - Bulk pasta and rice
They keep absorbing water. What looks like a little becomes a lot and that spells blockage.
Natural Clean-Up Routine
Skip the fancy cleaners. A green garburator stays that way with simple moves and stuff you already have.
Daily Maintenance
Keep it simple after every use:
- Run cold water
- Add a squirt of dish soap
This helps keep things moving and cuts grease before it clings.
Monthly Deep Clean
Once a month, take things up a notch:
Toss in: A handful of ice cubes, coarse salt or a splash of white vinegar
Turn on the garburator and let it grind
What happens:
- Ice scrubs the grinding parts
- Salt or vinegar deodorizes and breaks down grime
It’s loud. It’s worth it.
Troubleshooting Funk or Slow Drains
For lingering odors or sluggish flow, try this classic natural combo:
- Pour ½ cup baking soda into the drain
- Add 1 cup vinegar
- Let it fizz for 10–15 minutes
- Flush with hot water
Result: Smells fresher. Runs smoother.
What to Avoid
Skip chemical drain cleaners
- They’re harsh
- Toxic
- Potentially damaging to your pipes and your garburator
Dealing with Odors
Your garburator shouldn’t smell like last week’s leftovers. If it does, it’s likely because something’s sitting in there that shouldn’t be. Rule one: don’t let food hang around. Run cold water and let the system flush clean after each use.
For a natural refresh, citrus peels lemon, orange, lime can go a long way. Just don’t overdo it; too much rind can gum up the works, especially if you’re feeding it thick chunks. A bit every now and then is plenty. Think “perfume,” not “potpourri.”
Check the chamber, too. Sometimes food bits get wedged near the impellers or cling to the sides. A flashlight helps. If it’s gunky, unplug the unit and use tongs or a stiff brush to clean out the mess. No fingers ever.
Short version: use it regularly, keep it clean, and don’t rely on scent alone to know it’s fresh. If it’s quiet and smells like nothing, you’re doing it right.
Keep Blades Sharp and the Unit Efficient
First off, a reality check: your garburator doesn’t actually have “blades.” What it has are impellers blunt metal arms that spin at high speed to grind scraps against a stationary grind ring. Still, “blades” has stuck in the collective kitchen conscience, so we’ll roll with it.
The easiest way to keep things sharp, efficient, and running smooth? Ice cubes. Yep, simple, frozen water. Toss a handful of ice cubes down the garburator once a month and run it with cold water. Want to level up? Add coarse rock salt or a splash of vinegar. The ice scours the grind ring and dislodges gunk; salt adds abrasion, vinegar kills odors and mild bacteria.
This little ritual you’re talking 30 seconds, max serves triple duty: keeps the grinding parts clean, minimizes buildup on the inner chamber, and reduces wear on the motor over time. Skipping it? You’re not breaking the machine overnight, but you’re leaving it dirtier, noisier, and less effective. Which eventually means more clogs, more jams, and possibly a full-blown replacement. That’s the opposite of green. So sharpen up literally.
Use It Regularly
Garburators aren’t ornaments. They’re built to be used and left idle too long, they start to turn on you. Run the unit a few times a week, even if you’re not tossing much down. Just flip it on with cold water for 15 seconds; it helps flush out residue, keeps the moving parts from seizing up, and staves off rust.
When you let it sit, grime hardens, rubber gaskets dry out, and smells settle in like they pay rent. Think of it like a bike chain: let it collect dust and it won’t turn when you need it. Keep things flowing and friction low, and your garburator will stay sharp figuratively and literally.
Consider Water and Energy Use
Using your garburator efficiently means being smart about both water and electricity. Here’s how you can minimize waste while keeping your kitchen clean and green.
Use Cold Water, but Briefly
Cold water is essential – It helps fats and oils stay solid, allowing them to grind up and flush away more cleanly.
Keep it short – Only run the tap:
- A few seconds before switching on the garburator
- About 5–10 seconds after grinding is done
Quick Tip: You don’t need to soak your sink every time you turn it on.
Practice Energy Efficiency
Don’t let the disposal run needlessly
- Once the grinding stops, turn it off.
- Letting it hum on after it’s clear wastes electricity.
Avoid using the disposal as a trash chute
- Over-relying on it cancels out any potential eco-benefits.
Stay on Top of Minor Issues
Don’t wait until your garburator sounds like it’s chewing nails to pay attention catching small issues early keeps your unit alive and kicking. First, use your ears. A healthy garburator hums and grinds at a steady pitch. If you hear screeching, rattling, or a hum without movement, that’s your cue something’s wrong.
If it seizes up, kill the power. Seriously never mess with it while it’s plugged in. Grab the manual reset button (usually underneath the unit) or use the hex key it came with to manually rotate the impellers and break the jam. Most units come with a hex-wrench port near the bottom for exactly this reason.
One rule, always and forever: don’t stick your hand in there. Not for a second. If you dropped something or there’s a visible clog, use tongs or needle-nose pliers. Even when it’s off, it’s not worth the risk.
Fixing small problems as they show up means you won’t wake up one morning to a gurgling sink that smells like forgotten leftovers. Keep it simple. Stay alert. Your garburator will thank you with quiet, odor-free service.
Last Checks
The final step in maintaining your garbage disposal doesn’t need to be intensive but it shouldn’t be skipped either. Every few months, set aside five minutes for a simple glance-and-go routine.
What to Inspect
Hoses and Connections
Look under the sink for any of the following warning signs:
- Drips
- Tiny puddles
- Water staining
Even a small leak can lead to mold, mildew, or serious water damage.
Tighten loose fittings or replace aging parts before they fail.
Splash Guard
That rubber ring at the top of the disposal deserves a quick look. Watch for:
- Food buildup or crusted grime
- Cracks or tears
A faulty splash guard can cause odors to escape and allow debris inside.
If it’s showing wear, clean or replace it.
Persistent Clogs
If you’re using your disposal correctly but still experiencing clogs, it may not be the garburator itself.
- The issue could lie further down the drain line.
- This might require a plumber’s expertise.
Identifying the source early saves time and stress in the long run.
Wrap-Up
A green garburator isn’t about making your kitchen fancy it’s about making it functional, efficient, and smarter in the long run. When you treat your unit right, it doesn’t just run longer it runs cleaner, with fewer repairs, and uses less energy and water to boot.
You don’t need to be obsessive. Just consistent. Cut scraps to size. Use the cold water trick. Toss in a few citrus peels once in a while. It’s small stuff, but it stacks up.