
Upgrading Your Dryer Vent System for Better Performance
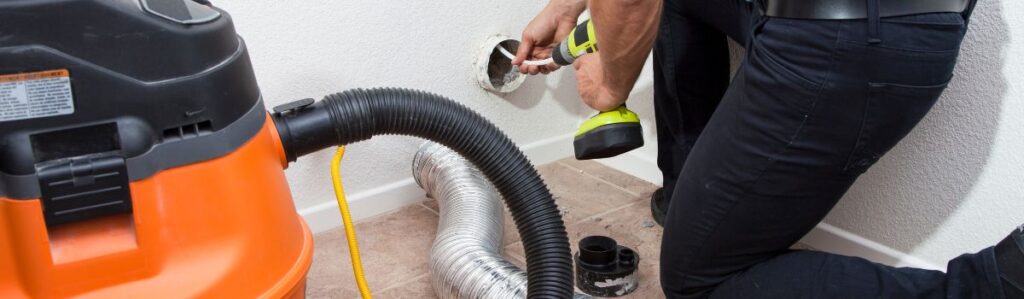
Why Your Dryer Vent Matters
A good dryer vent is more than a convenience it’s essential. Skip the maintenance, and you could be dealing with longer drying times, skyrocketing energy bills, or something worse: a fire hazard. Lint is highly flammable, and poor airflow can cause your dryer to overheat. Repair and replacement of faulty vents can help prevent these risks.
Upgrading your vent system isn’t complicated, but it makes a difference. A proper setup ensures smooth airflow, meaning your clothes dry faster and your dryer doesn’t have to work as hard. Less strain on the system means a longer lifespan for your machine and lower energy costs for you. Plus, a well-vented dryer keeps excess moisture from building up in your home, reducing the risk of mold and mildew.
Bottom line: If your dryer vent is outdated, inefficient, or just plain neglected, fixing it isn’t optional it’s necessary.
Signs Your Dryer Vent Needs an Upgrade
If your dryer vent system isn’t up to par, you’ll notice. Here’s what to watch for:
- Clothes take longer to dry than usual. If a single load needs two or more cycles, poor venting may be restricting airflow.
- The exterior of your dryer feels excessively hot. Heat buildup means the hot air isn’t escaping properly. That’s wasted energy and a potential fire risk.
- There’s a burning smell or visible lint near the vent opening. Lint is highly flammable. If it’s collecting around the vent, it’s a sign of poor airflow and possibly a hidden clog.
- You notice condensation or mold near the vent line. Dryer vents push out warm, moist air. If that air isn’t leaving the house efficiently, it can lead to mold growth and water damage.
- The ductwork is made of outdated or unsafe materials like vinyl or plastic. These materials can easily kink, trap lint, and even melt under high heat. Metal vent pipes are safer and more effective.
If any of these signs sound familiar, it’s time to upgrade. A better vent system means faster drying times, lower energy costs, and most importantly, reduced fire risk.
Choosing the Right Dryer Vent Materials
Not all vent materials are the same. Some are safer and more effective than others.
- Rigid Metal Ducts (Best Choice) – If performance and safety are priorities, this is the gold standard. The smooth interior walls allow unrestricted airflow, reducing lint buildup and the risk of fire. While installation requires precise measurements and proper fittings, the longevity and efficiency gains make it worth the effort.
- Semi-Rigid Metal Ducts – A step down from rigid metal but still a far better choice than flexible plastic or foil. It offers some flexibility for tight installations while maintaining decent airflow. Just be cautious over-bending can lead to internal ridges where lint accumulates, so keep the path as straight as possible.
- Foil or Plastic Ducts (Avoid) – These are the weak links of dryer ventilation. Plastic ducts are flammable, and foil ducts collapse easily, restricting airflow and trapping lint. Both present major fire hazards and should be replaced if they’re currently part of your system. Better to upgrade now than risk a costly (or dangerous) failure later.
Rerouting for Better Efficiency
A straight, unobstructed vent path helps your dryer breathe. The longer and more twisted the ductwork, the harder your dryer has to work, leading to higher energy costs and potential lint buildup.
First, trace your current vent route. Does it snake around walls or take unnecessary detours? Aim for the shortest possible path to the outside. If your dryer is far from an exterior wall, consider rerouting through a more direct path even if that means installing a new exit point.
Minimize 90-degree turns. Each sharp bend slows airflow and increases lint accumulation. If turns are unavoidable, use wider, gradual elbows instead of tight angles.
Finally, make sure your vent actually leads outdoors. Venting into an attic, crawl space, or garage creates moisture problems and fire risks. If your system doesn’t exhaust outside, fixing this should be priority number one.
Installing a New Dryer Vent
Upgrading your dryer vent isn’t complicated, but it does require precision. Every step affects efficiency and safety, so take your time and do it right.
- Step 1: Choose the Best Exit Point – The vent should push air directly outside, not into an attic, basement, or crawl space. A short, straight path is best fewer bends mean better airflow and less lint buildup.
- Step 2: Cut the Vent Opening – Using a hole saw or jigsaw, make an opening in the exterior wall for the vent hood. Install a vent hood with a built-in damper to prevent backdrafts, pests, and moisture intrusion. Seal around it with weatherproof caulk.
- Step 3: Connect the Ductwork – Use rigid or semi-rigid metal ductwork for the safest and most efficient airflow. Secure joints with foil tape (not regular duct tape, which degrades over time). Avoid unnecessary bends, and if possible, keep the run under 25 feet. Every 90-degree turn reduces airflow, so limit them as much as possible.
- Step 4: Test the System – Once everything is connected, turn on the dryer and check the outside vent. You should feel strong, steady airflow. If it’s weak, double-check for kinks, leaks, or excessive duct length. A solid airflow test ensures your dryer will operate efficiently and safely.
A properly installed vent means better drying times, lower energy use, and reduced fire risk. Take the time to set it up right, and your dryer will thank you.
Maintaining Your Dryer Vent Post-Upgrade
Upgrading your dryer vent is only half the battle keeping it clean and clear ensures it stays efficient and safe. Follow these steps to maintain optimal airflow and prevent potential hazards.
Regular Maintenance Tasks
Clean the lint trap after every load.
This simple habit helps prevent buildup in the ductwork and keeps your dryer running efficiently.
Inspect and clean the entire vent system at least once a year.
Lint and debris can accumulate over time, even in the best vent setups.
- Use a vent brush or vacuum attachment to remove blockages.
- If airflow seems weak, check for hidden clogs.
Make sure the exterior vent hood stays clear.
Lint, dirt, and even small animals can block the outside vent opening. Keep it free of debris so air can flow freely.
Signs of a Clogged Vent
Watch for these red flags that indicate restricted airflow:
- Clothes take longer to dry.
- Excess heat or moisture around the dryer.
- A burning smell or unusually hot dryer exterior.
The Benefits of Routine Maintenance
Regular maintenance doesn’t take long, but it makes a massive difference. A clean dryer vent means:
- Faster drying times
- Lower energy bills
- Reduced risk of fire
Stay consistent, and your dryer will thank you!
The Bottom Line
A better dryer vent means a safer, faster, and more efficient drying process. Upgrading isn’t complicated pick the right materials, minimize airflow restrictions, and stay on top of maintenance. It’s a simple fix that prevents fires, lowers energy costs, and extends your dryer’s life. Do it once, do it right, and you won’t have to think about it again.