
Replacing Dryer Vent Elbows & Ducts
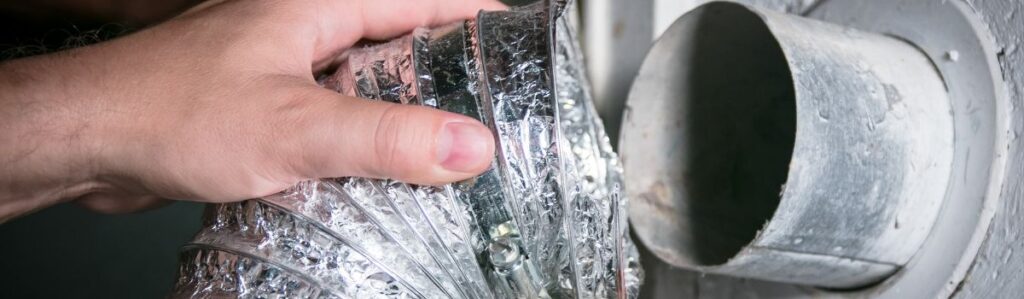
How to Replace Dryer Vent Elbows and Ducts the Right Way
Dryer vent elbows and ducts are more important than they look. They’re not just pieces of metal or plastic tucked behind your machine; they’re the path your dryer uses to breathe. The elbow is that curved connector piece at the back, usually a 90-degree turn, and the duct is the tubing that carries hot, moist air out of your laundry area. Together, they’re responsible for moving lint-heavy air away from your dryer so it doesn’t build up heat, eat your energy, or worse, start a fire. When upgrading or maintaining these parts, retrofitting dryer vent systems becomes an essential step in improving overall airflow and safety.
When these parts become clogged with lint or kinked due to poor positioning, airflow decreases. That means clothes take longer to dry, your utility bill climbs, and your dryer runs hotter than it should. Over time, bad or failing ductwork, crushed tubing, loose connections, holes, or cheap foil ducts can become serious fire hazards. It’s not just about keeping laundry day efficient; it’s about keeping your home safe.
Replacing elbows and ducts isn’t flashy, but it’s one of those fixes that just makes sense. A clean, solid vent path means better air circulation, fewer repairs, and a dryer that performs its job efficiently without struggle.
Get the Right Parts
Before rushing to the hardware store, take a moment to assess what you already have. Grab a tape measure and check the diameter of your existing ducting. Most systems use 4-inch ducts, but don’t assume. A snug fit is key. Also, note the material: metal ducting is code in many places, and with good reason. Plastic and foil-style ducts are a fire risk and generally a bad idea.
Now, let’s discuss the various types of ducts. Flexible ducts are easy to install and can snake around tight spots, but that convenience comes with a trade-off more places for lint to gather and airflow to suffer. If you can go rigid, do it. Rigid metal ducts move air more efficiently and resist clogging, resulting in less maintenance over time. They’re a bit trickier to fit, but worth it.
As for elbows, don’t just grab any 90-degree bend and call it a day. Every turn in your vent line reduces airflow. A single 90-degree elbow can be equivalent to 5 feet of ducting in terms of resistance. Use them only when necessary, and keep the number of bends to a minimum. If you must use one, opt for a wide-radius model; it bends just as much but keeps the airflow smoother.
What You’ll Need
You don’t need a garage full of tools, just the right handful. Below is a breakdown of the essential items and a few optional extras that can make the job run more smoothly.
Essential Tools
At a minimum, gather the following:
- Flathead or Phillips screwdriver – Depending on your clamps
- Tin snips – For trimming metal ducting to size
- Solid duct clamps – To securely hold everything in place
- HVAC foil tape – Not to be confused with standard duct tape.
Note: Despite its name, regular duct tape breaks down with heat and moisture. Skip it when working on dryer ducts.
Optional But Handy
These tools aren’t strictly necessary, but they can save time and effort:
- Drill – Useful if you need to secure the duct with screws into a wall or vent hood
- Dryer vent cleaning brush – A great addition if you’re already getting into the ductwork
- Gloves – Protect your hands from sharp metal edges
- Flashlight – Helps illuminate dark or tight corners
Pro Tip
Keep everything nearby before starting the job. Having the right tools within arm’s reach can save you from making repeated trips to the toolbox!
Remove the Old Setup
Before installing a new dryer vent or replacing old parts, it’s essential to carefully remove the existing setup. Follow these steps for a safe and effective process.
Power Down the Dryer
Electric Dryer: Simply unplug it from the wall.
Gas Dryer:
- First, turn off the gas valve before doing anything else.
- Safety first never skip this step.
Pull the Dryer Away from the Wall
Gently move the dryer back just enough to access the rear.
Check for:
- Straps, wires, or tight connections that might get damaged.
- Don’t yank, take it slow.
Disconnect the Old Vent
Locate the clamp or foil tape securing the duct to the exhaust port.
Use a screwdriver or your hands to loosen or unclip it.
Tip: Older setups might resist.
Expect:
- Crusty buildup
- Sharp edges
- Awkward angles
- Wearing gloves can help.
Remove the Duct and Elbow
Pull out the full duct system:
- From the dryer
- From the wall or exterior vent
You might get a little shower of lint that’s a good sign it needed this.
Inspect the Ductwork
Lay everything out and look for:
- Kinks or crushed sections
- Rust or corrosion
- Holes or damp patches
- Heavy lint buildup
These are clues that it’s time to replace your duct fully.
Keep or Toss
- Reusable Parts: Clean and keep as backups or for recycling.
- Damaged Components: Toss them responsibly.
- Hardware: Keep screws and clamps you’ll need these for reinstallation.
Pro Tip
Before removing anything, snap a quick photo of the current setup.
This comes in handy when reinstalling or adjusting for proper angles and positioning.
Install the New Elbow and Duct
Now that you’ve ditched the old, let’s get the new setup in place. This process involves four key steps: measuring, positioning, connecting, and sealing.
Measure and Cut
Start by measuring the distance between your dryer and the wall or vent exit. Then:
- Use tin snips to cut the new duct to length
- Avoid crushing the duct, a flattened duct restricts airflow
Tip: A smooth duct means an efficient dryer
Position and Dry Fit
Before securing anything, dry-fit all the components. Your goal here is to ensure minimal airflow resistance.
Position the 90-degree elbow to keep airflow as straight as possible
Avoid excessive bends they force your dryer to work harder
Think of this step as “plumbing for hot air”:
- Fewer turns
- Smoother flow
- Less lint buildup
Clamp it All Together
With dry fitting complete, it’s time to secure the joints:
Use worm gear clamps at every connection:
- Between the dryer and the duct
- Duct and elbow
- Elbow and wall vent
Take your time, loose connections can leak lint and reduce efficiency
Seal with Foil Tape
This is your final touch to ensure airtight integrity:
- Use real foil tape (not duct tape)
- Wrap every seam completely to seal off potential leaks
- Foil tape is heat-rated and prevents lint from escaping
Once you’ve followed these steps, you’ll have a mechanically sound, efficient duct system with solid fittings, clean cuts, and secure seals. Don’t overthink it. Keep it clean and tight. That’s the whole game.
Test for Good Airflow
Once your new elbow and duct are in place, it’s time to determine whether all your hard work has paid off. Follow these simple steps to test airflow and ensure your dryer is operating efficiently.
Power Up
Before testing, make sure to:
- Reconnect power or gas to your dryer.
- Set the dryer to a timed dry cycle with no clothes inside. You’re not drying laundry; you’re checking airflow.
Check Outside at the Vent Hood
Locate the dryer vent hood outside your home. Then perform the following checks:
Feel for airflow: A strong, steady stream of warm air should exit the vent.
Use the tissue test:
- Hold a tissue over the vent opening.
- It should flutter or flap vigorously, as if it’s in a wind tunnel.
- If the tissue hardly moves or doesn’t move at all, there’s a blockage.
Inspect for Leaks
Double-check the ductwork connections:
- Feel around the duct and elbow joints indoors.
- Look for escaping air, which shouldn’t be there.
- If you detect leaks, tighten the clamps or reapply foil tape to seal gaps.
Clear Any Remaining Blockages
Still having weak airflow?
Use a dryer vent brush to dislodge stubborn lint clumps that may be clinging inside.
Push the brush through from both sides:
- The dryer end
- The outside vent end
Even new ducting can get clogged by old lint buildup.
If You’re Upgrading the Vent Path
This is your shot to fix what the installer didn’t. If your dryer hose snakes twenty feet across the basement ceiling like a bad idea someone never undid, now’s the time to straighten it out.
Try to trim the overall duct run. The longer the air travels, the more heat and lint your dryer has to push. That’s wasted energy and a buildup of risk. Keep it under 25 feet if you can and subtract a few feet every time you add a 90-degree elbow. Those sharp turns quickly dissipate airflow momentum.
If you’re rerouting through a wall, don’t punch a hole and hope for the best. Buy a proper vent hood made for exterior walls, complete with a damper and pest screen. Line up your new path with studs, not just empty drywall. Use rigid metal ducting wherever possible and skip the plastic or foil accordion tubes; they’re lint traps in disguise.
Ceiling runs? Same deal: keep the duct smooth, securely fastened, and insulated if it travels through cold spaces, such as attic cavities. No matter where you go, minimize the use of elbows and sharp bends. A straight shot with gentle curves moves air more efficiently and won’t cause your dryer to overheat.
This part’s not flashy, but it’s the difference between a vent system and a fire hazard.
Keep It Clean From Here
Even the best-installed vent system won’t stay efficient if you don’t keep it clean. Lint builds up faster than most people think, not just in the lint trap but all the way through the ductwork. That soft, fluffy stuff is highly flammable and a pain for airflow. Plan to clear it out at least once a year, more often if you do a lot of laundry.
Start simple: empty the lint trap after every single load. No excuses. Then hit the ducts with a vent brush or cleaning kit every few months. They’re cheap and do the job. If drying takes longer than it used to or your laundry room runs hotter than normal, don’t ignore it; that’s a red flag.
And while elbows and ducts aren’t complicated parts, they don’t last forever. Plastics become brittle, metals corrode, and flexible pieces tear. Every few years, give the setup a once-over. If you’re switching to a new dryer, that’s the perfect time to upgrade the vent path too. Keep it clean, and the dryer continues to run smoothly. That’s the deal.
Wrap-Up
Swapping out your dryer vent elbows and ducts isn’t flashy work, but it matters. A tight, clean vent path prevents lint from accumulating where it shouldn’t, helps your dryer operate more efficiently, and reduces the risk of a fire you don’t need.
It’s not complicated. Get the right parts, cut cleanly, seal smart, and test your work. You’ll finish the job in an hour or two, tops. The payoff? Hot laundry without the noise, heat buildup, or extra cycles. Do it once, do it right and don’t think about it again for years.