
How to Identify Common Dryer Vent Issues
Spotting Common Dryer Vent Problems: Key Signs and Solutions
Dryer vent problems can cause a lot of frustration and even turn into safety hazards if left unaddressed. Diagnosing these issues early ensures your dryer operates efficiently, your household stays safe, and your energy bills remain manageable. Here’s how to spot the most common problems with dryer vents and why regular dryer vent cleaning is essential.
Understand the Basics of Your Dryer Vent System
Think of your dryer vent as the lungs of your dryer. It draws in air, heats it to dry your clothes, and then pushes the hot, moist air outside your home. Without this ventilation, your dryer would essentially be steaming your laundry or worse building up heat and moisture where it isn’t supposed to.
Here’s the quick breakdown: Air enters the dryer, flows through your wet laundry, and absorbs moisture. This humid air is directed through the vent duct, which routes it outside. That air pathway needs to stay clear for this system to work efficiently. If something clogs or disrupts the air’s journey, your dryer becomes a sluggish, stressed-out appliance that’s one loose spark away from a more serious problem.
Knowing this straightforward airflow process makes troubleshooting easier. If your clothes aren’t drying completely, or your laundry room starts doubling as a sauna, you’ll realize it’s probably an airflow issue somewhere along the line. Fixing a dryer vent problem may not be glamorous, but a clear vent makes for faster drying, lower energy bills, and a safer home. Sounds like a win, right?
Signs Your Dryer Vent May Have Issues
A malfunctioning dryer vent can lead to inefficiencies, potential fire hazards, and even damage to your home. Pay attention to these warning signals to ensure your dryer vent is operating correctly:
Clothes Taking Longer to Dry
- Is your dryer running multiple cycles to dry clothes?
- A likely culprit is a partially blocked vent caused by lint buildup, which restricts airflow and reduces drying efficiency.
Noticeably Hot Dryer or Laundry Room
- Is the dryer unusually hot to the touch?
- Or is your laundry room warmer than usual?
- This could indicate that hot air isn’t correctly venting outside your home, pointing to an airflow issue.
Burning Smell When the Dryer Is Running
- Have you noticed a burning odour during the operation?
- Lint buildup near heating elements can reach flammable temperatures, representing a serious fire risk.
What to Do: Turn off the dryer immediately and investigate the source of the smell.
Excessive Lint Build-Up
- Even after regular cleaning, do you see lint in and around the lint trap?
- This could mean lint is accumulating deeper in the vent system, straining your dryer and the vent.
Visible Debris Near the Exterior Vent
- Check the exterior vent outside your home.
- If lint or debris spills out, it signals that your system is clogged or not venting properly.
Odd Noises During Operation
- Hearing rattling or whistling sounds while your dryer runs?
- These noises can result from:
- Obstructed vents,
- Disconnected ductwork or
- Improperly installed vent paths.
Humidity Issues in the House
- Have you noticed an increase in indoor humidity levels while using the dryer?
- Improper venting may allow moist air to leak back into your home rather than being expelled outside.
If you notice any of these signs, promptly addressing potential dryer vent issues is important. Blocked vents impact your dryer’s performance and pose safety risks, such as fires or structural damage due to moisture. Consider seeking professional help for a thorough inspection and cleaning when in doubt.
Common Causes of Dryer Vent Problems
Understanding why dryer vent issues happen is half the battle. A combination of restricted airflow, poor design, and outside interference causes most problems. Let’s break down the usual suspects:
Lint Accumulation
Even the best dryers aren’t immune to lint buildup. Fine particles slip through and settle inside the vent despite regular screen cleaning. Over time, this buildup acts like clogged arteries, restricting airflow and forcing your dryer to work twice as hard.
Key risks of lint buildup:
- Reduced efficiency: Your dryer takes longer to do its job.
- Fire hazard: Lint is flammable, turning simple clogs into serious safety risks.
Improper Installation
Poorly designed or installed vent systems can cause major headaches. These issues include:
- Excessive bends: Long, winding ducts invite blockages.
- Incorrect materials: Plastic ducts, which are outdated and unsafe.
- Improper sealing: Using duct tape instead of metal clamps can create weak points.
- Slope issues: Failing to angle the vent properly can lead to debris accumulation.
Broken or Damaged Vent Ducts
Dryer vents don’t last forever. Over time, issues like cracks, holes, and loose connections can develop.
Why this matters:
- Inefficient airflow: Gaps allow air to escape, reducing dryer performance.
- Clog-friendly conditions: Damaged ducts make it easier for blockages to form.
Think of it like a leaky pipe problematic at best, disastrous at worst.
Animal Intrusion
Dryer vents can be cozy havens for small critters. Birds, squirrels, and rodents may nest inside your vent, bringing materials that obstruct airflow.
Problems caused by animal intrusion:
- Clogs: Nesting materials block airflow.
- Persistent issues: Animals may refuse to leave without intervention.
No one invited the raccoon, but that didn’t stop it from moving in.
Obstructed Vent Cap
The vent cap outside your home is another common trouble spot.
Potential problems include:
- Blockages from debris: Dirt, leaves, snow, or lint piling up.
- Malfunctioning parts: Stuck flaps or broken screens that impair airflow.
If air can’t properly escape through the vent cap, it stays trapped inside leading to inefficiency and higher energy bills.
By identifying these common culprits, you can address problems early and potentially avoid expensive and dangerous outcomes. Whether removing lint, repairing a vent, or evicting a squatter squirrel, staying proactive will keep your dryer running smoothly and your home safer.
DIY Steps to Inspect Your Dryer Vent
Here are simple ways to investigate your vent for potential issues:
Check the Lint Trap Frequently
- Start with the basics. The lint trap is your first line of defence against clogs. Clean it out religiously, ideally after every load. If it’s brimming with lint despite regular cleaning, that’s a red flag signalling deeper accumulation within the duct.
Inspect the Exterior Vent Cap
- Step outside while the dryer is running. Can you feel a steady flow of warm air exiting the vent cap? If not, you could be dealing with a blockage. Also, look closely: debris, lint, or even a wayward bird nest could obstruct the flap or grille.
Check the Duct for Obstructions
- Time to get hands-on. Disconnect the vent hose from the back of the dryer—don’t worry, it’s easier than it sounds, usually secured by a simple clamp or screw. Shine a flashlight into the vent and look for clogs. Found something? Grab a vacuum or a brush. No airflow means no drying, so clear it out.
Measure Drying Times
- Got a stopwatch? Do a rough test: Time how long it takes to dry a standard load. If it’s edging into overtime, this could indicate restricted airflow. Quick science: Poor venting equals trapped moisture, which equals inefficient drying. Why gamble on guesswork when you have a clock?
Use a Vacuum or Dryer Vent Cleaning Kit
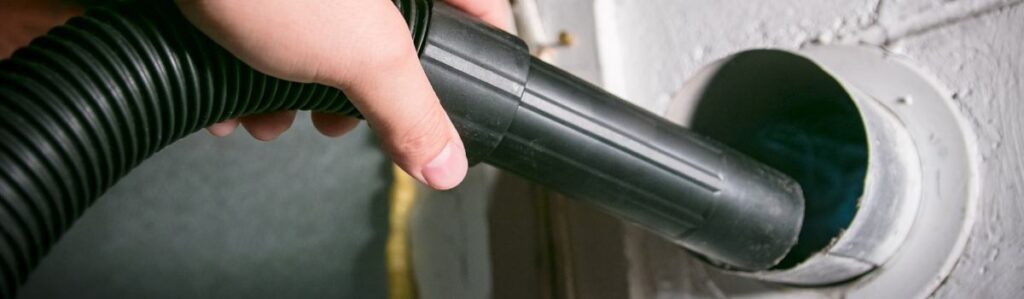
- For serious cleaning, you’ll want more than your hands. Specialized dryer vent cleaning kits (available in big-box stores) or an extendable vacuum attachment will save you from practically crawling into the ductwork. Feed the tool into the vent, twist it around, and pull out lint chunks that look like they’ve been hiding since the Reagan era. Satisfying and effective.
By performing these simple checks, you’ll either solve the problem or at least rule out straightforward fixes. It’s like running a low-budget diagnostic before calling in the pros. Keep it disciplined and regular, and your dryer will thank you with fewer breakdowns and faster drying times.
When to Address Issues Yourself
Some dryer vent issues are simple enough for a quick DIY fix no special skills or certifications are required. If the problem is mild, like lint buildup in the duct or debris near the exterior vent cap, you can usually handle it with basic household tools. Start by purchasing a dryer vent cleaning kit, which often includes a flexible brush or vacuum attachment designed specifically for clearing lint from vent ducts. These tools can help loosen and remove obstructions without damaging the ductwork.
You should also feel confident tackling issues like a clogged or stuck exterior vent flap. Simply inspect the cap outside your home to see if lint, leaves, or other debris have accumulated. If the flap isn’t opening properly, clean it thoroughly and confirm that air freely flows when the dryer is running.
For interior inspection, disconnect the vent hose from the back of the dryer and look inside with a flashlight. If you spot any blockages, use the same cleaning tool or vacuum hose to clear them. While at it, check for sharp bends or kinks in the duct that could restrict airflow and straighten them out.
As a general rule, if the problem is visible and accessible and doesn’t require dismantling complex systems, it’s worth trying to handle it yourself. Just turn the dryer off and unplug it before starting any work.
When It’s Time to Get Professional Help
Sometimes, a dryer vent issue exceeds what a flashlight, vacuum, and DIY determination can handle. In these cases, it’s better to step back and call in the pros. Knowing when to involve a professional can save you from worsening a bad problem or risking your safety.
Complex or Extensive Vent Systems
- If your dryer vent winds through multiple floors, ceilings, or tight spaces, cleaning it yourself can quickly become more trouble than it’s worth. Long or overly complicated systems are prone to hidden blockages or airflow bottlenecks requiring specialized tools and expertise to be fully cleared.
Repeated Blockages Despite Cleaning
- If you’ve already cleaned the vent thoroughly and your dryer still struggles, there’s likely a deeper issue. This could range from deep lint compaction in the ductwork to a poorly designed or damaged vent system. Professionals can access heavy-duty equipment and diagnostic tools to spot and solve issues you can’t.
Structural Damage or Major Wear and Tear
- Visible damage to the vent duct like crushed sections, disconnections, or even small holes means it’s no longer doing its job. Simply patching or ignoring these issues can lead to leaks, inefficiencies, and, in some cases, fire hazards. A professional can assess and replace damaged sections to restore the system’s integrity.
Complete Overhaul or System Upgrade
- If your home has older, flexible plastic or foil dryer ducts, it’s time to upgrade. These materials are notorious for trapping lint and are far less safe than modern metal ductwork. A professional can install rigid or semi-rigid metal ducts less prone to clogging and safer in high-heat scenarios.
Pest Intrusions
- Birds, small mammals, and insects are surprisingly resourceful when nesting in dryer vent openings. Clearing out these invaders can be messy and even dangerous, especially if sharp claws, stingers, or diseases are involved. Let the pros handle it safely and install pest-proof vent caps to prevent future intrusions.
If you are in any of those scenarios, don’t hesitate to bring in a professional dryer vent cleaning or repair service. A trained technician can identify issues you might overlook, resolve them thoroughly, and help you avoid long-term headaches. Plus, you’ll have peace of mind knowing the job was done right. Sometimes, spending a little now saves a lot later.
Preventing Future Dryer Vent Problems
Preventive maintenance is your first line of defence against dryer vent issues. Tackling small habits now can save you time, money, and frustration later. Here’s how to stay ahead of the game:
Clean the Lint Trap Every Single Time
- Don’t overthink it just do it. After every load, clear the lint trap. Think of it as a 10-second insurance policy for your dryer. This simple step drastically reduces the chance of lint sneaking into the vent system.
Make Vent Cleaning a Regular Thing
- Even the best lint trap won’t catch everything. Over time, particles build up in the ductwork, like cholesterol in an artery. Commit to a deep clean at least once or twice a year. A vent-cleaning brush kit or a professional service can make this job less nightmare.
Don’t Ignore the Exterior Vent
- Take a quick walk outside now and then to check the vent cap. Ensure it’s clear of lint, leaves, or rogue weeds trying to move in. Bonus: You also keep critters out squirrels don’t pay rent.
Fix Damage Before It Gets Worse
- Crushed or torn ducts? Loose connections? Don’t wait for them to “sort themselves out.” A roll of ductwork tape or a quick swap-out for damaged sections can save you from a cascade of problems later.
Upgrade Cheap Vent Materials
- If you’re still relying on flimsy plastic or foil ducts, it’s time to upgrade. Switch to rigid or semi-rigid metal ducts they’re tougher, safer, and far less likely to clog.
Add a Screen to Keep Wildlife Out
- A simple mesh screen over the exterior vent can stop birds, mice, or insects from adding their “renovations” to your ductwork. Just make sure the screen doesn’t restrict airflow.
Taking these steps isn’t glamorous, but it’s effective. Dryer vent problems thrive on neglect don’t give them the chance. A few mindful habits now will save you from sweaty laundry rooms, soaring energy bills, and fire hazards. Stay on top of maintenance, and your dryer will thank you by quietly doing its job for years to come.
Stay Alert to Warning Signs
Ignoring small issues with dryer vents is asking for bigger trouble. Warning signs like longer drying times or hotter-than-usual laundry might seem minor inconveniences, but they likely indicate airflow problems or buildup. These aren’t just inefficiencies they’re the early whispers of potential fire hazards, rising energy costs, and premature wear on your dryer.
Pay attention to burning smells, rattling noises, or a humid laundry room during operation. These signals don’t fix themselves; brushing them off could cost you pricey repairs or safety. Think of these signs as the dryer pleading for a quick intervention. Spot the problem, act fast, and solve it before it gets out of hand.
You don’t need to overthink it or panic; just look for these red flags and act on them early. Maintenance is about staying ahead of trouble, not reacting to it when it’s too late.