
Step-by-Step Smart Dryer Repair Tutorial
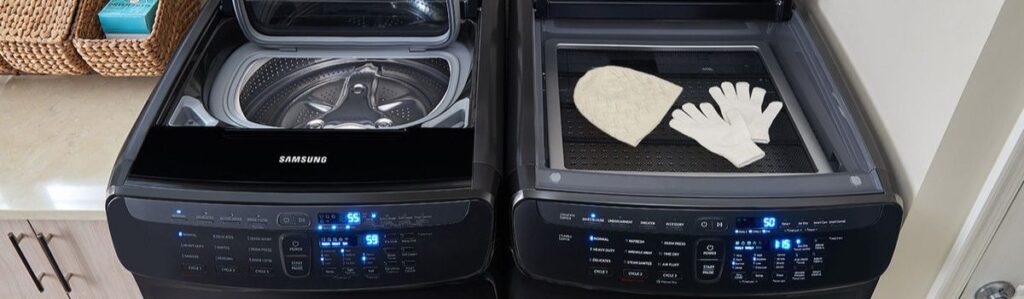
Fix Your Dryer Fast: Step-by-Step Smart Dryer Repair Tutorial
Smart dryers are no longer a luxury they’re the new normal in British Columbia households. With features like remote start, energy usage tracking, and maintenance alerts sent right to your phone, these appliances offer a level of convenience that traditional dryers can’t compete with. But when something goes wrong, that same tech can create frustration. Installation mistakes, error codes, blinking lights, or a machine that simply refuses to start can make the manual seem even more confusing.
That’s where this guide comes in.
Whether you’re dealing with a dryer that won’t heat, a sensor that keeps misreading moisture levels, or a Wi-Fi connection that won’t stick, you don’t always need to call a technician. With the right tools, a bit of patience, and a clear plan, many smart dryer problems can be resolved from the comfort of your laundry room. In this guide, we’ll walk you through troubleshooting common issues, step-by-step repairs, and essential maintenance tips all tailored to BC homes and common dryer models, such as LG ThinQ, Samsung SmartThings, GE SmartHQ, and Whirlpool smart dryers.
What You’ll Need: Tools, Parts & Preparation
Before getting started, take a moment to prepare your workspace and gather all the necessary materials. It’s tempting to dive right in, especially if you’re staring down a pile of damp laundry, but smart dryers are sensitive machines. Rushing through a fix can do more harm than good.
Essential Tools for Repair
- Screwdrivers (Phillips and flathead) – You’ll need these to remove panels and access internal components.
- Multimeter – This tool allows you to test electrical continuity and is essential for diagnosing sensors, fuses, and heating elements.
- Work light or flashlight – Most repairs involve small parts and tight spaces.
- Needle-nose pliers – Great for disconnecting wires and pulling worn components.
- Rubbing alcohol & microfiber cloths – For cleaning sensors and control panels without causing damage.
- Shop vacuum – Ideal for clearing out vent lint or dust inside the unit.
Safety Preparation
- Always unplug the dryer before performing any repair, even if it’s just to inspect a sensor.
- If your model is gas-powered, shut off the gas valve and ventilate the area.
- Place a mat or towel on the floor to avoid scratching your dryer or floors.
- Keep a small dish or magnetic tray nearby to hold screws and clips you’ll thank yourself later during reassembly.
Parts & Replacement Components
If you suspect a part may need replacing (such as a heating element or sensor), note down the exact model number of your dryer. This number is usually found:
- Inside the door frame
- Behind the control panel
- On the rear panel or sidewall
In British Columbia, you can often source parts the same day from reputable local shops. Look for high-quality OEM (original equipment manufacturer) parts whenever possible they last longer and fit properly.
Understanding Your Smart Dryer’s Ecosystem
Smart dryers operate on a combination of mechanical systems and intelligent software. While they still rely on heating elements, motors, and drums like their traditional counterparts, they also include components like:
- Moisture sensors that measure dryness in real-time
- Thermistors and thermal fuses that regulate temperature
- Control boards that process data and automate cycles
- Wi-Fi modules that communicate with mobile apps
- Digital diagnostics to alert users of potential issues
Each of these systems works together. If one fails say, a dirty sensor misreads a wet load as dry the whole operation can stall. That’s why many modern dryer issues are tied to software feedback loops, sensor errors, or communication faults rather than physical failures.
Most major brands offer an app that connects to your dryer:
- LG ThinQ allows you to remotely monitor cycle progress, download custom cycles, and receive troubleshooting alerts.
- Samsung SmartThings provides usage analytics, error notifications, and remote control via phone or voice assistant.
- GE’s SmartHQ enables users to run diagnostics, schedule maintenance, and order replacement parts based on error codes.
These systems are incredibly helpful but only if they work properly. When Wi-Fi fails, or an app misinterprets a sensor reading, it can feel like you’re locked out of your appliance.
Troubleshooting Common Smart Dryer Problems
Troubleshooting a smart dryer doesn’t require deep technical expertise. What you do need is a logical process and some understanding of how these machines behave. Below are four of the most common problems and how to resolve them confidently.
Dryer Won’t Turn On
This is one of the most frequently reported issues, and fortunately, it’s often one of the easiest to fix.
Step-by-step:
- Check the outlet. Plug in another device (such as a phone charger) to ensure the outlet is live.
- Inspect the power cord for signs of damage or fraying. Replace if needed.
- Reset the breaker in your fuse box. Dryers require a lot of energy and can trip breakers silently.
- Check the door switch. Smart dryers won’t power on if the door latch sensor isn’t engaged.
- Look for a control lock. Many smart dryers include a child lock feature that disables buttons and start cycles. Press and hold the “lock” or “control lock” button for 3 seconds.
- Try a full power reset. Unplug the unit for 1- 2 minutes, then plug it back in and test the interface.
If none of these work, the issue may lie with the thermal fuse or control board, which we’ll cover in the repair section.
Dryer Runs But Doesn’t Heat
Is the dryer spinning, but no heat? This one’s often linked to moisture sensors, vent blockages, or a failed heating component.
Step-by-step:
- Clean the lint trap and make sure it’s seated properly.
- Wipe down the moisture sensors inside the drum using rubbing alcohol. These can give false readings if coated in residue.
- Check for airflow blockages. Disconnect and inspect the vent hose for lint buildup. In BC’s damp weather, exterior vents can also clog with debris or ice.
- Test the thermal fuse with a multimeter. If it shows no continuity, it’s failed and must be replaced.
- Test the heating element if accessible look for visible breaks in the coil or lack of continuity.
- Examine the control board. If everything else checks out, it may not be sending the correct signal to start heating.
Wi-Fi or App Not Working
When the smart features stop working, it can feel like the whole dryer is down even if the machine runs fine otherwise.
Step-by-step:
- Ensure your phone and dryer are on the same Wi-Fi network. Many models only support 2.4GHz networks.
- Press and hold the Wi-Fi button on the dryer (typically for 3 – 10 seconds) to trigger pairing mode.
- Reconnect using the app on your phone. Remove the appliance and re-add it if needed.
- Restart your router if connection problems persist.
- Update firmware through the app if the option is available. Outdated firmware can create connectivity bugs.
Pro tip: If your dryer is in the basement or garage with a weak signal, consider using a Wi-Fi extender.
Dryer Stops Mid-Cycle
This issue often stems from overheating, clogged vents, or sensor malfunctions.
Step-by-step:
- Clear the vent duct and check the external vent hood for airflow. Blocked airflow causes the dryer to shut down as a safety measure.
- Reduce load size. Overloading the drum can confuse moisture sensors, causing the cycle to pause prematurely.
- Clean the sensors with alcohol to restore accurate readings.
- Reset the control panel by unplugging the dryer for 2 minutes.
- Check for error codes on the display or in the app. These can point to motor issues, belt problems, or communication faults.
Step-by-Step Repair Examples
Let’s get hands-on with some common repairs that many BC homeowners can handle themselves with just a few tools and a bit of patience. These fixes target the most frequent failure points in smart dryers.
How to Clean & Replace a Moisture Sensor
Moisture sensors are thin metal strips usually located near the lint trap that detect when clothes are dry. When dirty or faulty, they can prematurely end a cycle or cause it to run indefinitely.
Steps:
- Unplug the dryer.
- Open the door and locate the metal strips (often below or near the lint trap).
- Use a cloth dampened with rubbing alcohol to clean the strips.
- If drying is still inconsistent, you may need to replace the sensor.
- Remove the front panel or lint trap housing to access the wires.
- Disconnect the old sensor and unscrew the mounting brackets.
- Install the new sensor, reconnect wires, and reassemble.
Cleaning regularly can prevent the need for replacement altogether.
How to Replace a Heating Element
When your dryer tumbles but doesn’t heat, the heating element may have failed.
Steps:
- Unplug the dryer and pull it away from the wall.
- Remove the back panel (or front, depending on your model).
- Locate the heating element housing, which is usually a silver box with two wires attached.
- Disconnect the wires and unscrew the element housing.
- Slide out the element and inspect for breaks in the coil.
- Install the new element, reattach all connections, and secure the housing in place.
- Reassemble the dryer and test it by running a short cycle.
Heating elements wear out naturally over time especially in high-humidity regions like coastal BC.
How to Fix a Broken Drive Belt
If your dryer makes motor sounds but the drum isn’t spinning, the drive belt may be snapped or slipping.
Steps:
- Unplug the unit and remove the top panel by releasing its locking clips.
- Unscrew and remove the front panel.
- Carefully slide the drum out just enough to inspect the belt.
- If the belt is broken or frayed, remove it entirely.
- Loop the new belt around the drum and motor pulley in the correct tension pattern.
- Ensure the idler pulley is in place to maintain belt tension.
- Reassemble the panels and run a test cycle.
A properly installed belt should allow the drum to turn smoothly by hand.
How to Reconnect Your Dryer to Wi-Fi
If you’ve lost connection between your dryer and your mobile app, don’t worry it happens often.
Steps:
- Open the mobile app and go to the appliance settings.
- Select “add appliance” and begin the connection process.
- Press the Wi-Fi or Smart Control button on the dryer until the icon flashes.
- Enter your Wi-Fi password when prompted.
- Wait for confirmation on both the dryer screen and your app.
- If it fails, restart both the dryer and your router and try again.
Wi-Fi modules can disconnect due to router updates, outages, or firmware mismatches.
How to Clear Error Codes (App + Manual)
Error codes can be frustrating, but they often point to exactly what’s wrong.
Steps:
- Refer to the error code in your manual or app dashboard for further information.
- If it’s a one-time error (like a door left open), press and hold the “Cancel” or “Start/Pause” button for 3–5 seconds.
- For persistent errors, unplug the dryer for 2 minutes and then restart it.
- Still, showing the code? Perform a full diagnostic from the app if available.
- Follow the recommended fix or schedule service if the error involves the control board.
Smart Features Maintenance: Preventing Future Issues
Regular upkeep is the key to a long-lasting smart dryer. While these appliances are high-tech, they also benefit from basic maintenance just as traditional units do.
Monthly Maintenance
- Wipe sensors with alcohol. This prevents misreads and improves drying accuracy.
- Empty the lint trap after every load. It keeps airflow clear and reduces the risk of fire.
- Vacuum lint trap housing. Lint can collect under the screen and block airflow.
Quarterly Checks
- Inspect the vent duct. Make sure it’s not kinked or clogged with lint.
- Test the door latch. If the door isn’t sealing properly, cycles may pause unexpectedly.
- Run a diagnostic cycle. This helps identify issues early especially if you notice longer drying times.
Biannual Firmware Updates
- Use the app to check for updates. Smart dryers often receive performance and bug-fix patches.
Annual Deep Clean
- Remove the back panel and vacuum the internal lint buildup.
- Detach the vent from the back and clean thoroughly.
- Consider hiring a professional for a thorough duct cleaning if you notice poor airflow or prolonged dry times.
Helpful Resources for Smart Dryer Owners
Staying informed makes a huge difference. Here’s how to be proactive:
- Bookmark your brand’s support website and download the manual for your appliance.
- Subscribe to appliance repair YouTube channels for model-specific tutorials and expert advice.
- Keep a repair log and note the last time you cleaned the vents, updated the firmware, or performed diagnostics.
- Print a simple dryer maintenance checklist and post it in your laundry room for easy reference.
Conclusion: Fix Smarter, Not Harder
Smart dryers are designed to make life easier but when they break down, they can leave you wondering what to do. Fortunately, with the right knowledge and a calm, step-by-step approach, many of these issues are well within your reach.
From clearing clogged vents and recalibrating sensors to swapping out belts and reconnecting Wi-Fi, there’s a lot you can do yourself. The key is understanding what’s going wrong, following proper safety practices, and knowing when to bring in professional help.
In the end, smart dryers are powerful machines but with your hands, they don’t have to feel intimidating. With every fix, you’re saving time and money and learning how to make your home run even better.