
How to Replace a Dryer Heating Element
By Max · Updated May 29, 2026
A dryer that runs but blows cold air is, at best, a very expensive tumbler. At worst, it's damp laundry and a third re-wash. (At that point your clothing is not drying — it's aging.)
The most common cause is a failed heating element. You need a screwdriver and a multimeter. This guide walks through the full process — testing, replacement, and how to stop it happening again.
Is the Heating Element Actually the Problem?
Before ordering parts, confirm the heating element is the issue. A dryer that doesn't heat has a short list of possible causes.
Symptoms of a failed heating element
- The dryer runs normally but produces no heat at all.
- Clothes take two or three cycles to dry properly.
- Visible damage on the element — breaks, burns, or discoloration.
Other components that can mimic a dead element
Thermal fuse. A one-time safety device that blows if the dryer overheats. Once blown, there will be no heat. Test it with a multimeter, and replace it if it shows no continuity. Also find out why it blew, the answer is almost always a blocked vent.
Thermostat. A faulty cycling or high-limit thermostat causes inconsistent or zero heat. Test with a multimeter.
Power supply. Electric dryers need a full 240V supply. If one of the two 120V legs is out, the dryer will run but won't heat. Check the breaker or test the outlet voltage.
How to test the heating element
- Unplug the dryer.
- Locate the element's terminals — usually at the back or inside the dryer cavity.
- Set your multimeter to ohms (Ω).
- Touch the probes to the terminals.
10–50 ohms → element is working.
“OL,” infinity, or no movement → element is dead. Replace it.
What You'll Need:
Tools
- Phillips and flathead screwdrivers
- Nut driver or socket wrench (1/4-inch or 5/16-inch, depending on model)
- Multimeter
- Work gloves — the metal frames inside dryers have sharp edges that don't care about your good mood
Finding the right replacement part
- Find your model number. Check inside the door frame or on the back panel of the dryer.
- Look up the part using the model number on the manufacturer's website or a parts supplier.
- OEM vs. aftermarket. OEM parts fit better and typically last longer. Aftermarket parts cost less. For a dryer you plan to keep for years, OEM is usually the better call.
Get the part before you disassemble anything. A dryer in pieces waiting on a delivery is a situation nobody enjoys.
Cut the Power First
This step is not optional.
Unplug the dryer from the wall outlet. If it's hardwired, flip the breaker. If you have a voltage tester, confirm power is off before touching anything inside. Electric dryers run on 240V — double the standard household voltage. Technical Safety BC has a useful overview of electrical safety for home appliances if you want a reference point.
Move the dryer away from the wall to give yourself room to work. A stable, well-lit workspace saves a lot of time. Wear your work gloves from this point on.
Open Up the Dryer
How you access the heating element depends on your model. Most dryers fall into one of two configurations.
Back panel access (most brands)
- Unplug the dryer and pull it away from the wall.
- Use a nut driver or screwdriver to remove the screws along the back panel.
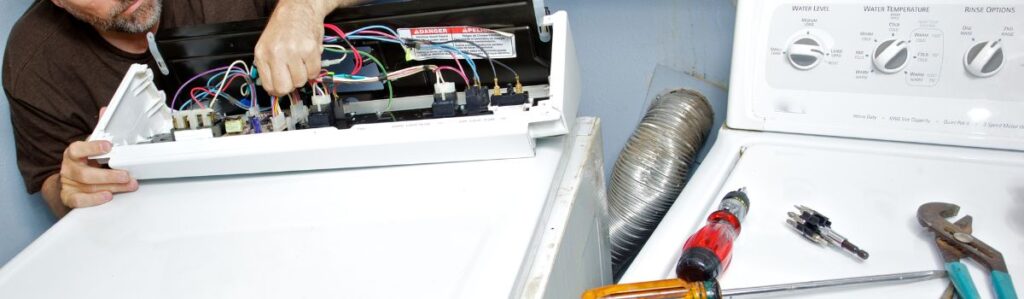
- Lift the panel off. The heating element is typically in a metal housing near the bottom.
Front panel access (some models)
- Remove the lint trap. Check for screws inside the slot and remove them.
- Pop the top panel up using a flathead screwdriver at the seam — insert, push the clip back, lift.
- Disconnect the door switch wiring.
- Unscrew and remove the front panel to expose the drum and element housing.
Not sure which configuration you have? Search your model number plus “heating element access”, someone has already filmed the exact procedure for your model.
Remove the Old Element
With the panel off:
- Locate the element. It's a metal frame with coiled wire, housed in a casing.
- Photograph the wiring before you touch it. Takes five seconds and saves considerable frustration on reassembly.
- Disconnect the wiring. Pull connectors off carefully. Use needle-nose pliers if they're stuck. Some terminals use small screws.
- Remove the mounting hardware. Nut driver or socket wrench, usually 1/4-inch or 5/16-inch.
- Slide the element out. A gentle wiggle if needed. It won't fight you.
Test It to Confirm
If you skipped the initial test before disassembly:
- Set the multimeter to ohms (Ω) or continuity mode.
- Touch the probes to the element's two terminals.
10–50 ohms → the element is actually fine. Check the thermal fuse and thermostats before ordering parts.
“OL,” infinity, or no reading → it's dead. Proceed with replacement.
Install the New Element
- Slide the new element into the housing. It should seat snugly.
- Secure it with the mounting screws or brackets. Firm, but don't overtighten you're threading into sheet metal.
- Reattach the wiring exactly as it was. Most terminals are push-on connectors; some use small screws.
- Final check before closing up: all connections seated, no loose screws, no wires pinched by the housing.
Reassemble the Dryer
Reverse your disassembly steps:
- Reattach the panel, align it with the frame and secure with the screws you removed.
- Reconnect any wiring you disconnected, including the door switch.
- Re-secure the top panel if you removed it.
- Check all screws are tight before pushing the dryer back against the wall.
Test the Dryer
Plug in. Set to a standard heat cycle. Run it.
After two minutes, open the door and feel for heat. Let it run a few more minutes. Listen for unusual noises and check for burning smells, both mean something isn't seated correctly and warrants another look before you run a full load.
If it heats up and sounds normal, you're done.
Still Not Heating?
If you've installed a new element and the dryer is still cold, the element wasn't the only problem. Work through this list.
Check the wiring connections. Every connector needs to be fully seated. A partially connected terminal looks fine and does nothing.
Test the thermal fuse. Use a multimeter for continuity. No continuity means it's blown. Replace it, but also find out why it blew. A blown thermal fuse almost always points to restricted airflow. Related: what to do when a dryer sparks or arcs electrically.
Test both thermostats. The high-limit thermostat prevents overheating. The cycling thermostat maintains consistent temperature. Use a multimeter on both.
Check the power supply. Electric dryers need both 120V legs delivering 240V total. Test at the outlet or the dryer cord with a voltage tester. If one leg is out, that's a breaker or wiring issue, not an appliance issue.
Inspect the control board. Look for burn marks or obviously damaged components. A faulty timer may not be triggering the heat cycle at all.
If you've been through this list and still have no heat, it's time to call a technician. At some point the diagnostic work exceeds what a screwdriver and multimeter can tell you, our dryer repair team serves the Lower Mainland and can usually get out the same day.
How to Stop This From Happening Again
A heating element burns out for one reason: the dryer overheats. Fix the airflow and the new element will last years longer.
Clean the lint trap after every load. This takes about eight seconds and is the single most effective maintenance step you can take. A clogged lint trap is the number-one cause of restricted airflow.
Clean the vent duct at least once a year. Lint builds up through the full length of the duct over time. A proper dryer vent cleaning clears it completely. Twice a year if you run heavy loads regularly.
According to Natural Resources Canada, residential clothes dryers account for roughly 5–6% of household energy use, and a clean, unobstructed vent can reduce drying time by up to 25%, which directly reduces how long the heating element runs per cycle.
Don't overload the drum. A packed dryer runs longer and hotter on every cycle. The heating element absorbs that extra stress.
Use medium heat when you can. High heat is not always necessary. Synthetics, delicates, and mixed loads dry well on medium. For context on how different brands hold up over time, see our dryer lifespan by brand guide.
Frequently Asked Questions
How much does it cost to replace a dryer heating element?
The part costs $20–$60 depending on brand and whether you go OEM or aftermarket. If you hire a technician, expect $350–$550 all-in for parts and labour.
Can I replace a dryer heating element myself?
Yes, for most electric dryers. You need a screwdriver, a nut driver, and a multimeter. The job takes 45–90 minutes. Gas dryer? The element itself is still DIY, but leave any gas-line work to a licensed technician.
How long does a dryer heating element last?
Most elements last 8–12 years with normal use. Running on high heat constantly, overloading the drum, and neglecting the lint trap all shorten that lifespan. Some go 15 years. Others burn out in four if the vent is never cleaned.
What causes a dryer heating element to burn out?
Restricted airflow, almost every time. When hot air can't exhaust properly, the element overheats and eventually fails. The two most common causes are a clogged lint trap and a blocked vent duct.
Is it worth replacing a dryer heating element or should I buy a new dryer?
If the dryer is under 10 years old and the heating element is the only problem, repair it. A new mid-range dryer costs $700–$1,200. A heating element costs $20–$60. The math does the talking.
How do I know if my dryer heating element is bad?
The dryer runs but produces no heat. Clothes take two or three cycles to dry. You may see visible damage on the element, breaks, burns, or discoloration. Confirm with a multimeter: set it to ohms, test the terminals, and look for “OL” or infinity. That means it's gone.
Still stuck after working through the steps above? ElectraFix technicians cover Coquitlam, Burnaby, Vancouver, Surrey, Langley, Richmond, and the rest of the Lower Mainland. Call 778-941-7758; we can usually get out the same day. The heating element won’t fix itself, but we will.