
Using a Wet/Dry Vac to Unclog a Dishwasher
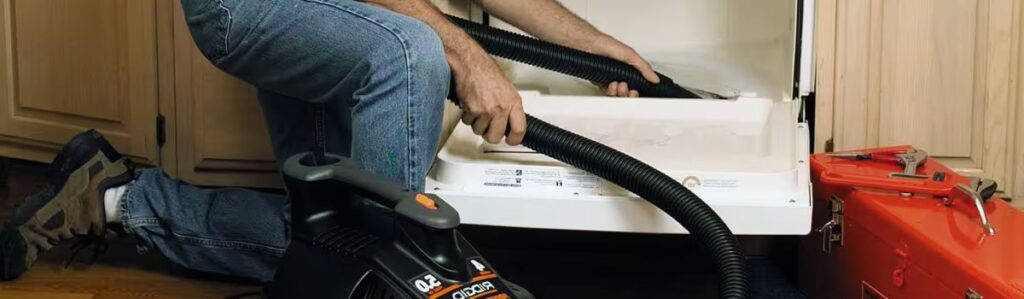
How to Unclog a Dishwasher Using a Wet/Dry Vac: A Simple Fix That Works
Before you go dragging your wet/dry vac into the kitchen, here’s what you’re signing up for.
You’re using suction, plain and simple. A wet/dry vac (shop vac) is strong enough to pull out food chunks, bits of glass, grease sludge, or that mystery gunk hanging out in your dishwasher’s drain dishwasher warranty consideration. If your dishwasher isn’t draining properly, and it’s not a major mechanical failure, this method is worth a shot. The idea is to create a tight seal over the drain opening and let the vacuum do its thing dishwasher warranty consideration.
This isn’t a fix-all, though. If your clog is buried deep in the plumbing or the pump is damaged, a vacuum won’t save you. But for surface-level clogs near the drain inlet, it’s a solid, no-frills approach. No plumber. No fancy tools. Just suction and grit.
Let’s get into it.
Signs Your Dishwasher Might Be Clogged
Some clogs sneak up on you, others make themselves known fast. Either way, keep an eye (and nose) out for these red flags:
- Standing water after a cycle: If there’s still water pooled at the bottom of the dishwasher after the cycle ends, that’s your #1 clue. Water should drain completely if it’s sticking around; something’s off.
- Drain taking forever: Even if water eventually drains out, it shouldn’t take ages. A slow drain usually means a partial blockage is forming.
- Bad smells: That swampy, leftover-lasagna-meets-wet-socks smell? It’s probably food breaking down in a clogged drain. A clear system doesn’t stink.
- Weird noises: Gurgling, sputtering, or grinding when the dishwasher drains? Those sounds can mean water’s trying to push past a blockage.
Each of these signs is pretty easy to spot. Alone, they’re annoying. Together, they’re a neon sign saying: “Yep, time to vacuum out the junk.”
Prep Work
Let’s not mess around with water and electricity involved, safety comes first. Here’s how to get your dishwasher ready for safe and effective maintenance.
Cut the Power
- Turn off the power at the circuit breaker or unplug the dishwasher.
- Do not skip this step; it’s critical to your safety.
Empty the Dishwasher
- Open the appliance and remove all dishes.
- If there is standing water inside, scoop it out using a cup or ladle and use a towel to absorb the remaining moisture.
- The drain area should be visible and as dry as possible.
Remove the Bottom Rack
- Slide the bottom rack out and set it aside.
- This gives you clear access to the filter and drain area.
- You might see some grime or food debris. Don’t worry, you’ll clean that up in the next step.
Prep for Potential Leaks
- Place a few towels around the base of the dishwasher.
- A small amount of water may leak once you begin working on the drain.
- Better safe than soggy!
Clean the Filter and Drain Area
Now that you’ve accessed the guts of the dishwasher, it’s time for the dirty work. This step is all about clearing the filter and drain so nothing blocks the vacuum later.
Step 1: Remove and Clean the Filter
The filter is your first stop. It usually lifts out with a gentle twist or pull.
To clean it:
- Take the filter to the sink.
- Rinse thoroughly under hot water.
- Use a soft brush or an old toothbrush to scrub away: Greasy buildup and food scraps
Tip: No need to overthink it, just get it visibly clean.
Step 2: Clear Out the Drain Well
Once the filter’s clean, look inside the drain well. You might find:
- Soggy food chunks
- Plastic bits
- Tiny glass shards
To clean it out:
- Use your fingers or a spoon to remove the debris.
- Be cautious, some items may be sharp!
Reminder: You’re not trying to sanitize, you’re just creating a clear path for the next step.
Vacuum Setup
You don’t need top-of-the-line gear here, but make sure your wet/dry vac has decent suction. This isn’t suck-a-bowling-ball level work, but it does need enough pull to lift soggy pasta and mystery sludge.
If your model has a “wet” mode, switch to it now. That’ll protect the motor and make sure the vacuum is ready for liquid. (If it doesn’t, check the manual some are automatic, some need a filter change.)
Next, grab a flexible nozzle attachment. The smaller and bendier, the better it needs to fit down into the drain area at the base of your dishwasher. Some folks even use a funnel or wrap a rag around the nozzle to help get a tighter seal.
Now, position the nozzle directly over the drain opening. You want good contact here no gaps. A solid seal lets the vacuum do its job without pulling in too much air around the edges.
Once everything is in place, you’re ready to let it rip.
How to Unclog with a Wet/Dry Vacuum
Start by getting a tight seal between the vacuum nozzle and the dishwasher drain opening. You want all the suction going into the drain, not escaping around the sides. Hold it steady with some pressure. If you have someone to help, this is a good moment to tag them in.
Run the vacuum for about 60 to 90 seconds. Then take a look. Check the inside of the vacuum tank for whatever it pulled out: bits of old food, cloudy water, maybe a clump of mystery gunk. If you see a decent amount, that’s a good sign the clog is breaking up.
Still not draining? Run the vacuum again. Two or three rounds usually max out what this method can do. Sometimes switching it up helps too if your wet/dry vac has a reverse (blow) function, alternate between suction and blowing. That push-pull action can dislodge more stubborn blockages. Just be smart about it, blowing might make a mess if your seal isn’t solid.
Once it seems like nothing more is coming out, it’s time to move on and test the results. With any luck, things are already flowing better.
What to Do After Vacuuming
Once you’ve vacuumed a few rounds and you’re confident the clog’s been cleared or at least loosened up, it’s time to put things back in order.
Clean the Drain Area
Before reassembling anything:
- Wipe out any leftover gunk or debris from around the drain.
- Use paper towels or an old rag to do the job; no need to be fancy.
Reinstall the Filter and Rack
Put everything back in its proper place:
- Reinstall the dishwasher filter. Ensure it’s seated correctly, as an improper placement or tilt can affect drainage.
- Slide the bottom rack back into place carefully.
Restore Power to the Dishwasher
Once the components are back in:
- Plug the dishwasher back in or
- Flip the breaker switch back on (if you turned it off earlier).
Run a Test Cycle
To ensure the problem is resolved:
- Run a quick rinse or short cycle, something you can observe from start to finish.
- Pay special attention to the drain phase.
What to Look For
- Does water drain out smoothly and quickly? You’re in the clear.
- Still pooling or draining slowly? Check the troubleshooting section below.
For now, enjoy the small win; you’re one step closer to a fully functioning dishwasher.
If Things Still Aren’t Working
If the vacuum trick didn’t do the job, the clog might be deeper out of reach from inside the dishwasher. One common trouble spot is the drain hose. That hose runs from your dishwasher to either the garbage disposal or the sink’s drain pipe, and it can collect grease, sludge, or food chunks over time.
Start by unplugging the dishwasher again and pulling it out slightly if needed (watch the water line and power cord). Then, find where the drain hose connects to the sink drain or disposal. Loosen the clamp and carefully detach it. Have a bucket or towel underneath, because some water might spill. Now, take your wet/dry vac and vacuum the hose directly. You can also try blowing air through to dislodge any stuck gunk if your vacuum has a reverse mode.
If you’ve cleared the hose and still nothing’s draining, you’re probably dealing with a blockage beyond DIY territory. That includes clogs further down the plumbing system or an issue with the dishwasher’s pump or motor. At this point, it’s time to call in a plumber or appliance tech. No shame in tapping out when the problem runs deeper.
Keep it from Clogging Again
If you’ve gone through the hassle of vacuuming gunk out of a clogged drain, the last thing you want is to do it again anytime soon. The good news? A little maintenance goes a long way.
Start by rinsing your dishes,not a full scrub, just a quick rinse to knock off food chunks. Your dishwasher is designed to clean, not dissolve last night’s lasagna. Next, get in the habit of cleaning the filter. Once a month is a good target. It only takes a couple of minutes, and it keeps greasy build-up and food sludge from becoming a bigger problem.
Every few weeks, run a cycle with white vinegar or a dishwasher cleaning product. This helps break down soap scum, grease, and mineral deposits. Think of it as giving your dishwasher a reset button.
And don’t overload it. More isn’t better if dishes block the spray arms and prevent water flow. You want water to move freely, which helps keep the drain working as it should.
A little effort now saves you from having to drag out the wet/dry vac later.
Wrapping It Up
When your dishwasher won’t drain and the filter isn’t to blame, a wet/dry vacuum might be the fix you need. It’s not fancy, but it works for the everyday food gunk and junk that builds up in the drain. Just remember: this isn’t a magic solution for every problem. If the hose is clogged or something deeper is acting up, you’ll need to dig deeper or call in backup.
That said, a few minutes with the vacuum beats pulling your whole machine out or paying for service. Keep it clean, run monthly maintenance cycles, and treat your dishwasher like the helper it is. That way, you won’t be back here next week doing this all over again.