
Dishwasher Drainage for Apartment Installations
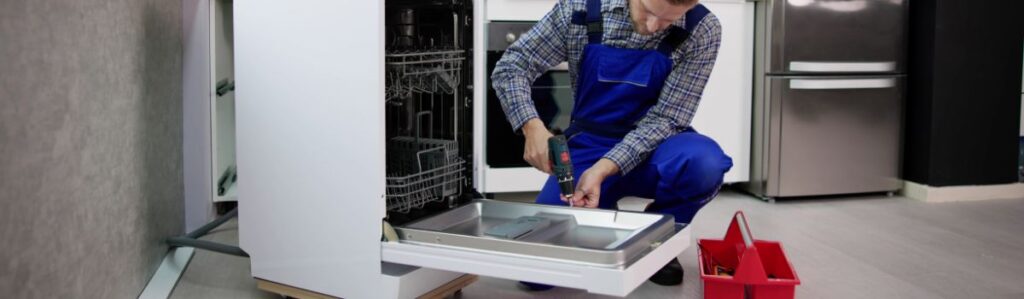
How to Handle Dishwasher Drainage in Apartments
Installing a dishwasher in an apartment isn’t always a plug-and-play process, mainly because apartment kitchens weren’t always designed with one in mind. While standalone houses often have room to rework plumbing or install a garbage disposal, apartments are tighter on space and stricter on what you can tweak. You’re usually working with fixed counter layouts, congested under-sink real estate, and building codes that assume no one’s adding appliances without a permission slip.
Drainage is where the issue becomes complicated, and this is where how drainage internal flow works really matters. A dishwasher doesn’t just drip excess water away; it needs to pump waste water out with enough force to keep up with each wash cycle. If the routing isn’t correct or the hose gets creatively bent around cabinetry and pipes, that water has nowhere good to go. That means dishes come out dirty, backups can happen, and worst-case: water spills under the cabinetry and ruins more than your night.
Most apartment installs struggle because of poor planning, not because dishwashers don’t work in small spaces. Get the drainage right, and you’re 80% of the way there.
Know Where the Water Goes
Dishwashers don’t just let gravity handle their dirty work; there’s a small pump inside doing the heavy lifting. After the rinse cycle, the pump pushes out the dirty water through a flexible drain hose. In most setups, this hose connects to either the side of the garbage disposal, if you’ve got one, or taps into the kitchen sink drain upstream of the trap.
Now, here’s where apartments complicate the story.
For starters, many units don’t come with garbage disposals, so there’s no obvious connection point. You may need to add a branch tailpiece under the sink or look into alternative methods like a standpipe, which is rare in apartments, but occasionally floats into the picture.
Even if you’ve got somewhere to plug in the hose, apartments often mean longer or oddly elevated hose runs, think hose tucked tightly behind cabinetry or running uphill to meet the under-sink drain. These longer routes can stress the little dishwasher pump and slow drainage, sometimes leading to minor floods or backups.
And let’s not forget shared plumbing, once you vent into a common drain line, anything upstream can influence flow. A neighbour’s gurgling sink might become your dishwasher’s unexpected backup buddy.
Drain Hose Setup Basics
Drain hose setup is where most people get it wrong and where most drainage issues begin. A proper setup doesn’t just prevent backflow or weird smells; it protects your kitchen from flooding. Let’s break it down.
At its simplest, your dishwasher’s drain hose needs a clear path to a drain, usually through a tee on the sink’s waste line or, in more tricked-out kitchens, a garbage disposal. But it’s not just about where the hose goes. It’s about how it gets there.
First, the hose needs to loop up before it goes back down. This isn’t just a weird plumbing aesthetic; it’s essential. There are two common methods: the high loop and the air gap.
High Loop: This is the bare minimum. The hose is attached as high as possible under the sink (usually with a clip or zip tie to the cabinet wall) before it descends to connect with the drain. The purpose? To prevent dirty sink water from flowing back into the dishwasher. Simple, effective, and often enough for apartment setups.
Air Gap: This is the gold standard, and in some places, it’s code. It’s a small device installed on the sink or countertop, and it vents air into the hose system to break any chances of backflow. Not all apartments allow or include them, some landlords don’t want extra holes in the counter, but if you’ve got one, use it. If not, aim for the best possible high loop.
As for connection points, under-sink is the usual suspect. You’ll often find a branch on the drain pipe set aside for the dishwasher, sometimes capped off. Just remove the cap and tighten the hose on with a hose clamp. The garbage disposal method is similar but typically includes a knockout plug you’ll have to remove before attaching the hose.
Now and then, you’ll run into a standpipe setup more common in laundry connections but fair game in some apartments. Still, it’s less ideal for dishwashers, and you’ll want a secure fit to avoid spills or splashes.
Common Problems (and How to Avoid Them)
Let’s cut to it, bad drainage isn’t just annoying, it’s potentially destructive. Flooded cabinets, foul odours, or worse, angry neighbours below you. Here’s what typically goes wrong and how to keep it in check.
Clogs from Food Debris or Grease
This one’s a textbook. People think they can treat the dishwasher like a garbage disposal. You can’t. Tiny food scraps can accumulate in the hose or drain line, especially when grease is involved. The fix: Rinse dishes lightly before loading. Maybe not full-on hand washing, but scrape off the stuff. Also, run a vinegar rinse monthly; it keeps things cleaner than you’d think.
Hose Placement Too Low
This is a silent killer. If the drain hose slopes the wrong way, such as downward into the drain instead of using a high loop or air gap, you’re inviting dirty water to siphon back into the dishwasher. That’s how your clean plates end up smelling like the sink. Always install the hose with a high point secured to the underside of the countertop before dropping into the drain; that loop saves you every time.
Leaky Connections
Sometimes it’s just old clamps or a mismatched hose on a stubby connector. Either way, leaks behind the cabinetry are easy to miss and hard to fix once they fester. Check for moisture during and after a wash cycle. If the hose wiggles, replace the clamp. If the connector looks worn or cracked, swap it out. Don’t get fancy, go for tight and secure.
Overloaded Shared Drains
Apartments often have shared or undersized drain lines. That cute 70s sink setup? It’s not built for modern dishwashers. A good sign that things are iffy: slow sink draining when the dishwasher runs. You can’t upgrade the drain yourself, but you can avoid overloading it. Don’t run the sink, disposal, and dishwasher at once; spread the love out. And keep an ear out for gurgling, that’s your early warning system.
Signs It’s All Going Sideways
How do you know your setup’s in trouble? Easy:
- Water is sitting at the bottom of the dishwasher after a cycle
- Strange smells when you open the door
- Gurgling sounds in the sink or dishwasher
- Visible leaks or dampness under the sink
If any of these pop up, pause. Check the hose, check the drain, and if you’re stuck, ask for help. Better now than after a warped subfloor.
Managing Limited Space
Apartments don’t exactly roll out the red carpet for dishwasher installations. Under-sink cabinets are squeezed, plumbing is pre-routed for small, generic setups, and any tweaked hose route has to fight for space with trash bins and cleaning supplies. So, how do you make a functional drainage setup work when every inch counts?
Work With What You Got
Tight under-sink areas mean every turn of the hose matters. Start by clearing out the cabinet so you can lay things out flat. Look at where the drain port is (usually the tailpiece under the sink drain) and aim for the shortest, smoothest hose path possible, no sharp bends, no kinks. Use zip ties or adhesive mounts to gently guide the hose along the cabinet wall. That keeps it out of the way and helps prevent sagging loops that collect grime.
Slim Dishwashers, Same Drainage Rules
Compact and drawer-style dishwashers are space-savers, but they don’t magically solve drainage issues. Their pumps are usually just as sensitive, and they still need either a high loop or an air gap. So even if the appliance is smaller, the drainage standards are the same. Don’t let the marketing fool you smaller doesn’t mean simpler.
Reroute Smart or Use Flex
Routing a drain hose through tight quarters often requires flexibility literally. Use a flexible hose with enough length (but not too much) to double back if needed. Avoid running across hot pipes or sharp cabinet edges. In some cases, a soft hose sleeve can add protection without eating up space.
Adapter and Extension Kits: Not All Equal
If you need to extend the hose or connect to an unconventional drain fitting, don’t grab the first adapter off some bargain website. Match the diameter, check for compatibility with your dishwasher model, and if it promises to “fit everything,” be suspicious. You want secure fittings and zero leaks especially when you’ve crammed the whole thing into a dark cabinet where small problems hide until they’re big ones.
What You Can and Can’t Modify
Here’s the gritty reality: in an apartment, you can’t just start tearing into pipes like you’re remodeling a fixer-upper. Drainage setups live in a weird middle ground part DIY, part “please don’t anger the landlord.”
What you can usually change:
Swapping out the dishwasher’s drain hose for a longer or more flexible one? Fair game. Rerouting the hose to create a proper high loop? That’s smart, and you should. Adding clamps or securing mounts under the sink? Go for it. These are all reversible moves that don’t alter any existing plumbing.
Use what’s already there. Most apartments will have a connection point under the sink. If there’s a garbage disposal, even better it likely has a capped inlet waiting for a hose. If not, you’ll need to tie into the sink drain which is still allowed, just requires attention to slope and secure fittings.
What you can’t (usually) touch:
Cutting into cabinet walls…that’s a red flag. Punching new holes through existing pipes? No way. If you’re thinking about adding new piping or modifying the kitchen’s drainage layout, pump the brakes and read your lease not to mention checking in with the building manager.
Temporary is your friend.
Use compression fittings, bracket-mounted hardware, and enough foresight to reverse everything when it’s time to move.
Quiet but Useful Add-ons
If there’s one thing you want from your dishwasher besides clean dishes, it’s silence in operation and in upkeep. No one wants hidden leaks, weird smells, or surprises under the sink. That’s where a few underrated extras come in to quietly safeguard your drainage setup.
First up: the air gap (or at the very least, the high loop). These aren’t just fancy plumbing flourishes they’re your best defence against backflow, where dirty sink water sneaks into your dishwasher. A high loop is simple: just route the drain hose so it loops up typically as high as the underside of the countertop before dropping back down to the drain. It’s not just a suggestion; it’s how you prevent gross water from staging a comeback.
An air gap, if your building allows it, is a more elegant version. It’s that odd little cap next to the faucet on some sinks. Inside, it physically separates dirty drain water paths from your dishwasher’s clean lines. No amount of pressure or clogging in the sink will ever reverse-flow into your machine. It’s small, unobtrusive, and does a crucial job.
For longer or uphill hose runs, a common pain point in apartments is a drain pump helper. Some dishwashers include them, but not all do. If yours struggles to push water through a lengthy setup or up to a higher drain connection, a compact booster pump can keep things flowing smoothly. It’s overkill for some setups, but a lifesaver for others.
Finally, think downstream. A small inline mesh filter or a removable trap can prevent food bits and grease from clogging your building’s shared drain. These don’t take up much space and are easy to clean out every few weeks. It’s a low-effort way to avoid bigger clogs that affect not just you, but potentially your neighbours too.
None of these add-ons scream for attention, but that’s kind of the point. They’re the quiet bodyguards of dishwasher drainage out of sight, but very much on duty.
Wrap-Up
Good drainage isn’t flashy, but it’s essential, especially in an apartment. A proper setup can mean the difference between smooth sailing and costly water damage.
Don’t Skip the Basics
Make sure to:
- Route the drainage hose correctly
- Include a high loop or air gap; these are not optional!
These simple steps prevent dirty water from flowing back into your dishwasher.
Avoid Cutting Corners
Tempted to rush the install? Think twice. Problems can sneak up through small mistakes like:
- Loose clamps
- Kinked hoses
- Poor hose connections
Even a slow drip can lead to:
- Water stains
- Mold or mildew smells
- Angry neighbours (and unexpected repair bills)
Test Before You Tuck It Away
Before sealing everything up:
- Run a full dishwasher cycle
- Listen for strange draining noises
- Look for leaks or puddles
- Watch the drainage flow and ensure it’s smooth