
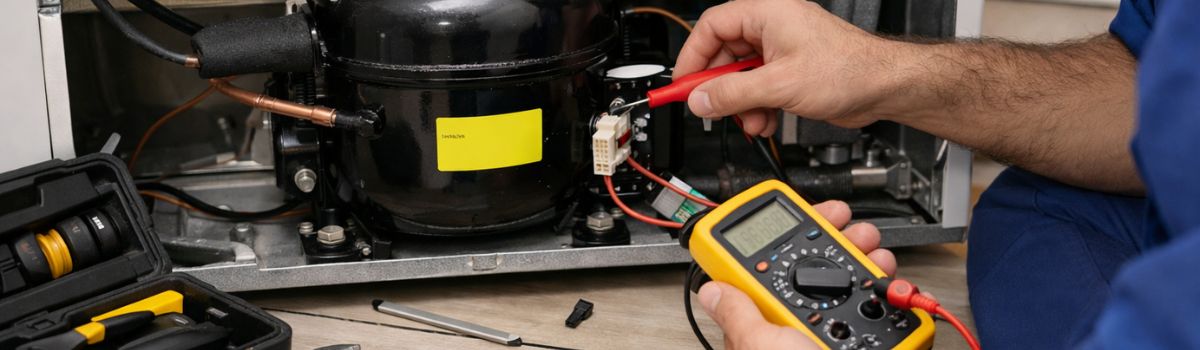
DIY Refrigerator Compressor Repair Tips for Homeowners Across Victoria
The refrigerator compressor plays a crucial role in keeping your appliance functioning efficiently. It acts as the heart of the refrigeration system, compressing refrigerant and enabling the cooling cycle that preserves your food. Without a properly working compressor, your refrigerator cannot maintain the necessary low temperatures, especially when relay and capacitor issues interfere with startup and power flow.
Common issues with compressors include overheating, strange noises, failure to start, and reduced cooling performance. These problems often stem from electrical faults, wear and tear, or refrigerant leaks.
Opting for DIY repair of your refrigerator compressor can save time and money, especially for those familiar with basic appliance maintenance. However, it comes with risks such as electrical hazards, potential damage to the appliance, and voiding warranties if not done correctly. Understanding these factors is essential before attempting any repair work.
Understanding Refrigerator Compressors
What is a Refrigerator Compressor?
The refrigerator compressor is a crucial component in the refrigeration cycle. Its primary role is to compress the refrigerant gas, raising its pressure and temperature. This process allows the refrigerant to flow through the condenser coils, where it releases heat and cools down to become a liquid. The compressed refrigerant then moves through the expansion valve and evaporator coils inside the fridge, absorbing heat from the interior and keeping the contents cool.
There are several types of compressors commonly used in household refrigerators, including reciprocating, rotary, and scroll compressors. Reciprocating compressors use pistons to compress the refrigerant and are common in many older models. Rotary compressors have a rotating mechanism that compresses the refrigerant and are quieter and more efficient. Scroll compressors use two interleaved spiral scrolls to compress the refrigerant and are known for their durability and energy efficiency.
Common Signs of Compressor Failure
Recognizing compressor failure early can save time and repair costs. Common signs include:
- Unusual noises: Grinding, clanking, or humming sounds coming from the compressor may indicate mechanical problems.
- Refrigerator not cooling properly: If the fridge or freezer isn’t maintaining the correct temperature, the compressor might be failing to circulate the refrigerant effectively.
- Frequent cycling on and off: A compressor that starts and stops too often can point to overheating or electrical issues.
Diagnosing Compressor Problems
Tools and Equipment Needed for Diagnosis
To effectively diagnose refrigerator compressor problems, you will need some basic tools and equipment:
- Multimeter: For measuring electrical continuity and resistance in compressor windings and wiring.
- Manifold gauge set: To check refrigerant pressure levels accurately.
- Screwdrivers and basic hand tools: For opening panels and accessing the compressor safely.
Step-by-Step Diagnostic Procedures
Checking Power Supply and Wiring
- Ensure the refrigerator is properly plugged in and receiving power.
- Use the multimeter to test the outlet voltage and check continuity in the power cord and wiring leading to the compressor.
- Inspect for any visible signs of damage, burnt wires, or loose connections.
Testing Compressor Windings
- Disconnect power before testing.
- Use the multimeter to measure resistance across the compressor’s start, run, and common terminals.
- Compare readings to manufacturer specifications; infinite resistance or zero ohms indicate a faulty winding.
Evaluating Refrigerant Levels
- Connect the manifold gauge set to the service ports following safety guidelines.
- Check the pressure readings; low pressure may suggest a refrigerant leak or undercharge.
- Note that refrigerant handling requires care and sometimes certification.
Cost Considerations for Compressor Repair and Replacement
Breakdown of Costs in Victoria and Australia
The cost to repair or replace a refrigerator compressor in Victoria and across Australia can vary widely depending on the brand, model, and extent of the damage. According to ServiceTasker’s Fridge Repair Cost Guide, compressor replacement typically ranges between $400 and $800. HomeGuide’s Refrigerator Repair Cost Overview reports a somewhat higher range of $700 to $1,250, reflecting possible differences in service providers and parts availability. Right Whitegoods notes an even broader range from $850 to $1,500 for compressor replacements, indicating that high-end models or complex repairs can push costs upward.
On average, repair costs tend to be around $650 but can vary significantly, with HomeAdvisor citing a range from $200 to $1,300 depending on the specific repair needed and location.
Economic Considerations
One important factor when deciding between compressor repair and replacement is cost-effectiveness. If the cost to repair a compressor approaches or exceeds half the price of a new refrigerator, replacement may be the more economical choice. Additionally, the age and model of the refrigerator play a crucial role. Older units may have obsolete or hard-to-find parts, increasing repair costs and the likelihood of future breakdowns. In contrast, newer models might have warranties or more readily available parts, making repair more feasible.
Ultimately, assessing the total expected lifespan of the refrigerator post-repair against the repair cost is essential. In many cases, if the refrigerator is over 8-10 years old, investing in a new unit might offer better long-term value than repairing an expensive compressor.
Step-by-Step Guide to DIY Compressor Repair
Safety Precautions
Before beginning any repair on your refrigerator compressor, ensure your safety by following these precautions:
- Disconnecting power: Always unplug the refrigerator from the electrical outlet to prevent electric shock.
- Handling refrigerants safely: Refrigerants can be hazardous. Avoid releasing them into the atmosphere and handle them according to safety guidelines.
- Using protective gear: Wear gloves and safety goggles to protect your hands and eyes from sharp components and refrigerant exposure.
Tools and Materials Required
To perform a compressor repair, gather the following tools and materials:
- Compressor replacement unit compatible with your refrigerator model.
- Refrigerant recovery and recharge kit to safely remove and add refrigerant.
- Sealing and insulation materials like refrigerant-safe sealant and insulation tape.
Detailed Repair Steps
- Diagnosing the compressor: Confirm that the compressor is faulty by checking for signs such as unusual noises, failure to start, or overheating.
- Evacuating refrigerant properly: Use the refrigerant recovery kit to safely remove the refrigerant from the system, adhering to environmental regulations.
- Removing the faulty compressor: Disconnect electrical connections and mounting bolts carefully; then remove the compressor.
- Installing the new compressor: Position the new compressor, secure it with mounting bolts, and reconnect electrical wires according to the manufacturer’s instructions.
- Recharging the refrigerant: Use the recharge kit to add the correct amount and type of refrigerant specified for your refrigerator.
- Testing the refrigerator function: Plug the refrigerator back in and monitor its operation to ensure the compressor runs smoothly and the unit cools properly.
Troubleshooting Common Issues During Repair
- Compressor not starting: Check electrical connections, fuses, and overload protectors. Ensure the new compressor is compatible and correctly installed.
- Refrigerant leaks: Inspect all seals and connections for leaks using a leak detector or soapy water. Tighten fittings and replace damaged seals as necessary.
Resources for DIYers
When repairing a refrigerator compressor yourself, having the right resources can make all the difference. Here are some valuable tools and references to help you through the process:
Comprehensive Tutorials and Videos: Appliance University offers detailed tutorials and step-by-step videos specifically focused on appliance repair. Their content is designed for DIYers of all levels and covers various aspects of refrigerator compressor repair.
Manufacturer Repair Manuals: These manuals provide detailed technical information and diagrams specific to your refrigerator model. Accessing the official repair manual can guide you through the correct procedures and help identify the exact parts you need.
Local Appliance Parts Suppliers in Victoria: Having a reliable local supplier is important for obtaining replacement parts quickly. Many suppliers in Victoria specialize in appliance components, including compressors and related hardware, which ensures you get the right parts without delay.
Utilizing these resources will help ensure your DIY refrigerator compressor repair is efficient and successful.
Conclusion
Repairing a refrigerator compressor can be a cost-effective way to extend the life of your appliance if you approach the process with the right knowledge and precautions. Understanding the typical repair costs, learning how to diagnose compressor issues accurately, and following safe DIY steps are essential for success. Always prioritize safety by disconnecting power, using proper tools, and avoiding handling refrigerants without professional training.
Making informed decisions means weighing the potential savings against the risks involved, including the possibility of further damage or personal injury. While DIY repair can save money, it requires careful attention and respect for the complexity of refrigerator systems. Balancing these factors will help you decide whether to tackle the repair yourself or seek professional assistance.