
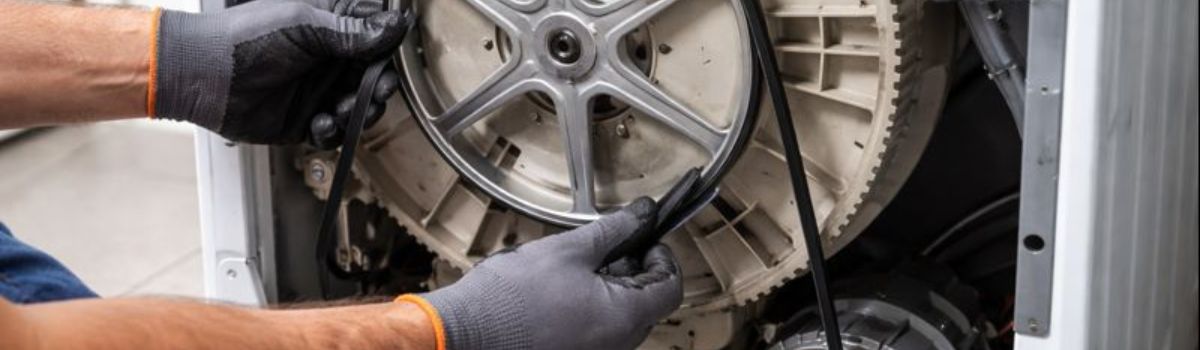
Your Easy Guide to Step-by-Step Washer Belt Replacement in Chilliwack
Maintaining your washing machine’s drive belt is crucial for ensuring the appliance operates efficiently and reliably. The drive belt plays a key role in spinning the drum and agitating clothes during wash cycles. Over time, wear and tear can cause the belt to become loose, cracked, or even break, leading to machine malfunctions.
Common signs that indicate a worn or broken washer belt include unusual noises during operation, the drum not spinning properly, or the washer failing to start the spin cycle altogether. Recognizing these symptoms early supports proper maintenance and helps ensure safety DIY repair practices before issues get worse.
Replacing a worn or broken washer belt restores your machine’s full functionality and can save you significant repair costs compared to replacing the entire appliance. For residents of Chilliwack, there are two main options: tackling the repair yourself or hiring professional services. DIY repair is feasible with the right tools and instructions, offering cost savings and convenience. Alternatively, professional technicians provide expertise and efficiency, especially for those unfamiliar with appliance repairs.
Understanding Your Washing Machine Drive Belt
What is a Drive Belt?
The drive belt is a crucial component in your washing machine that connects the motor to the drum, enabling the drum to spin during wash and spin cycles. This spinning action agitates the clothes and helps remove water during the spin cycle. Without a functioning drive belt, the drum will not rotate, leading to ineffective washing.
Different washer brands use various types of drive belts. For instance, Asko washers often use a flat, ribbed belt designed for quiet and efficient operation. Whirlpool and GE washers typically utilize a V-shaped or serpentine belt that provides strong grip and durability. Understanding the type of belt your washer uses will help in selecting the correct replacement.
Common Causes of Belt Wear and Damage
Over time, washing machine drive belts can wear out or get damaged due to several factors:
- Age and Usage: Continuous use over many years naturally wears down the belt material, causing it to become brittle or stretched.
- Overloading and Mechanical Strain: Placing too many clothes in the washer can strain the belt, causing it to slip or snap.
- Environmental Factors: Exposure to moisture, heat, or dirt can degrade the belt, leading to cracks or loss of flexibility.
Identifying Belt Issues
Recognizing problems with your washer’s drive belt early can prevent further damage. Common signs include:
- Noisy Operation: A worn or slipping belt often produces squealing or grinding noises during operation.
- Washer Drum Not Spinning: If the drum fails to turn while the motor runs, the belt may be broken or slipped off.
- Visible Belt Damage: Inspecting the belt for cracks, fraying, or looseness can confirm if it needs replacement.
Understanding these aspects ensures proper maintenance and timely replacement of the drive belt, keeping your washing machine running smoothly.
Preparing for Washer Belt Replacement
Safety First
Before starting the washer belt replacement, always prioritize safety. Begin by unplugging the washing machine from the electrical outlet to prevent any risk of electric shock. Additionally, wear protective gloves to safeguard your hands from sharp edges and any moving parts inside the machine.
Tools and Materials Needed
To successfully replace the washer belt, gather the necessary tools: screwdrivers, pliers, and a socket wrench. These will help you open the washer casing and remove the old belt. It is crucial to have a replacement belt that matches your washer model exactly. Using a belt that is not compatible can lead to poor performance or damage to your machine.
Locating the Replacement Belt
To find the correct replacement belt, first identify your washer’s model number. This information is usually located on a sticker or plate inside the door frame or on the back of the machine. Once you have the model number, you can purchase a compatible belt from local appliance parts stores or trusted online retailers. Buying from reputable sources ensures you receive a quality belt designed for your specific washer.
Step-By-Step Washer Belt Replacement Process
Step 1: Accessing the Drive Belt
Begin by unplugging your washer for safety. Depending on your washer model, you will need to remove either the back panel or the entire cabinet to access the drive belt. For front-loading washers or some top-load models, the back panel is usually removable by unscrewing several screws. For other models, you may need to remove the entire cabinet by carefully lifting it off after loosening the necessary fasteners.
Step 2: Removing the Old Belt
Once the drive belt is visible, carefully slide it off the motor and drum pulleys. It may require some gentle wiggling or maneuvering to loosen it from the pulleys. While the belt is off, take the opportunity to inspect other components, such as the pulleys and motor shaft, for signs of wear or damage. This can help prevent future issues.
Step 3: Installing the New Belt
Place the new belt onto the drum pulley first, making sure it sits evenly in the grooves. Then, stretch it over the motor pulley. The belt should be tight enough to stay on the pulleys without slipping but not overly tight to strain the motor. Proper tension is crucial for the washer to operate smoothly.
Step 4: Reassembling the Washer
After the new belt is in place, reattach the back panel or cabinet securely, ensuring all screws or fasteners are tightened properly. Double-check all electrical and mechanical connections to confirm nothing was disturbed during the replacement process.
Step 5: Testing the Replacement
Plug the washer back in and run a test cycle. Observe the drum rotation and listen for any unusual noises. If the belt is installed correctly, the washer should operate smoothly without slipping or excessive noise.
Additional Tips and Maintenance
To ensure your washer belt lasts as long as possible and your machine runs efficiently, it’s important to follow some maintenance best practices.
Regular Inspection Schedules
Regularly inspecting the washer belt can help you spot signs of wear and tear early. Check the belt every few months for cracks, fraying, or glazing (a shiny, hardened surface). Catching these issues early allows you to replace the belt before it breaks and causes more damage to your washer.
Avoiding Washer Overloading
Overloading your washing machine puts excessive strain on the belt and other components. Stick to the manufacturer’s recommended load size to prevent unnecessary stress. Overloaded washers can cause the belt to slip, wear out faster, or even snap, leading to costly repairs.
Lubrication and Cleaning Advice
While the washer belt itself usually doesn’t require lubrication, keeping the surrounding parts clean and free of debris is essential. Dirt and grime can cause the belt to slip or degrade prematurely. Periodically clean the pulleys and the motor area with a dry cloth. Avoid using oil or grease on the belt, as this can cause it to slip and reduce its lifespan.
By following these tips, you can extend the life of your washer belt and maintain optimal performance for your washing machine.
Frequently Asked Questions (FAQs)
How long does a washer belt typically last?
A washer belt usually lasts between 3 to 5 years, depending on usage and maintenance. Frequent heavy loads or improper installation can shorten its lifespan.
Can I use a generic belt or must it be brand-specific?
While some generic belts may fit, it’s recommended to use a brand-specific belt to ensure proper fit and performance. Brand-specific belts are designed to match your washer’s model precisely.
What safety precautions should I take?
Always unplug your washer before starting any repairs to avoid electric shock. Wear gloves to protect your hands from sharp edges, and ensure the washer is stable and on a flat surface to prevent tipping.
What if the washer still doesn’t spin after belt replacement?
If the washer doesn’t spin after replacing the belt, check that the belt is installed correctly and not too loose or tight. Also, inspect other components like the motor or lid switch, as they may be causing the issue.
Conclusion
Replacing the washer belt offers several advantages, including restoring your machine’s efficiency, preventing further damage, and saving money compared to purchasing a new washer. Performing this repair yourself can be safe and rewarding, provided you follow proper guidance and safety precautions.
However, if you encounter complex issues or prefer convenience, professional repair services are readily available in Chilliwack. Skilled technicians can ensure the job is done correctly and quickly, giving you peace of mind and a fully functioning washer.