
Simple Whirlpool Dryer Care Tips Every Delta Resident Should Know
Maintaining your dryer is essential to ensure it operates safely and efficiently. Regular cleaning and care help prevent potential hazards such as fires caused by lint buildup and reduce the risk of costly repairs. For Whirlpool dryer owners in the Delta area, proper maintenance is especially important due to the region’s climate and environmental factors that can affect appliance performance.
By keeping your Whirlpool dryer in good condition, you not only extend its lifespan but also improve its drying efficiency, saving energy and lowering utility bills. Prioritizing safety and efficiency through routine care such as regular cleaning and knowing when to replace dryer belt – is a simple way to protect your home and keep your laundry routine running smoothly.
Understanding Your Whirlpool Dryer
Key Components
Your Whirlpool dryer consists of several key components that work together to dry your clothes efficiently. The lint screen and filter trap lint and debris from your laundry, preventing buildup inside the dryer. The dryer drum is the rotating cylinder where you place your clothes; it tumbles them to ensure even drying. Lastly, the venting system and exhaust channel hot, moist air out of your home, maintaining proper airflow and preventing overheating.
How Maintenance Impacts Performance and Safety
Regular maintenance is crucial for your Whirlpool dryer’s performance and safety. Lint buildup in the lint screen, venting system, or exhaust can restrict airflow, causing longer drying times and increased energy consumption. More critically, accumulated lint can lead to overheating, which significantly raises the risk of fire. Keeping your dryer clean and well-maintained helps ensure it runs efficiently and reduces potential hazards.
Daily and After-Each-Load Cleaning Tasks
Cleaning the Lint Screen and Filter
After every drying cycle, it’s essential to clean the lint screen and filter to maintain your Whirlpool dryer’s efficiency. Follow these steps:
- Open the dryer door and locate the lint screen, usually found on the door frame or inside the door.
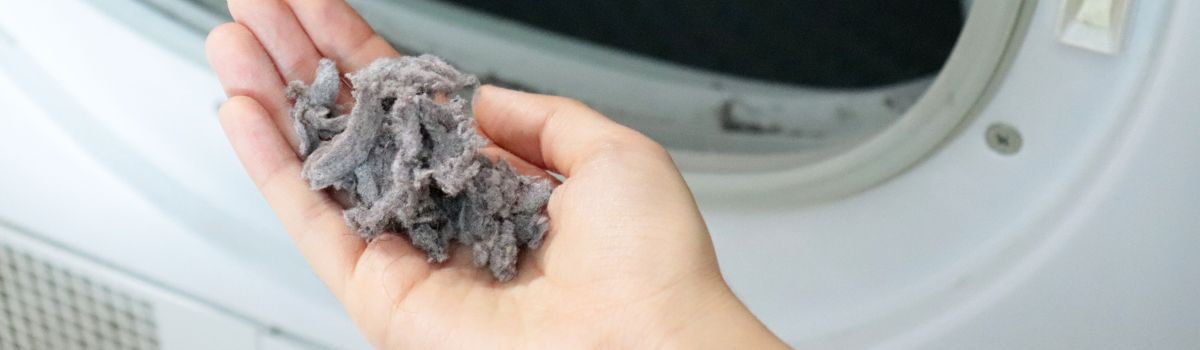
- Remove the lint screen and carefully peel off the lint buildup with your fingers.
- For a thorough clean, rinse the screen under warm running water to remove any fine lint particles.
- Allow the screen to dry completely before reinserting it back into the dryer.
Regularly cleaning the lint screen prevents lint accumulation, which can lead to increased drying times and potential overheating, ensuring your dryer operates safely and efficiently.
Quick Drum Wipe-Down
After each use, giving the dryer drum a quick wipe-down helps maintain its condition and prevents residue buildup. Use a soft cloth dampened with warm water mixed with a mild hand dish detergent to gently clean the drum’s interior surface.
Avoid using harsh chemicals or abrasive cleaners, as these can damage the drum’s finish and affect its longevity. This simple routine preserves the drum integrity and keeps your clothes fresh and lint-free during drying cycles.
Monthly and Periodic Maintenance
Deep Cleaning the Dryer Drum
To keep your Whirlpool dryer running efficiently, it’s important to perform a deep cleaning of the dryer drum monthly. Begin by unplugging the dryer to ensure safety. Use a soft cloth and mild detergent to wipe down the interior drum surface, removing any residue or stains left by fabric softeners or dryer sheets. Avoid abrasive cleaners that can scratch the drum. After cleaning, thoroughly rinse the drum with a damp cloth to remove any soap residue. Dry the drum completely with a clean, dry cloth before closing the dryer to prevent moisture buildup, which can affect drying performance and lead to odors. Regular deep cleaning helps maintain the drum’s efficiency and prolongs the life of your appliance.
Cleaning the Dryer Cabinet and Removing Accumulated Lint
Over time, lint can accumulate inside the dryer cabinet, reducing airflow and efficiency. To clean the cabinet safely, first unplug the dryer and move it away from the wall. Use a screwdriver to remove the screws holding the dryer cabinet in place, then carefully lift the cabinet away from the dryer frame. With a vacuum cleaner equipped with a hose attachment, remove lint and dust from inside the cabinet, focusing on corners and crevices. A soft brush can help dislodge stubborn lint. Avoid using water inside the cabinet to prevent electrical damage. Once clean, replace the cabinet securely and plug the dryer back in. Regular lint removal inside the cabinet helps prevent overheating and maintains dryer performance.
Inspecting and Cleaning the Venting System
The dryer venting system is critical for safe and efficient operation. Lint buildup in vents is a leading cause of dryer fires, making regular inspection and cleaning essential. Check the vent hose and exterior vent at least once a month for blockages or damage. Disconnect the vent hose from the dryer and use a vent cleaning brush or vacuum to remove lint buildup inside the hose and vent pipe. Ensure the vent flap outside your home opens freely and is not obstructed. For thorough maintenance, it’s recommended to have a professional vent cleaning service at least once a year. This reduces fire risk, improves drying times, and extends the life of your dryer.
Comprehensive Cleaning: Step-by-Step Process
Overview of the 9-Step Cleaning Guide
Maintaining your Whirlpool dryer involves a thorough cleaning process that covers all key components: the lint screen, drum, cabinet, and vent system. This comprehensive approach ensures your dryer runs efficiently, reduces fire risks, and extends its lifespan. The 9-step cleaning guide combines these elements into a clear routine, focusing on best practices that address every part of the dryer. Following this guide helps remove lint buildup, dust, and debris that accumulate over time, keeping your dryer in top condition.
Tools and Supplies Needed
To perform a thorough cleaning of your Whirlpool dryer, gather the following tools and supplies:
- Soft cloths or microfiber towels for wiping surfaces without scratching.
- Mild detergents or gentle cleaning solutions to clean the drum and exterior.
- Vacuum cleaner with specialized attachments, such as a crevice tool, to reach lint in vents and tight spaces.
- Compressed air (optional) to blow out dust from hard-to-reach areas.
- Screwdriver or other basic tools if you need to access internal parts for cleaning.
- A dryer vent brush to clean out the vent duct.
Having these tools ready ensures you can efficiently and safely complete each step of the cleaning process.
Safety Tips and Precautions
Avoiding Fire Hazards
One of the most important safety measures when using a Whirlpool dryer is regular lint removal. Lint buildup is a common cause of dryer fires, as it can easily ignite from the heat generated during drying cycles. To prevent fire hazards, make sure to clean the lint trap after every load and periodically check and clean the dryer vent.
Safe Cleaning Practices
Before performing any cleaning or maintenance on your Whirlpool dryer, always unplug the appliance from the power source. This simple step prevents accidental electric shocks and other hazards. Additionally, avoid using excessive water or cleaning liquids near the dryer’s electrical components. Moisture can damage wiring and other sensitive parts, leading to malfunction or safety risks. Use a dry or slightly damp cloth to clean the exterior and ensure the interior areas are dry before plugging the dryer back in.
Additional Care Tips for Delta Area Residents
Environmental Considerations
Living in the Delta area means dealing with specific environmental factors like dust and humidity that can affect your Whirlpool dryer. Dust can accumulate more quickly, potentially clogging vents and filters, so it’s important to clean these parts more frequently than you might in drier or less dusty regions. Humidity levels in the Delta can also influence drying times and moisture buildup inside the machine. To combat this, consider increasing the frequency of lint trap and vent cleanings to maintain optimal airflow and prevent mold or mildew growth.
Adjust your cleaning schedule based on the season and weather conditions. For example, during drier months with more dust in the air, you may need to clean your dryer’s lint trap and vent every two weeks rather than monthly. In more humid times, ensure your dryer’s interior stays dry by leaving the door open after use for a while to allow moisture to escape.
Energy Efficiency Tips
To keep your Whirlpool dryer running efficiently and save energy, proper loading is key. Avoid overloading the dryer, as this forces the appliance to work harder, increasing drying time and energy consumption. Load the dryer loosely, allowing hot air to circulate freely around your clothes.
Additionally, use the appropriate drying cycles for your laundry. Many Whirlpool dryers come with sensor drying or moisture-sensing features that automatically stop the cycle when clothes are dry, preventing unnecessary energy use. Select these cycles whenever possible instead of timed drying. For lighter loads or delicate fabrics, use lower heat settings to conserve energy while protecting your clothes.
By adjusting both your cleaning habits and drying practices to suit the Delta area’s environmental conditions, you can extend the life of your Whirlpool dryer and reduce your energy bills.
Conclusion
Regular maintenance of your Whirlpool dryer is essential to keep it running efficiently and to extend its lifespan. Cleaning the lint trap, vent, and drum not only improves drying performance but also reduces the risk of fire hazards. For residents in the Delta area, following these care guidelines ensures that your dryer operates safely and effectively in the local climate conditions.
Remember to always unplug your dryer before performing any cleaning or maintenance tasks. Prioritizing safety while maintaining your appliance will help prevent accidents and costly repairs. By staying consistent with these simple steps, you can enjoy the reliable performance of your Whirlpool dryer for years to come.