
DIY Washing Machine Voltage Stabilizer Setup
Smart Fix: DIY Washing Machine Voltage Stabilizer Setup Made Easy
Electricity at home isn’t always as stable as you think. Voltage can dip or spike depending on things like weather, grid load, or faulty wiring. That’s where a voltage stabilizer steps in it acts as a buffer between your appliance and those unpredictable swings, keeping the voltage within a safe, steady range.
Now, your washing machine may look tough, but inside it’s packed with sensitive parts: microcontrollers, sensors, and motors that don’t deal well with erratic power. A surprise voltage surge could fry the control board. Running it on low voltage too often? That strains the motor. In short, power instability reduces the lifespan of your machine and may trigger a smart washing machine app syncing problem.
This guide is for anyone who’d rather fix a problem before it costs them. You should be okay with a screwdriver and not scared of a bit of wiring. If you’ve ever plugged in an extension cord or mounted a shelf, you’ve got this. We’ll keep things clear, simple, and safe. Let’s get started.
What You’ll Need
Let’s keep this simple. You don’t need a full workshop, just some basic tools and the right gear. Here’s your no-fuss checklist:
Basic Tools:
- Screwdriver (Philips and flat-head): To open wire terminals and tighten things down.
- Wire cutter/stripper: For cleanly removing insulation from wire ends.
- Insulation tape: For covering any exposed wire, especially after direct wiring.
- Voltage tester (non-contact or probe type): To make sure power’s off (and safely back on when you’re done).
Equipment:
- Voltage stabilizer: Make sure it’s rated for your washing machine’s power draw. A typical one handles about 2,000 watts, but check your machine’s manual or nameplate.
- Plug tops (and possibly a 3-pin plug socket): In case the stabilizer or washer needs a fresh one.
- Extension cord (optional): Useful if your outlets are far from where you want the stabilizer.
- Mounting screws/brackets: To safely fasten the stabilizer to the wall or a platform, don’t leave it dangling.
You don’t need anything fancy. Just make sure your tools are safe to use and your stabilizer isn’t some sketchy knockoff. This setup’s only as solid as what you put into it.
Pick the Right Stabilizer
Protecting your washing machine from power fluctuations starts with choosing the right voltage stabilizer. Here’s how to make an informed decision:
1. Check the Voltage Input Range
Before buying anything:
- Look at the back of your washing machine or consult the user manual.
- Identify the voltage input range, typically marked near the power cord entry point. Example: 220V ±10% (which means the machine operates safely between 198V–242V).
If your local power often:
- Drops below 198V, or
- Spikes above 242V,
Your appliance is at risk of:
- Random shutdowns
- Long-term internal damage
- Complete electronics burnout
Goal: Pick a stabilizer that prevents all that by covering your specific power range.
2. Match the Stabilizer to Your Local Power Fluctuations
A good rule of thumb:
- Most homes do fine with a 140V–280V stabilizer.
- If you live in an area with: Frequent brownouts, Severe voltage swings, Rural or unstable grids
…consider going for a wider voltage range for better protection.
3. Check Wattage Requirements
You’ll need to:
- Find your washing machine’s power consumption on the label or in the manual.
- Choose a stabilizer that’s rated at least 20% higher than that wattage.
Example:
- If your washer uses 1000 watts → choose a 1200W stabilizer or higher.
Why the buffer?
- Washing machines have startup surges—brief moments where they draw extra power when they start spinning.
4. Choose the Right Stabilizer Type
Two common types:
Relay-Type Stabilizers
- Faster and more affordable
- Switch between preset voltage levels
- Ideal for appliances like washing machines
Servo-Based Stabilizers
- More accurate adjustment via motor controls
- Better for highly sensitive electronics (e.g., lab equipment, AV systems)
- Slower response time
Recommendation: For home washing machines, relay-type is more than enough.
By understanding these factors input voltage range, wattage requirements, and stabilizer type you’ll avoid unnecessary damage and ensure your washing machine runs smoothly, even in unstable electrical conditions.
Find a Safe Setup Spot
The stabilizer isn’t a “set it and forget it” brick you can shove in a corner. Its location matters for safety, airflow, and longevity. First rule? Keep it dry. That sounds obvious, but many washing machines sit in utility rooms, basements, or even balconies where water spills, splashes, and humidity are regular guests. Stabilizers aren’t waterproof, and moisture creeping into their vents can short them out or corrode components over time.
Second, make sure the area is ventilated. Stabilizers regulate power by dispersing minor heat, and without airflow, that heat builds up. Don’t tuck it behind the washing machine or cram it inside a cabinet. Leave a few inches of breathing room on all sides, especially around the vents.
Also worth thinking about: elevation. If you’re setting this up in a flood-prone or damp basement, raise the stabilizer off the ground. Even a few inches can save it from mop water or a surprise leak. Use a wall mount, shelf, or even strong zip ties and hooks, whatever keeps it safe and off the floor.
Lastly, accessibility. You’ll want to get to the stabilizer for the occasional check or reset. Don’t force yourself into a game of washer Tetris every time something needs adjusting. Secure it where it’s visible, reachable, and away from foot traffic or snag zones. Simple moves now save big headaches later.
Installation Steps
Follow these steps to safely install your voltage stabilizer for a washing machine.
1. Turn Off All Power
This isn’t optional.
- Unplug the washing machine.
- Turn off the main circuit breaker for the area if possible.
- You’re working with electricity, treat it with respect.
2. Plug the Stabilizer into the Wall (Plug-in Models)
If your stabilizer is a standard plug-in type:
- Insert it directly into the wall socket.
- Ensure it’s firmly connected no wobbling or loose fit.
- Avoid using an adapter unless specified by the manufacturer.
3. Wiring Directly? (Hardwired Models)
If your stabilizer requires hardwiring:
- Use a wire cutter/stripper to prep cable ends.
- Connect the following to the appropriate labeled terminals: Live (L), Neutral (N), Earth (E)
- Gently tug each wire after securing it to ensure it’s firmly connected.
- Wrap exposed metal parts with insulation tape for added safety.
4. Mount the Stabilizer
Secure the stabilizer to a safe, dry surface using the included mounting hardware.
- Mount it on the wall just high enough to avoid accidental splashes or moisture from the floor.
- Route wires carefully: Avoid placing them across walkways and keep them away from any areas prone to standing water.
5. Connect the Washing Machine
Once the stabilizer is mounted:
- Plug the washing machine into the output socket of the stabilizer.
- Verify that the plug fits snugly; don’t force it.
- If your stabilizer has a power switch or breaker, leave it in the OFF position for now.
6. Test Voltage
Before powering on:
- Use a voltage tester to check both the input and output terminals.
- Confirm that current is flowing and that output voltage is within the acceptable range: typically between 220V and 240V (regional variations apply).
- If everything checks out, you’re ready for the final power-up.
Before You Power Up
Alright, pause here and do a sanity check before flipping anything on. Go back over each wire you connected yes, even if you’re sure. Give every terminal a little wiggle to make sure it’s snug and not going anywhere. Loose wires can lead to sparks or worse.
Next, check your insulation. If any bare copper is peeking out, cover it with insulation tape. Don’t leave any chance for a short circuit.
Look around the stabilizer. Is there at least a few inches of airflow on all sides? It needs to breathe. Tucking it behind the washing machine or stuffing it into a tight corner is asking for heat buildup, which is bad news for electronics.
Lastly, don’t plug high-load stuff like irons, heaters, or another major appliance into the same outlet or extension cord where the stabilizer is connected. That’s a one-way ticket to overload city.
Once everything looks set, you’re ready to power on.
Power On and Monitor
Now comes the moment of truth.
Flip the main power switch back on. First, power up the stabilizer. Most units will give you a soft click or a hum, maybe an LED blink or a startup delay built in. That’s normal. Wait a few seconds for it to settle.
Next, switch on your washing machine. If all the wiring’s solid, it should start up like any regular day. No smoke, no sparks, no drama.
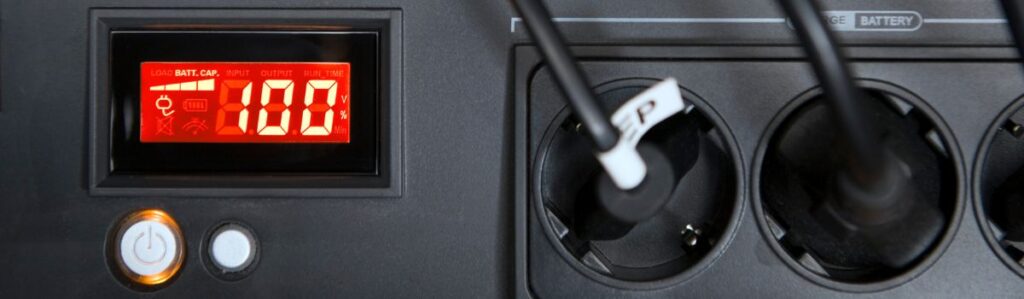
Watch the stabilizer. Most models have an indicator panel, either basic LEDs or a small digital readout. What you want is confirmation that the input voltage is within range and the output is steady. If the display shows wild fluctuations or constant switching between “Low” and “Normal,” you might be pushing the limits of its capacity or dealing with a serious power issue from your line.
To be sure, run a cycle, nothing fancy. A quick rinse or wash will do. You’re looking for smooth motor operation and zero power dropouts. If the stabilizer holds steady the whole way through, you’re good.
Pro tip: note how long the stabilizer takes to kick in at startup. Some have a delay loop (5 – 10 seconds) to protect appliances from sudden surges. That’s a feature, not a bug.
Give it a full cycle. If everything runs quietly and clean, you’ve just levelled up your setup.
Keep It in Good Shape
A stabilizer isn’t exactly high-maintenance, but it’s not set-it-and-forget-it either. Like anything electrical, a little upkeep goes a long way. First off, keep it clean. Dust tends to build up around the vents, and that messes with airflow. A quick wipe down every week or so keeps things breathing easily.
Next, do a visual check every couple of months. Look for any scorch marks near plug points or melted insulation. If plugs feel hot to the touch or wires look crusty, something’s off. Don’t ignore it unplug and investigate.
One more thing: listen to it. A faint hum is normal, especially for relay-type units. But if it starts crackling, buzzing loudly, or keeps shutting things off mid-cycle, that’s a red flag. It could mean your stabilizer is overloaded, faulty, or just past its prime.
Treat it like any vital piece of your setup: out of sight, but not out of mind. Keep it clean, dry, and running cool, and it’ll return the favor.
Wrap Up
Getting a voltage stabilizer up and running isn’t rocket science, but doing it right matters. A good install means your washing machine stays safe from the kind of sketchy voltage dips and spikes that can fry circuits or wear out motors faster than they should.
Take the extra time to match the stabilizer specs, double-check your wiring, and don’t rush through the safety bits. Do that, and you’re giving your appliance an edge in a power grid that doesn’t always play nice.