
Common Dishwasher Installation Mistakes
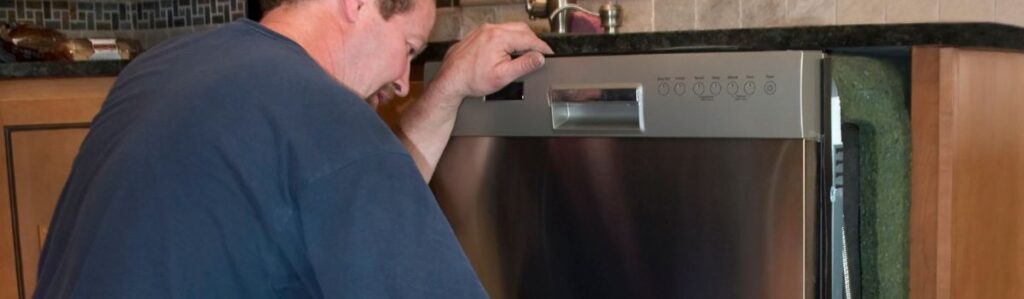
Avoid These Common Dishwasher Installation Mistakes
Installing a dishwasher can feel like a simple plug-and-play task until it isn’t. A slight tilt here, a loose hose there, or a missed step in the drainage setup can lead to serious headaches down the road. And in British Columbia, where homes range from modern condos to character houses with 50-year-old plumbing, the margin for error is even tighter.
This guide walks you through the most common and most preventable dishwasher installation mistakes that homeowners across BC make every year. We’ll help you spot these pitfalls before they happen, understand what matters during installation, and know when it’s time to call in a professional. Whether you’re a DIYer or just double-checking a contractor’s work, the goal is the same: avoid damage, stay code-compliant, and enjoy a perfectly functioning dishwasher from day one while protecting its lifespan & cleaning performance.
Tools & Pre‑Installation Checklist
Before diving into any installation, preparation is everything. Most people underestimate the impact of a few missing tools or overlooked parts on a project, or worse, a compromised setup.
Here’s what you need to have ready before unboxing the dishwasher:
- Basic tools: Adjustable wrench, flathead and Phillips screwdrivers, channel lock pliers, a spirit level, and a flashlight.
- Plumbing supplies: Water supply line (typically stainless steel braided), 90-degree elbow fitting, Teflon tape, and hose clamps.
- Mounting materials: Dishwasher mounting brackets specific to your countertop type (wood, laminate, stone) plus screws or side clips.
- Drain hose: Often included, but verify length and compatibility.
- Electrical materials: Wire nuts, cable clamp/strain relief, and a power cord kit if your model doesn’t come hardwired.
Many installation kits don’t include everything you need. That’s why it’s smart to double-check your user manual and buy a universal dishwasher hookup kit if you’re unsure. A quick 15-minute review of what’s in the box versus what’s required could save you hours later.
Mistake #1: Skipping Accurate Measurements
One of the most overlooked aspects of dishwasher installation is simply taking proper measurements and it’s often where the first problem arises.
Many people assume their new appliance will fit seamlessly into the existing space without issue. But every kitchen has its quirks. Flooring thickness, under-counter bracing, and even cabinet warping over time can affect whether your dishwasher fits properly.
When measuring, make sure to:
- Measure the width at the top and bottom of the opening (in case of cabinet bowing).
- Measure the height from the floor to the bottom of the countertop not the toekick.
- Account for flooring differences especially if new flooring was installed after the last dishwasher was installed.
- Consider door clearance. Will the door open fully without hitting a nearby cabinet or fridge?
In many BC homes especially older houses in areas like Vancouver, Victoria, or Burnaby cabinets can be slightly off-square, and floors may slope ever so slightly. That quarter-inch can make all the difference.
Mistake #2: Poor Drainage Setup (High Loop or Air Gap Missing)
Drainage is one of the least visible yet most important components of your dishwasher’s performance if water isn’t draining properly or worse if dirty water backflows into the unit you’ve got a serious hygiene and functionality issue on your hands.
There are two key methods to ensure proper drainage:
- High Loop: This involves looping the dishwasher drain hose as high as possible (usually under the sink) before connecting it to the garbage disposal or drain pipe.
- Air Gap: A small cylindrical fitting installed above the sink or counter that physically separates the dishwasher drain hose from the home’s plumbing, preventing backflow.
In many parts of BC, air gaps are mandatory for new installations. Even when they’re not legally required, high loops are the bare minimum standard. Without one of these setups, you risk back-siphoning dirty water into the dishwasher, especially when the sink is clogged.
Avoid routing the drain hose along the floor or with dips in the line. These can trap water and lead to odour buildup or mould growth over time.
Mistake #3: Loose or Improper Water Line Connections
A dripping connection can cause slow, hidden water damage that ruins cabinets, flooring, and even subfloors before you know it’s happening. It’s one of the easiest errors to avoid, yet one of the most common among DIYers.
When connecting the water line:
- Use Teflon tape or a thread sealant on the elbow joint or brass fitting.
- Hand-tighten first, then gently snug it with a wrench. Don’t over-tighten, as that can crack the fitting or strip threads.
- Always test the shutoff valve under the sink. If it sticks or leaks, replace it before installing the dishwasher.
BC’s water hardness varies by region, but in places like Kelowna or Abbotsford, mineral buildup can damage fittings faster than expected. Ensuring the connection is clean, dry, and secure will give your installation the longevity it needs.
Mistake #4: Electrical Mistakes & Safety Oversights
Dishwashers are powerful appliances, and improper electrical installation is a serious hazard. In BC, many residential codes require dishwashers to have a dedicated 15- or 20-amp circuit especially in newer builds.
What to watch out for:
- Never share the dishwasher’s circuit with other major appliances, such as a microwave or refrigerator.
- Use a strain relief connector at the junction box to protect wires from being pulled or cut over time.
- Ensure that all wire nuts are securely twisted and that the ground wire is properly connected to the grounding screw.
In multi-unit buildings, such as high-rises in Vancouver or townhomes in Surrey, electrical work often requires the services of a licensed electrician. If you’re uncertain about your panel or circuit load, don’t guess; get help.
Mistake #5: Poor Leveling and Alignment
A dishwasher that isn’t level can cause a host of long-term problems, including poor drainage, improper detergent dispersion, noisy operation, and even door seal failures that lead to leaks.
Here’s how to level correctly:
- Use a spirit level on the front edge and inside the tub to ensure it is level.
- Adjust the front levelling legs with a wrench, and check the rear with a flat board under the base.
- Test fit the unit before the final hookup. Don’t assume the floor is perfectly flat.
This matters even more in BC homes with older subfloors or basement installations. If the unit rocks even slightly, it can loosen connections over time or rattle loudly during wash cycles.
Mistake #6: Improper Mounting or Lack of Securing
Securing the dishwasher in place is a step many skip until they slam the door one day and the whole unit tips forward.
Mounting matters:
- If your countertop is made of wood or laminate, top-mount brackets (screwed into the underside) are the standard.
- For stone or quartz, you’ll need side-mount brackets, which attach to the cabinet walls. Never drill directly into granite or quartz.
- Ensure mounting hardware is flush and tight but avoid over-tightening to the point of warping.
A properly secured dishwasher not only prevents tipping but also helps maintain the alignment of the drain hose and electrical cable. It’s a safety and longevity step, not just a finishing touch.
Mistake #7: Leaving Transport Bolts or Packaging Inside
Transport bolts and internal packaging protect your dishwasher during shipping but they must be removed before the first run. Leaving these in can cause loud banging, poor ventilation, or damage to internal components.
Check for:
- Bolts on the rear or base of the unit
- Foam blocks inside the tub or filter area
- Tape or zip ties securing spray arms or hoses
It only takes a few minutes to inspect, but skipping this step could mean dealing with melted parts, burning smells, or restricted airflow once the dishwasher runs its first cycle.
Mistake #8: Not Testing with a Full Cycle Before Finishing
A dishwasher installation isn’t complete until it has been tested under real-world conditions. Many people install the unit, push it into place, and assume everything’s fine, only to discover leaks behind the cabinet weeks later.
Always run a full cycle before closing up:
- Check that the drain function is evacuating water properly.
- Listen for abnormal noises such as grinding, thumping, or high-pitched whines.
- Place paper towels or a dry cloth under the unit to spot small leaks early.
By catching these issues during a test cycle, you avoid the need to disassemble the cabinetry or pull the dishwasher back out. It’s a critical step that wraps the whole project up safely.
BC-Specific Compliance: What Homeowners Should Know
British Columbia’s building and plumbing codes vary across municipalities. What’s acceptable in Victoria might not be in Burnaby, and new builds have stricter expectations than older homes.
Homeowners should be aware of:
- Air gap requirements in cities like Vancouver (especially in new homes or full renos)
- Permit needs for full kitchen remodels involving plumbing or electrical relocation
- Strata bylaws that dictate whether you can DIY or must use licensed contractors
If you’re unsure, contact your local city’s building department for guidance. A five-minute phone call can save you from inspection headaches or insurance denial later.
Final Tips: Preventive Maintenance After Installation
Once the hard part is done, a few ongoing habits can keep your dishwasher performing like new:
- Run hot water at the sink for a few seconds before starting a cycle this helps the machine fill with hot water right away.
- Inspect the water line and drain hose every 3 to 6 months for signs of wear, corrosion, or leaks.
- Remove and clean the filter and spray arms regularly to prevent buildup and clogs.
- Verify that the appliance remains level and securely in place as it settles over time.
A well-installed and well-maintained dishwasher can easily last 10–12 years with minimal issues.
Conclusion: Save Time, Money & Headaches with Smart Installations
Dishwasher installation doesn’t have to be stressful, but it does have to be done right. With a little planning, the right tools, and an understanding of BC’s unique home setups and regulations, you can avoid the most common mistakes that lead to costly repairs or code violations.
And if at any point it feels too complex or uncertain, don’t hesitate to call in a professional. A smooth, safe, and efficient dishwasher setup is worth every ounce of preparation, and your kitchen will thank you for years to come.