
Refrigerator Not Defrosting? Causes & Fixes
Refrigerator Not Defrosting? Causes & Fixes (BC Homeowner’s Guide)
A refrigerator that stops defrosting can quietly cause bigger problems than you might expect. What starts as a bit of frost on the back wall can quickly become a sheet of ice, blocking vents and spoiling your food while making your fridge work overtime, raising both your energy bill and your stress levels. If caught early, some of these issues can be resolved with simple diy repairs, saving you both time and money.
This guide is specifically designed for BC homeowners seeking answers. We’ll break down how the defrost system works, how to spot the signs of failure early, how to diagnose the issue, and whether it’s something you can fix yourself or a job for a professional. Whether you’re dealing with a Whirlpool, Samsung, LG, or older GE unit, we’ll help you figure out what’s going wrong and what to do next.
Let’s get into it.
How the Defrost System in a Refrigerator Works
Modern “frost-free” refrigerators are designed to prevent frost from building up inside the freezer compartment. This isn’t magic it’s thanks to a self-regulating defrost system built into the appliance. The system operates quietly in the background and cycles a few times a day. Each time it runs, it melts away any frost forming on the evaporator coils the cold, metal tubing that cools the air inside your fridge.
Here are the key players in this system:
Defrost Heater
- This is an electric heating element located directly beneath or around the evaporator coils. Its job is simple: when activated, it warms up just enough to melt any frost or ice that’s accumulated on the coils.
Defrost Thermostat
- This small sensor monitors the temperature of the coils. If the coils are cold enough and frost is detected, it allows the heater to kick on. Once the coils are warm again, the heater shuts off to prevent overheating.
Defrost Timer or Control Board
- Older refrigerators use mechanical timers that count down and engage the defrost cycle at preset intervals. Newer models utilize digital control boards that rely on sensor input to determine when to initiate and terminate the defrost cycle.
Thermistor (Temperature Sensor)
- This sensor sends temperature data to the control board. If it detects that the temperature is too low, it signals the need for a defrost cycle; however, if it malfunctions, it can block this cycle entirely.
Evaporator Coils
- Hidden behind the rear freezer panel, these coils cool the air that circulates throughout both the fridge and freezer compartments. If they freeze over, air can’t flow properly and that affects everything from food preservation to internal temperatures.
When any one of these parts fails, the whole defrost process can grind to a halt. Ice builds up, air circulation slows, and food storage becomes a frustrating game of guesswork.
Signs Your Refrigerator Isn’t Defrosting Properly
Recognizing the signs of defrost failure early can save you from spoiled groceries and costly repairs. Here are the most common symptoms that your refrigerator may not be defrosting the way it should:
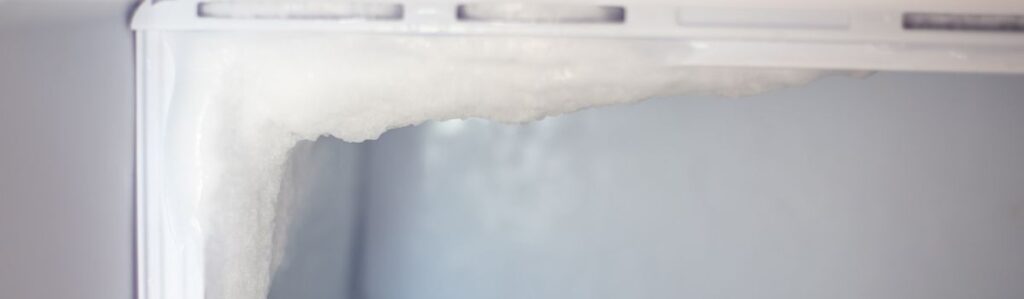
Thick frost or solid ice on the back wall of the freezer
- This is often the most visible sign. If you see a hard layer of ice or snow-like buildup, especially behind your freezer’s back panel, it usually means the evaporator coils aren’t defrosting.
The fridge compartment is warm, but the freezer is cold.
- Cold air is typically circulated from the freezer to the fridge through a small vent. When ice blocks the coils or the vent, the freezer may stay cold while the fridge climbs into unsafe temperature ranges.
Unusual noises from the fan area
- If the evaporator fan is hitting frost or ice, it might start making clicking, whirring, or humming sounds. These noises can start quietly but often become louder over time.
Water pooling under crisper drawers or around the front feet
- During the defrost cycle, melted frost drains out of the fridge. If the drain line is clogged with ice, that water has nowhere to go. It can collect at the bottom of the fridge or leak onto your floor.
Food spoils quickly or develops a strange texture.
- If your produce wilts in a few days or your milk sours before the expiration date, inconsistent cooling could be to blame, often due to poor airflow caused by frost buildup.
Even one of these symptoms is enough to raise concern. If you’re seeing two or more, it’s time to take action.
What Causes a Refrigerator to Stop Defrosting?
Understanding the most likely culprits behind defrost failure can help you identify the root cause of the issue more quickly. Below are the five most common causes, their mechanisms of operation, and potential issues that can arise.
Burned-Out Defrost Heater
The defrost heater is responsible for melting the frost off the evaporator coils. If it fails, ice continues to build up. This part is subject to wear and tear over time and can stop working without warning. You can sometimes tell it’s gone bad if there’s visible ice buildup around the coils and the heater looks cracked or burnt out.
A simple continuity test with a multimeter (which checks whether electricity can pass through the part) can confirm if it’s defective. If there’s no continuity, it’s time for a replacement.
Faulty Defrost Thermostat
This thermostat detects when the evaporator coils are sufficiently cold to initiate a defrost cycle. If it sticks in the “open” position, it won’t allow the heater to activate even if the coils are completely iced over.
These parts are inexpensive and fairly easy to replace. The tricky part is accessing it since it’s often clipped directly onto the coils and hidden behind the freezer’s inner panel.
Broken Defrost Timer or Control Board
The defrost cycle needs a trigger and that’s where timers or control boards come in. In older fridges, a mechanical timer might be stuck in the cooling mode. In newer models, the control board could have a software glitch or a failed relay preventing defrost from starting.
If you’ve replaced the heater and thermostat but the issue persists, the timer or board is the next logical place to look. These parts can be tested, but some newer control boards may require specialized diagnostic tools.
Defective Thermistor or Sensor
A thermistor feeds temperature data to the control board. If it’s damaged, misaligned, or providing false readings, the board won’t know when to trigger the defrost cycle or may trigger it too late.
Testing this component usually involves comparing the resistance values at different temperatures. If they don’t match up with manufacturer specs, it’s faulty.
Clogged Drain or Ice Blockage
Even when the heater is working, melted frost needs somewhere to go. If the drain line is blocked with ice or debris, water can pool at the bottom of the freezer and refreeze, leading to ice patches, leaks, or pooling under the fridge.
This is more of a maintenance issue than an electrical failure, but it can appear to be a defrost problem. If the fridge is still cold but you’re getting puddles or strange odors, that be your answer solution
Steps on How to Diagnose the Problem
Diagnosing a refrigerator defrost issue doesn’t always require advanced tools or electrical expertise. Here’s a basic guide most homeowners can follow safely:
Unplug the refrigerator
Before proceeding, ensure the unit is unplugged. You’re working near water and electrical components safety first.
Check for ice buildup.
Remove the contents of the freezer and take out the rear interior panel. If you see ice covering the evaporator coils or the panel itself, the defrost system isn’t doing its job.
Run a manual defrost cycle.
If your fridge has a diagnostic mode, activate the manual defrost cycle. If the heater kicks in and begins melting the ice, your control board and heater may still be functioning. If nothing happens, you’ll need to test further.
Use a multimeter to test key parts.
Test the defrost heater and thermostat for continuity. Both should show a closed circuit (usually under 1–2 ohms). If either part fails the test, it likely needs to be replaced.
Inspect the defrost drain.
If you find pooled water or sheets of ice, try gently pouring warm water down the defrost drain to check if it flows freely. If it backs up or refreezes quickly, the line could be blocked.
Observe the control board.
If all other parts appear to be functioning properly and your fridge still won’t defrost, the issue may be with the control board. Burnt marks, clicking relays, or blinking lights can signal that something’s gone wrong.
Avoid diagnosing sealed systems or inverter boards unless you’re experienced. If in doubt, take pictures, document your findings, and contact a professional.
How to Fix Defrost Problems (DIY Repairs)
Once you’ve identified the faulty component, fixing it yourself may be possible especially if you’re comfortable using a few basic tools and following the manufacturer’s guides. Here’s how to tackle the most common repairs.
Replacing a Defrost Heater
Swapping out a faulty defrost heater is often straightforward. These heaters are usually clipped, wrapped, or mounted near the evaporator coils in the freezer compartment.
Steps:
- Unplug the fridge and remove all food from the freezer.
- Take off the rear freezer panel using a screwdriver.
- Locate the defrost heater, which may resemble a metal rod or coil.
- Disconnect any wiring harnesses or connectors.
- Gently remove the old heater and secure the new one in place.
- Reconnect the wiring, reassemble the panel, and plug the fridge back in.
Time required: About 45 minutes.
Tools needed: Screwdriver, multimeter, gloves, flashlight.
This is one of the most satisfying DIY repairs when done right and can dramatically improve cooling performance.
Installing a New Thermostat
The thermostat is a small disc-shaped sensor clipped near the evaporator coils. It opens or closes the circuit depending on the temperature.
Steps:
- Access the thermostat after removing the rear panel.
- Snip or disconnect the old thermostat’s wires (make sure to label or photograph them).
- Strip the wire ends and attach them to the new thermostat using insulated connectors.
- Clip the new thermostat into place.
- Reassemble the panel and plug the unit back in.
Testing Tip: Place the thermostat in a cup of ice water. If it doesn’t close the circuit at 0°C (32°F), it’s bad.
Fixing or Replacing a Timer or Control Board
If your model uses a mechanical defrost timer:
- Locate it (usually near the compressor or behind the kick plate).
- Unplug the fridge, unscrew the timer, disconnect it, and replace it with a matching model.
- Use the manual dial (if available) to trigger defrost and test it.
If your fridge uses a control board:
- This part is more advanced and often hidden behind a panel near the back.
- Replacing a board typically involves removing a few screws, disconnecting the wiring harness, and then plugging in the new board.
- Be aware that some control boards require programming codes or diagnostics to fully integrate.
If you’re unsure, stop here and consult a technician. A misconfigured board can cause more problems than it solves.
Thawing a Frozen Drain
When the defrost system works but melted water can’t drain, it often freezes in place leading to leaks, ice buildup, and musty smells.
To fix:
- Use a turkey baster to squirt warm (not boiling) water down the defrost drain.
- If the water pools or backs up, the line is clogged with ice.
- Repeat until water flows freely.
- Flush with a bit of vinegar or diluted bleach to clean mould or bacteria.
- Consider installing a small copper wire “drain heater” to prevent future freezing.
It’s a simple fix that many overlook but it can prevent months of frustration if caught early.
Preventive Maintenance for Your Refrigerator’s Defrost System
Most defrost failures happen slowly and can often be avoided with regular care. Here’s what you can do to keep your fridge working efficiently and prevent future breakdowns:
Clean behind and underneath your refrigerator every 6 months.
- Dust on the condenser coils causes overheating, which puts more strain on the defrost system.
Inspect and clean the door gaskets.
- If warm air leaks into the fridge, it causes condensation that turns into frost. Gently clean the rubber seals with warm water and check for gaps or tears.
Don’t block air vents inside the fridge or freezer.
- Good airflow is key. Keep items away from the vents to avoid warm or frozen spots.
Check the drain hole regularly.
- Pour a small amount of warm water into the drain to ensure it flows. A clogged drain leads to ice buildup and leakage.
Avoid overstuffing your freezer.
- Too much packed-in food restricts air circulation and accelerates the formation of frost.
Run a diagnostic cycle every few months (if available)
- Many modern refrigerators allow you to test fan motors, defrost elements, and sensors through a built-in control panel.
Keeping up with these simple tasks can help extend the life of your refrigerator and reduce the need for emergency repairs.
FAQs About Refrigerator Defrost Issues
Can I just unplug the fridge to defrost it?
Yes, unplugging it will force a manual defrost, allowing built-up ice to melt. But it’s only a temporary fix. If the system isn’t running defrost cycles on its own, the problem will return.
Is defrosting the same as cooling?
Not at all. Defrosting clears frost that can block cold airflow. Cooling happens when refrigerant flows through the coils. The two systems work together but perform opposite tasks.
Why is my freezer cold, but the fridge is warm?
The fridge often relies on the freezer to generate cold air. If frost blocks the vents or fan, that cold air can’t reach the fridge compartment.
How long does a defrost cycle last?
Usually between 20 – 45 minutes. It depends on the fridge model, how often you open the doors, and the humidity level of your environment.
Does a clicking sound indicate that the timer is malfunctioning?
Not always. But if you hear repeated clicks or the compressor seems to turn on and off constantly, the defrost timer or control board might be stuck.
Final Thoughts
If your refrigerator isn’t defrosting like it should, it doesn’t mean you need a brand-new unit. Many defrost problems stem from one or two faulty components and with the right tools and information, they can be completely fixed at home.
In this guide, we walked through how your defrost system works, how to spot trouble signs early, how to test each component, and which fixes are safe for DIY. We also covered when to stop and call a professional, especially if you live in BC and own a newer or high-end appliance.
Whether you’re fixing it yourself or calling a pro, the most important step is action. The longer ice builds up behind your freezer panel, the harder your fridge has to work and the more food and energy you waste.
Stay ahead of the problem with regular maintenance, and you’ll keep your fridge cooling efficiently for years to come.