
Fixing Clogged Dishwasher Spray Jets
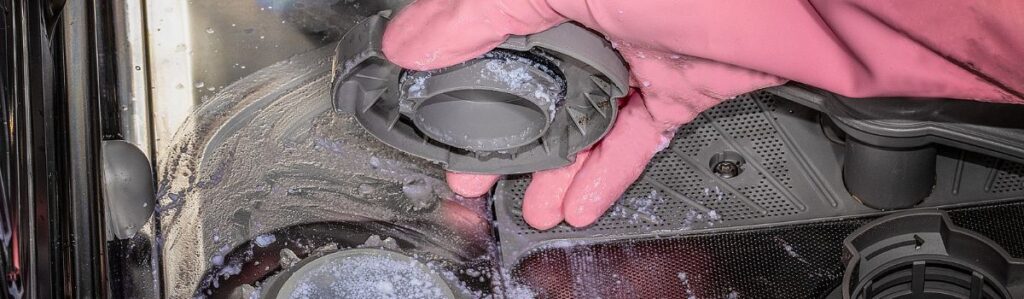
Fixing Clogged Dishwasher Spray Jets: Complete DIY Guide for BC Homeowners
If you’ve noticed that your dishwasher just isn’t doing what it used to leaving crusty food on plates, a cloudy film on glasses, or strange grinding noises mid-cycle there’s a good chance the spray jets are clogged. These small holes are crucial to the cleaning performance of a dishwasher, and once blocked, even the best dishwasher can struggle to do its job.
This is an issue especially familiar to many homeowners across British Columbia. Whether you’re in Metro Vancouver, Victoria, or the Okanagan region, water conditions can play a role particularly in areas with harder water. Minerals in the water, combined with leftover food debris, grease, and detergent residue, can quickly accumulate inside your dishwasher’s spray arms, reducing water pressure and coverage. Dishwasher drain systems lifespan may also be affected by this buildup, contributing to overall inefficiency if not properly maintained.
But here’s the good news: cleaning and maintaining spray jets isn’t as complicated as it sounds. In most cases, it’s a manageable DIY task that can be done with everyday household tools in under an hour. And doing it can drastically improve the cleanliness of your dishes after each cycle.
This guide will walk you through the entire process, step by step from diagnosing the issue to cleaning and maintaining the spray arms to preventing future clogs so your dishwasher runs efficiently all year long.
Why Spray Jets Matter in Your Dishwasher’s Performance
Spray jets are the engine of your dishwasher’s cleaning cycle. These jets are located along the spray arms long, rotating plastic or metal bars inside your dishwasher that spin during each cycle and shoot pressurized streams of water in every direction. Their job? To reach every surface of every dish, no matter where it’s loaded.
Most dishwashers have two spray arms: one at the bottom (under the lower rack) and one attached to the upper rack. Some newer or high-end models also have a third spray arm at the top of the machine for extra coverage. Each arm contains several small nozzles these are the spray jets.
When these jets are clean, water pressure stays strong and evenly distributed. However, when they become clogged whether with bits of food, hardened detergent, or mineral buildup the water can’t exit properly. This results in uneven spraying, poor detergent mixing, and dishes that appear only half-cleaned.
For homeowners using newer Energy Star-rated dishwashers, this becomes even more important. These appliances are designed to use less water and energy but that also means they rely heavily on optimal spray performance to make up for the lower volume of water used.
How to Tell If Your Dishwasher Spray Jets Are Clogged
Spotting a clogged spray jet isn’t difficult once you know what to look for. If your dishwasher has been underperforming lately, here are the most common symptoms that point directly to a spray arm problem:
Your dishes come out dirty, greasy, or with food stuck on
- This is often the first sign. Even after a full cycle, you may find plates with hardened bits of food or glasses that look foggy.
Spray arms aren’t spinning properly.
- Open the dishwasher and manually spin the spray arms. If they’re stiff or feel jammed, that could be due to internal debris.
You hear weaker water flow or unusual noises during a wash.
- A properly functioning spray arm makes a steady whirring or spraying noise. Anything different like grinding, groaning, or silence could signal a blockage.
Water isn’t reaching the top rack.
- If your top rack items consistently come out dirty while the lower rack looks fine, the top spray arm is likely blocked.
You can see physical clogs inside the jets.
- A flashlight helps here. Remove the spray arms and look closely if you spot debris, that’s your confirmation.
Not every dishwasher problem is caused by clogged jets, but these signs are strong indicators that it’s time to take a closer look.
What Causes Spray Jet Blockages?
Spray jets are vulnerable to several common forms of buildup. Over time, small particles and mineral residue can narrow or fully block these tiny holes, cutting off water flow. Here are the most common causes:
Food Debris
Dishwashers have filters designed to trap food particles, but these filters don’t catch everything. Seeds, grains, and fibrous foods like kale or spinach often slip through the cracks. These particles can get lodged inside the spray jets and dry into place, eventually blocking them.
This is especially common if dishes aren’t scraped before loading. Even small amounts of leftover food can add up over time.
Grease and Soap Scum
Fat and oil from cookware can cling to the inside of the spray arms, combined with detergent, to create a sticky film. This gunk accumulates slowly and can shrink the jet holes from the inside out. The result is decreased water flow and pressure and, eventually, complete blockages.
Hard Water and Mineral Deposits
British Columbia has a mix of soft and hard water zones. In areas with harder water such as parts of the Fraser Valley and Okanagan calcium and magnesium in the water can adhere to surfaces inside the dishwasher. These minerals crystallize, creating limescale around the tiny jet holes and reducing their size. The narrower the hole, the weaker the spray.
If your dishwasher’s internal walls, heating element, or filter show white, chalky residue, your home likely has hard water, and your spray arms are also at risk.
Safety First: What to Do Before You Start Cleaning
Before undertaking any DIY repair, it’s essential to take a few precautions to protect both yourself and your dishwasher. Here’s a quick checklist to follow:
Turn off the power
- Unplug your dishwasher or shut it off at the breaker box. You’ll be handling internal parts, and safety should always be your top priority.
Wait for everything to cool.
- If you have recently run a cycle, allow it at least 30–60 minutes to cool down. The water and spray arms may still be hot.
Remove racks and clear the workspace.
- Pull out the lower and upper racks completely. This provides you with full access to the spray arms, helping to prevent accidental damage.
Gather your tools
- You’ll need white vinegar, an old toothbrush, a toothpick or sewing needle, rubber gloves, a soft cloth, and a towel or mat to catch drips.
Protect your flooring
- Place a towel under the dishwasher door in case any water spills out while you’re working.
These basic steps ensure you’re set up for a safe, mess-free cleaning session.
Step-by-Step: How to Clean Your Dishwasher Spray Jets
Now that you’re ready let’s get to work. This process takes approximately 20–40 minutes, depending on the level of dirt on the spray arms. Follow these steps carefully:
Remove the spray arms.
Most spray arms twist off or snap out of place. Start with the lower arm (usually the easiest), then remove the upper and middle arms if your dishwasher has them.
Inspect the spray arms under light.
Hold each arm up to a light source and look through the holes. If you see food particles or cloudiness, those are blockages.
Rinse under warm water.
Let water run through each spray arm. In many cases, you’ll see particles float out. Shake gently to help loosen trapped debris.
Unclog each jet hole
Use a toothpick, straight pin, or soft wire to gently clean out each spray jet. Avoid metal objects that can scratch or deform the hole shape. Be thorough but gentle.
Soak in vinegar solution.
Fill your sink or a large bowl with equal parts white vinegar and warm water. Let the spray arms soak for 30 minutes. This helps break down mineral buildup and soap scum.
Scrub with a toothbrush
After soaking, scrub the arms inside and out. Focus on the jet openings and run water through again to flush everything out.
Dry and reinstall
Shake off excess water, dry with a towel, and then snap or screw the spray arms back into place. Give them a spin to ensure smooth movement.
Pro tip: If the arms still feel jammed or water isn’t flowing after reassembly, remove them again and check for missed clogs inside the central shaft.
Optional Deep Cleaning: When & How to Do a Full Soak
If your dishwasher hasn’t been cleaned in six months or longer or if your water is very hard it’s worth doing a more thorough, deep clean.
Here’s how:
- Mix 1 part white vinegar with 1 part hot water in a tub or large sink
- Submerge the spray arms and let them soak overnight
- Optional: add one tablespoon of baking soda for extra degreasing power
- In the morning, scrub the arms again and rinse thoroughly
This method is excellent for removing limescale, grease buildup, and persistent food clogs. While soaking the spray arms, take a moment to clean the dishwasher’s filter and interior walls. A clean machine overall means your jets stay unclogged longer.
Prevent Future Clogs with These Easy Tips
Prevention goes a long way in keeping your dishwasher spray jets clean. A few small adjustments to your dishwashing routine can make a big difference:
Scrape food, don’t rinse
- You don’t need to fully rinse dishes, but scraping off large bits of food helps keep filters and jets clear.
Clean the filter regularly.
- Most filters are removable and can be rinsed clean in under five minutes. Aim to check and rinse yours every 1–2 weeks.
Use rinse aid
- Rinse aid improves water flow and drying while reducing mineral spots that can clog jets.
Run hot water before starting the cycle.
- Let the tap run hot for 10–15 seconds before starting the dishwasher. This ensures that hot water reaches the jets immediately, improving cleaning and dissolving grease more effectively.
Use dishwasher-cleaning tablets
- These monthly cleaners help break down detergent residue and grease inside the machine, keeping jets, filters, and drains clear.
Consider dishwasher salt
- If your dishwasher supports it and you’re in a hard water area, using dishwasher salt can help soften the water and reduce mineral deposits.
When DIY Isn’t Enough: Calling a Pro
Sometimes, a good cleaning just isn’t enough to solve the problem. Here’s when to consider professional help:
- The spray arms still don’t rotate after cleaning.
- There’s no water spraying at all.
- Clogs return frequently despite maintenance.
- You notice leaks, electrical faults, or burning smells.
Also, if your appliance is still under warranty, it’s best not to tamper with internal components beyond basic maintenance. A licensed technician can handle more advanced diagnostics without voiding coverage.
FAQs About Dishwasher Spray Arm Cleaning
How often should I clean the spray arms?
Every 2 to 3 months, or monthly, in homes with hard water. If your dishes aren’t coming out clean, inspect the arms sooner.
What’s the best cleaner for dishwasher jets?
White vinegar is an excellent choice for removing mild mineral buildup. For heavy-duty jobs, try citric acid or a dishwasher-specific cleaner tablet.
Can I use lemon juice as a substitute for vinegar?
Lemon juice can help but is weaker than vinegar. It’s more effective for freshening scent than for dissolving buildup.
What if I’m unable to remove the spray arms?
Some spray arms require a specific unlocking mechanism. Refer to your user manual or search for a video tutorial specific to your model. If they truly don’t budge, clean the jets in place using a needle and hot water.
Can clogged jets damage the dishwasher?
Not directly, but they cause poor cleaning and can overwork other components. Left unchecked, clogs can lead to residue buildup in the filter, drain, or pump.
Final Thoughts: Keep Your Dishwasher Running Like New
Taking the time to clean your dishwasher spray jets isn’t just about aesthetics it’s about restoring performance, saving water, and extending the life of your appliance. With just a bit of regular care, you can prevent clogs, reduce energy consumption, and ensure every dish comes out spotless.
Make it part of your monthly routine: inspect the spray arms, check the filter, and give your dishwasher a little TLC. Your dishes and your utility bill will thank you.