
DIY Cooktop Repair Safety Tips
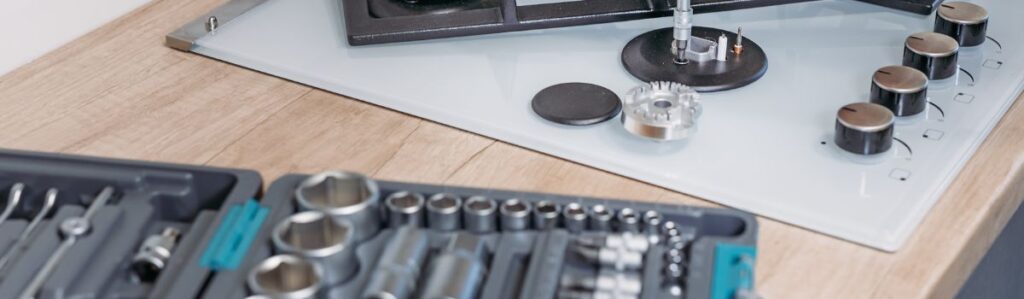
Stay Safe: Essential DIY Cooktop Repair Safety Tips You Need to Know
A malfunctioning cooktop can be a real disruption to your daily routine. Whether prepping a quick meal or entertaining guests, the last thing you want is a burner that won’t light or an element that refuses to heat. It’s no surprise many homeowners consider fixing it themselves after all, how hard can it be? Cleaning and maintenance play a big role in preventing many of these issues in the first place.
Some cooktop repairs are relatively simple, especially if you’re comfortable handling basic tools and following instructions. But it’s equally true that cooktops can be dangerous. They involve electricity, gas, heat, and sometimes fragile electronics none of which should be taken lightly.
This guide isn’t meant to scare you away from handling minor fixes. Instead, it’s designed to help you do it safely and responsibly. We’ll walk through what you need to know before you begin, how to approach the most common issues, and when to put down the wrench and call in a professional.
Know Your Cooktop: Gas, Electric, or Induction?
Before you pick up any tools, the most important step is 3identifying what kind of cooktop you have. Not all cooktops are created equal; each type carries safety concerns and repair limitations.
Identify the Type of Cooktop You Own
Here’s how to quickly determine your cooktop type:
- Gas Cooktops usually feature metal grates over burners. When you turn the knobs to ignite the flame, you’ll hear a clicking sound. They run on natural gas or propane.
- Electric Cooktops may have visible coil burners or a smooth glass-ceramic surface. When on, the burners glow red to indicate heat.
- Induction Cooktops also have smooth tops, but they heat pots and pans through electromagnetic fields, not radiant heat. If you’re unsure whether you’re dealing with induction, try placing a magnet on the bottom of your cookware if it sticks, it’s induction-compatible.
Understanding your cooktop type isn’t just academic. It affects everything from the tools you’ll use to the level of danger involved in a repair.
Why Cooktop Type Impacts Repair Safety
- Gas cooktops come with one major concern: gas leaks. A loose fitting or damaged valve can allow gas to seep into your kitchen an invisible, odourless threat that can lead to fire or explosions. Even something as routine as cleaning the burner ports must be done cautiously.
- Electric cooktops, while free from the risk of gas leaks, carry the danger of electrical shock. Many people don’t realize that some internal components can hold a charge even after unplugging. Mishandling them could result in burns, shocks, or damage to the appliance.
- Induction cooktops are sophisticated and delicate. They rely on control boards, magnetic coils, and sensors. Unlike a coil element you can unplug and replace, these systems require a nuanced understanding of electronics. One mistake can lead to expensive replacements.
Knowing your cooktop and how it functions will equip you to make smart decisions and avoid turning a minor problem into a major one.
First Things First: Pre-Repair Safety Checklist
Let’s discuss preparation now that you know what you’re working with. This step is where many DIY repairs go sideways not because of what’s done during the repair, but because of what’s not done beforehand.
Here’s a detailed safety checklist you should follow every single time:
- Shut off the power. If you’re working on an electric or induction cooktop, find the breaker in your electrical panel and switch it off. Unplugging may work for some models, but cutting power at the breaker is safer.
- Shut off the gas supply. For gas cooktops, locate the shut-off valve usually found in the cabinet below the cooktop and turn it clockwise until tight. Never attempt any work with an active gas line.
- Allow the unit to cool completely. Cooktops can retain heat longer than you think, especially under glass surfaces. Even touching seemingly “cool” elements can cause burns.
- Clear the surrounding area. Remove kitchen towels, paper products, oil bottles, or anything flammable nearby. Give yourself room to work without bumping or brushing against hazards.
- Have a fire extinguisher within arm’s reach. Even if you’ve done everything right, it’s smart to have a Class B or ABC extinguisher nearby one rated for grease and electrical fires.
These steps aren’t just “best practices” they’re essential to protecting yourself, your home, and your family.
Must Have Safety Gear and Tools
Think of safety gear as your first defence. Even if you’re experienced with tools, things can go wrong. Here’s what you should always have on hand when attempting a cooktop repair:
- Gloves: Choose heat-resistant and cut-resistant gloves. These gloves protect your hands from sharp edges, hot surfaces, and grease.
- Goggles or Safety Glasses: Even a minor spark or splash of cleaner can damage your eyes. Don’t risk it wear protection.
- Multimeter: This tool is vital if you’re working on an electric or induction cooktop. It allows you to test for voltage and continuity, helping you confirm that the power is truly off.
- Insulated Tools: Use tools specifically rated for electrical work. This includes screwdrivers with rubber handles and wire strippers designed to prevent conductivity.
- Work light or flashlight: Many cooktop components are tucked into dark, tight spaces. A good light improves visibility and reduces error.
Avoid makeshift solutions like butter knives, extension cords, or off-brand multimeters. Safety starts with the right equipment and the discipline to use it properly.
Step-by-Step: Safe DIY Repairs for Common Cooktop Issues
Let’s examine a few common issues you can often fix yourself safely. These steps are only for accessible parts and straightforward fixes. Stop and reassess if you get partway into any of these and feel uncertain.
Gas Burner Won’t Ignite
- Turn off the gas before doing anything.
- Remove the burner cap and clean it with a soft brush and mild soap.
- Gently brush out the gas ports using a toothbrush not a pin or needle, which can enlarge the openings.
- Wipe the igniter and surrounding area clean of debris and residue.
- Turn the gas back on and try lighting the burner.
Safety Note: If you smell gas at any point even a faint whiff shut everything down and ventilate the area. Do not attempt to light the burner.
Electric Element Not Heating
- Unplug the unit or cut power at the breaker.
- Remove the coil element (if it’s a plug-in type).
- Use a multimeter to test for continuity. If the reading shows a broken circuit, it’s time for a replacement.
- Replace only with a compatible part that matches the wattage and shape.
Caution: Never attempt to access or repair hardwired electric burners unless you are trained. These require electrical knowledge and could expose live wires.
The Induction Cooktop is Not Responding
- First, confirm that you’re using compatible cookware. Many “unresponsive” complaints are caused by improper pans.
- Try resetting the cooktop at the breaker.
- If the unit displays an error code, consult your user manual for basic troubleshooting. Do not open the cooktop or remove the glass panel.
Important: Induction repairs often involve capacitors, circuit boards, and diagnostic software. That’s best left to licensed technicians.
Red Flags: When to Stop and Call a Pro
There’s no shame in reaching your limits. Knowing when to stop is one of the smartest things you can do. These are the signs that it’s time to call a professional:
- You smell gas, even after shutting off the valve.
- You see sparks, melted wires, or burn marks inside the appliance.
- Your circuit breaker trips repeatedly when using the cooktop.
- You’ve tried a repair, and the issue persists or gets worse.
- Your cooktop is still under warranty, and you want to avoid voiding it.
If any of these happen, don’t try to push through. Step back, call a technician, and describe exactly what you did and saw. A proper diagnosis can prevent further damage and ensure your safety.
Ongoing Maintenance for a Safer Kitchen
The best way to avoid unsafe repairs is to avoid needing repairs altogether. Each month, a few minutes of maintenance can save you hours of frustration and prevent accidents.
Here’s how to keep your cooktop in top shape:
- Wipe up spills immediately, especially around knobs and burners. Accumulated grease is a fire hazard and can interfere with ignition or heating.
- Clean burner caps and ports regularly to maintain smooth flame ignition.
- Inspect electrical cords (for plug-in models) and connections for wear, cracks, or signs of overheating.
- Avoid abrasive scrubbers and metal tools on smooth glass or ceramic surfaces.
- Schedule professional inspections annually, especially for gas appliances.
Consistency is key. Regular care not only extends the life of your cooktop but also helps you spot problems before they become dangerous.
Conclusion: Be Smart, Stay Safe, Know When to Step Back
Something is empowering about fixing your appliances but cooktops aren’t like tightening a loose doorknob or patching drywall. They involve forces that demand respect: fire, electricity, and pressure.
So yes, tackle that non-igniting burner or slow-heating coil but only if you’ve taken the time to prepare, protect, and understand what you’re working with.
Don’t hesitate to call a pro when the issue is beyond your scope or the risk is too high. Because at the end of the day, the best outcome isn’t just a working cooktop. It’s a safe kitchen, a confident homeowner, and peace of mind that everything’s done right.