
Freezer Performance Optimization
Optimizing Freezer Performance: The Complete Guide for Homeowners and Professionals
Whether you’re storing food for your family or preserving sensitive materials in a lab setting, your freezer is one of the most critical appliances in your home or workplace. Yet, it’s also one of the most overlooked regarding energy efficiency and performance. Many people don’t realize that a poorly performing freezer can waste hundreds of kilowatt-hours of energy each year, drive up utility bills, and shorten the freezer’s life and its contents. One often overlooked fix is insulation replacement, which can significantly improve efficiency and reduce energy loss.
Optimizing freezer performance isn’t about expensive upgrades or complicated tech. In most cases, it comes down to smart maintenance, temperature awareness, and changes in how and where the appliance is used. This guide is for anyone who wants to get the most out of their freezer whether you’re a homeowner looking to reduce energy costs, a small business owner managing food inventory, or a lab technician working with temperature-sensitive samples.
Let’s break it down so you can take action today and see long-term results.
Freezer Fundamentals: How It Works
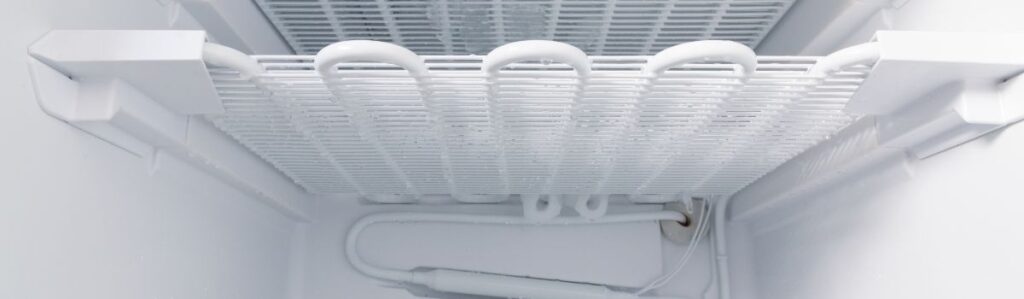
Before improving performance, you need to understand how your freezer functions. At the heart of every freezer is a simple yet powerful cooling system comprising a compressor, condenser coils, an evaporator, and a thermostat. These components work together to remove heat from the unit and keep the temperature low.
The compressor pumps refrigerant through the coils. As the refrigerant moves, it absorbs heat inside the freezer and releases it externally. The evaporator fan helps circulate cold air evenly throughout the compartment while the thermostat monitors the temperature and signals the compressor to turn on or off.
Different types of freezers offer different advantages. Chest freezers are highly efficient because cold air sinks and remains trapped when the door opens. They’re ideal for long-term storage of bulk items. On the other hand, Upright freezers offer shelves for better organization but tend to lose more cold air with each opening. Then, there are Ultra-Low Temperature (ULT) freezers, typically used in medical or research settings. These freezers maintain temperatures as low as -80°C and require more precise performance management.
Poor airflow is a common issue across all types. If overfilled bins or misplaced items block vents, temperatures become uneven, causing certain areas to warm up or over-freeze. Understanding these basic mechanics is essential to optimize your freezer’s function without relying solely on repairs or replacements.
Set It Right: Finding and Maintaining the Ideal Temperature
The temperature setting you choose is central to your freezer’s performance and efficiency. For typical household use, the recommended temperature is -18°C (0°F). Food stays frozen solid at this level, bacteria growth is halted, and energy use is balanced. Going significantly lower doesn’t add much benefit but can increase electricity consumption.
ULT freezers are often set to -80°C in labs and research facilities by default. However, more and more institutions are now setting these units to -70°C instead. The difference may seem small, but it can reduce energy use by 20 – 30% a significant saving, especially when managing multiple freezers.
Use a standalone freezer thermometer to ensure your unit is running at the correct temperature. Built-in displays can be off by several degrees. If your freezer holds sensitive or valuable items, you can also find smart thermometers with alerts and data tracking.
Even minor temperature fluctuations can impact food quality or, in the case of medical or research materials, compromise an entire batch. Keeping the temperature stable isn’t just a technical detail it’s foundational to preserving what matters most.
Seal the Cold In: Gasket and Door Integrity
Your freezer’s door seal, also known as a gasket, is one of its most critical components and one of the easiest to overlook. A damaged or dirty seal allows cold air to escape and warm, moist air to enter. Over time, this leads to frost buildup, increased compressor activity, and uneven cooling. You’ll pay more to run the freezer while getting worse results.
There’s a quick and simple way to test your seal: take a piece of paper, close the freezer door on it, and try to pull it out. If it slides out easily, the seal will likely fail and must be cleaned, repaired, or replaced.
Clean your gasket every month using warm water and a mild detergent. Avoid harsh chemicals that can dry out or crack the rubber. If the gasket feels stiff or brittle, applying a small amount of petroleum jelly can help restore flexibility although this is a short-term fix.
If you see visible cracks or the seal won’t stay in place, it’s time for a replacement. Many gaskets are designed to be user-replaceable and can be ordered online or through your appliance manufacturer.
A tight, well-maintained seal ensures the cold air stays in, and your compressor doesn’t have to work overtime. That’s better for your freezer, wallet, and peace of mind.
Keep It Clean: Smart Maintenance That Pays Off
Routine maintenance is the key to long-term freezer performance. Dust, grime, and ice buildup can all interfere with your unit’s ability to function efficiently.
Start with the condenser coils. Depending on the model, these are either at the back or underneath your freezer. When dust collects on them, the coils can’t effectively release heat, and the compressor has to work harder. Cleaning them every three to six months with a coil brush or a vacuum is one of the most impactful maintenance tasks you can do.
Next, tackle frost management. Even frost-free models can accumulate ice over time, especially if seals are weak or the door is opened frequently. If you notice a layer of frost on the walls or ceiling, it’s time to defrost. For manual-defrost models, unplug the unit, remove all items, and let the ice melt. Never chip away at the frost with sharp tools you risk damaging the internal components.
Also, pay attention to how you organize your freezer. Overpacking restricts airflow, which results in uneven cooling and makes the compressor cycle more often. Aim for about 75 – 85% full. Group similar items together so cold air can circulate freely.
These steps might seem small, but they add up to lower energy bills, better food preservation, and fewer repair calls.
Location Matters: Where to Place Your Freezer
Believe it or not, the environment around your freezer has a significant effect on its performance. If your freezer is located in a hot garage, near a sunny window, or beside a stove or dryer, it has to work significantly harder to maintain its internal temperature.
Place your freezer in a cool, dry, ventilated area. This could be a utility room, insulated basement, or shaded kitchen corner. If you’re using a freezer in the garage, monitor the ambient temperature. Most freezers are designed to operate within a specific temperature range usually between 10°C and 32°C (50°F to 90°F). In extreme cold, the thermostat may misread the conditions and shut down; in heat, it may struggle to cool efficiently.
Ensure at least 2–3 inches of space behind and on each freezer side to allow for proper airflow. Good ventilation helps release heat and reduces strain on the compressor.
If relocation isn’t an option, consider installing a garage freezer kit or a small fan to assist with airflow. Small changes in setup can improve performance greatly.
Upgrade Wisely: Choosing or Replacing a Freezer
Freezers are long-lasting appliances, but they don’t last forever. If your unit is older than 10 to 15 years, it may be time to upgrade. Not only do older freezers consume more energy, but they also lack modern efficiency features like inverter compressors or smart temperature controls.
Look for models that carry the ENERGY STAR® label. These units use 10 to 15% less energy than non-certified models and often include better insulation, temperature accuracy, and quiet operation.
Due to their shape and design, chest freezers tend to be more efficient they retain cold air better when opened. However, upright freezers are often preferred for convenience, organization, and smaller spaces.
When deciding whether to repair or replace, consider the repair cost and the annual energy savings a new model could offer. For example, replacing a 20-year-old freezer with a new, high-efficiency model could save you $100 or more per year in electricity alone.
A freezer upgrade is an investment, but it pays off in reliability, performance, and lower energy bills.
Pro Zone: Commercial & Lab Freezer Optimization
Freezer optimization takes on a whole new level of importance in professional settings, especially in labs or medical environments. Ultra-low temperature (ULT) freezers consume up to 20 times more energy than a standard household unit. Mismanagement of just one ULT freezer can waste thousands of dollars in electricity annually.
A growing number of institutions are adjusting their ULT freezers from -80°C to -70°C, based on studies showing this change has minimal impact on most biological samples but results in substantial energy savings.
In addition to temperature adjustments, lab staff should:
- Minimize door openings to prevent temperature spikes
- Use inventory systems to reduce search time
- Install alarms or data loggers to monitor fluctuations
- Schedule preventive maintenance for compressors and seals
For labs and healthcare settings, efficiency isn’t just about cost; it’s about safety, compliance, and operational stability.
Troubleshooting Performance Drops
Even the best-maintained freezer can develop issues. The key is recognizing the signs early and taking action before a small problem becomes a major breakdown.
Watch out for these warning signs:
- The compressor runs constantly or never kicks in
- Frost builds up rapidly
- Food doesn’t stay fully frozen
- The internal light or display malfunctions
If you notice any of these, check the door seals, condenser coils, and internal temperature first. Dirty coils or damaged gaskets can cause many issues.
If problems persist, it could be a thermostat or compressor failure. These are repairable, but it’s important to weigh the cost of service against the value and age of your freezer. Don’t hesitate to contact a qualified technician for a diagnosis.
Conclusion & Quick Tips Recap
Optimizing freezer performance is less about big changes and more about consistent, smart habits. A well-maintained freezer lasts longer, performs better, and saves money year after year.
Here’s your quick-start checklist:
- Set your freezer to -18°C (or -70°C for ULT models)
- Test and clean your door gaskets every month
- Clean the condenser coils every 3–6 months
- Defrost regularly and avoid overpacking
- Place your freezer in a cool, ventilated area
- Upgrade if your model is over 15 years old
These are simple steps with big benefits. Whether you’re storing meat for your family or safeguarding research samples, these practices ensure your freezer remains one of the most reliable tools.
Looking to take the next step? Consider booking a freezer inspection or upgrading to a high-efficiency model that fits your lifestyle or your lab’s demands.