
LG Dryer Installation Instructions
How to Install Your LG Dryer: Step-by-Step Guide
Setting up an LG dryer correctly ensures safe and efficient operation. Follow these steps to install your dryer, from unboxing to final testing. Refer to the maintenance checklist to keep track of essential setup and safety steps.
Unpacking and Preparation
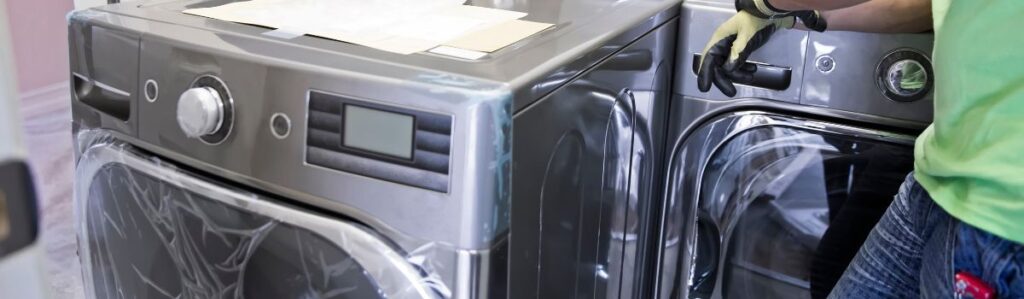
Start by stripping away all packaging materials plastic wrap, foam inserts, and protective film. Inspect the dryer’s exterior for any dents, scratches, or other signs of shipping damage. If anything looks off, document it and contact the retailer before proceeding.
Next, take stock of all included parts. Locate the power cord (if applicable), exhaust vent components, hoses, mounting brackets, and any additional hardware. Cross-check this with the installation guide to ensure nothing is missing.
Now, decide where the dryer will sit. The space should meet the clearance specifications outlined in the user manual, allowing enough room for ventilation, connections, and door movement. Avoid cramped corners or tight enclosures that could restrict airflow. The area should also stay dry; excess moisture can lead to performance issues or even electrical hazards.
Before moving forward, confirm that the installation spot has the right hookups: a compatible electrical outlet or gas line, a proper exhaust vent, and if you’re setting up a steam dryer a cold water connection. With everything in place, you’re ready for the next steps.
Choosing the Right Location
Placement matters get it wrong, and you’re in for noise, inefficiency, or even safety risks.
- Solid, Level Surface: A wobbly dryer is a noisy dryer. Install on a firm, even floor to minimize vibration and movement. If the surface isn’t perfect, adjust the leveling feet accordingly.
- Clearance & Ventilation: Check the manual for minimum spacing requirements. Leave enough room behind and around the dryer for air circulation, venting, and easy access to connections. Too cramped? Heat buildup and restricted airflow can lead to performance issues.
- Avoid Problematic Areas: Stay clear of spaces with excessive moisture, poor ventilation, or heavy dust. Basements or garages with extreme temperatures can affect drying efficiency, while humid areas increase the risk of rust and mildew. Keep the unit away from open flames or heat sources like furnaces.
Choose wisely the right location sets the foundation for smooth, long-term operation.
Power Requirements
Before plugging in your LG dryer, confirm your home’s electrical supply meets the unit’s specifications. Check the voltage rating in your user manual and match it with your outlet most electric dryers require a 240V connection.
Your dryer must be connected to a properly grounded 3- or 4-prong outlet, depending on your home’s setup. If your outlet doesn’t match, do not modify the plug or use an adapter hire a licensed electrician to install the correct outlet.
Never use an extension cord. Dryers draw significant power, and an extension cord can overheat, creating a fire hazard.
If you’re installing a gas dryer, it will still need a standard 120V grounded outlet to power the controls and igniter. Double-check your connections before moving forward.
Venting Setup
Proper venting is non-negotiable it affects everything from drying efficiency to fire safety. Follow these key guidelines to ensure a safe and effective setup.
Choose the Right Materials
- Use metal ducts (rigid or flexible).
- Avoid plastic or foil these trap lint and create a fire hazard.
Optimize the Vent Path
- Keep the vent path short and as straight as possible.
- If bends are necessary, use gentle curves instead of sharp angles to maintain airflow efficiency.
Secure All Connections
Use clamps to secure fittings loose connections can leak air and slow down drying.
Check the outside vent to ensure:
- It opens freely.
- There are no obstructions (e.g., bird nests or lint buildup).
Follow Building Codes
- If you’re running the vent through a wall, follow local building codes to ensure proper installation.
- A proper setup now helps prevent future problems and ensures safety.
Gas vs. Electric Dryer Setup
Electric Dryer Installation
Setting up an electric dryer is straightforward but non-negotiable on safety.
- Power Supply: Use a dedicated 240V outlet nothing else will do.
- Cord Connection: Depending on your home’s setup, you’ll need either a 3-wire or 4-wire power cord. Match the dryer’s terminal setup exactly.
- Securing Wires: Tighten connections firmly but don’t overdo it stripping or damaging wires is a headache you don’t want.
- Double-Check Grounding: If using a 4-wire setup, verify that the neutral is separate from the ground to avoid electrical issues.
Gas Dryer Installation
Gas connections demand precision mistakes can mean leaks, and leaks mean real danger.
- Shut Off the Gas: Rule number one don’t work with a live gas line. Find the shutoff valve and close it before doing anything else.
- Use the Right Connector: Flexible stainless steel gas connectors are your best bet. Skip rubber or cheap alternatives; they aren’t meant for this job.
- Seal the Threads: Apply a small amount of pipe joint compound (rated for gas use) to the thread connections before tightening. This prevents leaks.
- Tighten Securely, But Smartly: Connections should be snug but forcing them can strip threads or crack fittings. Precision beats brute strength.
- Leak Test: Mix soap and water, brush it onto the connection, and slowly turn on the gas. If you see bubbles, you have a leak. Shut it down and re-tighten; leaks are not optional.
With either setup, don’t rush. Taking an extra minute to verify connections now saves you from troubleshooting (or worse) later.
Water Supply (For Steam Dryers)
If your LG dryer has a steam function, it needs a water supply. Follow these steps for a proper connection:
- Locate the cold water source – Steam dryers must be connected to a cold water supply, not hot. Use an existing washer hookup if available.
- Attach the inlet hose – Connect one end of the provided water inlet hose to the dryer’s water inlet valve.
- Secure to the water supply – Attach the other end to the cold water faucet. Use the included rubber washers to prevent leaks.
- Tighten, but don’t overtighten – Turn the hose connections snug by hand, then give them an extra quarter-turn with pliers. Over-tightening can damage the fittings.
- Check for leaks – Turn on the water supply and inspect both connections. If you see drips, slightly tighten the fittings.
Once the water supply is connected and leak-free, your steam dryer is ready for operation.
Levelling the Dryer
An unlevel dryer isn’t just annoying it can cause excess noise, vibration, and even performance issues. Take the time to level it properly.
- Adjust the Feet – At the base of the dryer, locate the adjustable leveling feet. Turn them clockwise to lower the dryer and counterclockwise to raise it. Start with small adjustments.
- Check with a Level – Place a level on top of the dryer, front to back and side to side. The bubble should sit centered. If not, make further adjustments to the feet.
- Test for Stability – Try rocking the dryer gently from different corners. If it wobbles, fine-tune the feet until it sits firmly in place.
- Double-Check if Stacking – If your dryer sits on top of a washer, make sure both units are level. Even a small imbalance can lead to movement during operation.
A stable dryer means fewer headaches and quieter operation. Take the extra few minutes now to avoid issues later.
Final Checks
Before you call it a job well done, run through these last steps to ensure safety and functionality.
- Electrical and Venting Connections – Make sure all power cords, plugs, and vent hoses are securely fastened. A loose connection can cause inefficiency or even hazards.
- Gas Flow (If Applicable) – If you installed a gas dryer, turn on the gas supply and check for leaks using a soap and water solution. If you see bubbles forming, shut off the gas and recheck the connection.
- Lint Filter & Door – Ensure the lint filter is correctly inserted and free of debris. Open and close the dryer door a few times to check for a secure seal.
- Surrounding Area & Stability – Inspect the area around the dryer. Make sure there are no obstructions and that the dryer sits level, with no wobbling.
A thorough final check helps prevent common installation mistakes and ensures the machine is ready for use.
Initial Test Run
Now that everything is connected, it’s time to make sure the dryer runs as expected.
- Plug it in and power it on – If the control panel doesn’t light up, double-check the power source.
- Run an empty cycle – Choose a basic drying cycle and start the dryer.
- Check for heat – Feel inside after a few minutes to confirm it’s warming up (for gas dryers, ensure the burner ignites).
- Listen for odd noises – Grinding, rattling, or excessive vibration could mean the dryer isn’t level or something is loose.
- Inspect the exhaust airflow – Go outside and check that air is flowing strongly from the vent. Weak airflow could indicate a blockage.
- Watch for error codes – If the dryer displays a fault code, refer to the manual for troubleshooting.
If everything runs smoothly, the dryer is ready for use. If not, address any issues before running a full load.
Troubleshooting Common Issues
Even with a proper installation, minor issues can arise. Here’s how to diagnose and fix the most common problems:
Dryer Won’t Turn On
- Ensure the dryer is plugged in.
- Check the circuit breaker and reset it if necessary.
- For gas dryers, confirm that the gas supply is turned on.
No Heat
- Gas models: Make sure the gas valve is open and the igniter is functioning.
- Electric dryers: Verify that the power cord is correctly installed and that your home’s voltage matches the dryer’s requirements.
Excessive Noise
- Check for loose items inside the drum.
- If the dryer vibrates too much, recheck the leveling feet and ensure it’s placed on a stable surface.
- Clanking sounds may indicate an improperly installed drum or loose screws.
Slow Drying Times
- A clogged vent can severely impact airflow check and clean it.
- Ensure the exhaust duct is properly connected and as short and direct as possible.
- Using the wrong drying cycle for heavy fabrics can also extend drying times.
If problems persist after these checks, refer to the user manual or contact LG support before attempting advanced repairs.
Regular Maintenance for Optimal Performance
A well-maintained dryer runs more efficiently and lasts longer. Stick to these simple habits to keep yours in top shape.
- Clean the lint filter after every use. A clogged filter reduces airflow, forcing the dryer to work harder and increasing the risk of fire. Slide it out, clear the lint, and put it back takes seconds.
- Check and clean vents periodically. Lint buildup in ducts slows drying times and can become a fire hazard. Every few months, disconnect the vent and remove any debris. A strong exhaust flow at the outdoor vent means you’re good to go.
- Inspect gas and electrical connections annually. Loose wires or aging gas lines can cause inefficiency or worse, a safety issue. Check for wear, make sure fittings are tight, and replace anything suspect.
Regular upkeep isn’t complicated, but it pays off. A little effort keeps your dryer running efficiently and safely for years.