
DIY Dryer Vent Hose Repair & Replacement
How to Repair & Replace a Dryer Vent Hose (DIY Guide)
A properly functioning dryer vent hose is essential for maintaining efficiency and ensuring household safety. The vent hose serves a critical function by directing hot, moist air out of the dryer and safely expelling it outside. When the hose becomes damaged, clogged, or disconnected, it can lead to serious issues such as excessive lint buildup, inefficient drying cycles, and even fire hazards.
According to fire safety experts, a neglected venting system is one of the leading causes of home fires related to dryers. Dryer vents maintenance helps prevent blocked vents, which reduce airflow, making the dryer work harder and creating a flammable environment. A simple tear or loose connection in the vent hose can allow lint to accumulate in places it shouldn’t, increasing the risk of a fire hazard.
This guide will explain how to inspect, repair, and replace your dryer vent hose step by step. Following these instructions ensures your dryer operates safely and efficiently, avoiding costly energy waste and potential fire risks.
How to Identify a Damaged Dryer Vent Hose
Warning Signs of a Faulty Vent Hose
Many homeowners don’t realize they have a venting issue until their dryer performance suffers. Recognizing the early signs of a failing vent hose can help prevent bigger problems.
- Clothes take longer than usual to dry – If your dryer is running longer than normal, it could be due to restricted airflow caused by a damaged vent hose.
- Excess heat or humidity accumulates in the laundry room – A properly functioning vent hose directs heat and moisture outdoors. If you notice excessive warmth or condensation in your laundry area, your venting system might not work.
- A burning smell or excessive lint near the dryer – Lint is highly flammable. If you smell burning or see an unusual amount of lint collecting around your dryer, it’s a red flag that the air is not being properly exhausted.
- Visible cracks, holes, or disconnected sections – Regularly inspecting the vent hose can reveal physical damage that needs immediate attention.
Common Causes of Damage
A dryer vent hose can become damaged for various reasons. Understanding these causes can help prevent premature failure and maintain an efficient venting system.
- Normal wear and tear – Vent hoses can develop cracks or become brittle due to repeated exposure to heat and moisture.
- Poor installation or incorrect hose type – Using a plastic or foil vent hose instead of a rigid or semi-rigid metal hose can lead to faster degradation and potential fire hazards.
- Sharp bends, crushing, or improper routing – If the hose is crushed behind the dryer or has excessive bends, it restricts airflow and increases the likelihood of lint buildup.
- Damage caused by pests, pets, or accidental interference – Rodents and insects sometimes enter dryer vents, chewing through the hose or blocking the airflow with nests.
Safety Precautions Before You Start
Safety should always be your top priority when working on your dryer’s venting system. Here are some important steps to take before beginning any repair or replacement.
- Always unplug the dryer and turn off the gas supply (if applicable) before working on the appliance. This prevents accidental electrocution or gas leaks.
- Ensure proper ventilation. Work in a well-ventilated area to avoid inhaling dust and lint that may be released during the repair process.
- Wear protective gear. Gloves protect your hands from sharp metal edges, while a dust mask prevents inhalation of fine lint particles.
- Check for obstructions in the vent line. Before reattaching any hoses, inspect the entire venting path for blockages, ensuring there is no trapped lint or debris.
Tools & Materials You’ll Need
Having the right tools and materials on hand will make the repair or replacement process much easier.
Essential Tools
- Flathead and Phillips screwdriver – Needed to remove and tighten clamps.
- Adjustable wrench or nut driver – Helps with securing metal connections.
- Utility knife or tin snips – Used for trimming old or new vent hoses to the correct length.
- Vacuum cleaner with a hose attachment – Helps remove lint buildup from vents and dryer connections.
Recommended Materials
- New vent hose – Opt for a rigid or semi-rigid metal vent hose, which is more durable and safer than plastic or thin foil hoses.
- Hose clamps or UL–listed foil tape – ensure a tight, secure connection. Avoid using standard duct tape, which can degrade over time.
- Lint trap cleaner or vent brush – This is Used to remove lint buildup inside the vent hose and dryer exhaust opening.
How to Repair a Dryer Vent Hose (Temporary Fixes)
If the damage to your dryer vent hose is minimal, a temporary fix might be a practical short-term solution.
Step 1: Locate the Damage
Carefully inspect the entire hose, looking for holes, loose connections, or cracks. If the hose is crushed or severely kinked, replacement is usually the best option.
Step 2: Trim & Reconnect
If the damage is isolated to a small section, trim it off using tin snips or a utility knife. Then, using hose clamps, reconnect the hose to the dryer and wall vent.
Step 3: Seal Small Holes
For small punctures or cracks, apply UL-listed foil tape over the damaged area to create an airtight seal. Avoid using duct tape, as it won’t hold up under heat and moisture.
How to Replace a Dryer Vent Hose (Step-by-Step)
A full replacement is recommended for major damage.
Step 1: Remove the Old Vent Hose
Loosen the clamps or carefully cut away any securing tape.
Detach the hose from both the dryer and the wall vent.
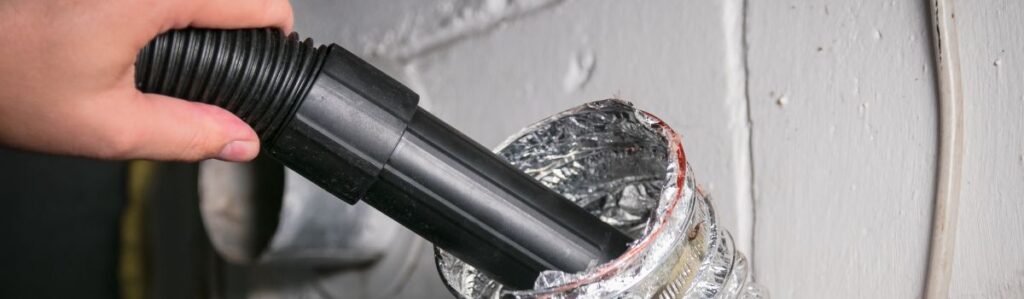
Use a vacuum cleaner to remove any built-up lint from the connections.
Step 2: Measure and Cut the New Hose
Measure the distance between the dryer and the external vent.
Cut the new hose to the appropriate length, avoiding unnecessary slack.
Step 3: Attach the New Hose
Secure one end to the dryer exhaust vent and the other to the wall vent.
Use hose clamps or UL-listed foil tape to ensure a snug fit.
Step 4: Test the Connection
Plug the dryer back in and run a short cycle.
Check for any leaks or loose connections by feeling for escaping air around the hose.
Best Practices for Dryer Vent Hose Maintenance
- Inspect your vent hose regularly for signs of wear or blockages.
- Clean the vent system at least every six months to remove lint buildup.
- Ensure the hose is installed with minimal bends to allow unrestricted airflow.
Conclusion
A well-maintained dryer vent hose keeps your appliance running efficiently and prevents potential fire hazards. By inspecting and cleaning the vent regularly, you can extend the lifespan of your dryer and improve its performance. If a repair isn’t enough, replacing the vent hose is a straightforward process that ensures safe and effective operation. Stay proactive with maintenance, and your dryer will thank you!