
Spare Parts Guide for DIY Washing Machine Repair
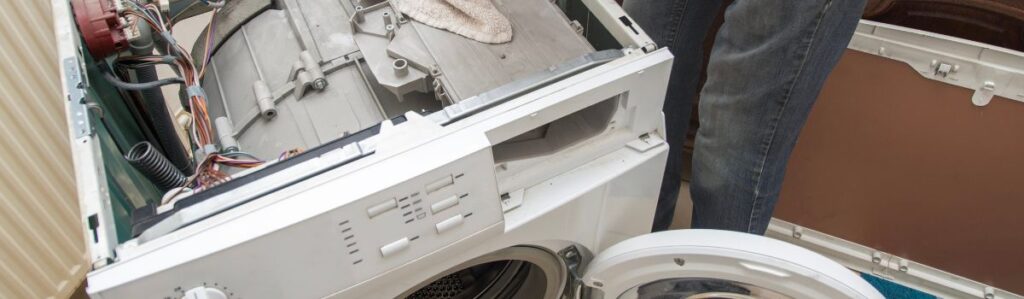
DIY Washing Machine Repair: Spare Parts Guide
Fixing your washing machine by yourself can save you time and money. Plus, it feels great to fix something on your own. But sometimes, DIY repairs fail because people don’t know which parts they need or order the wrong ones. Maintenance issues in washing machines can also make repairs harder than they need to be, especially if you don’t have the right tools.
This guide is here to help. We’ll show you how to recognize the important parts of your washing machine, how these parts work together, and how to find the right tools. By the end, you’ll have the knowledge and confidence to handle common washing machine problems without stress.
How Washing Machine Parts Work Together
A washing machine runs smoothly when all its parts work together properly. Each washing cycle filling with water, agitating clothes, spinning, and draining happens in order and on time. The motor powers the drum to spin while the pump moves water in and out. The control panel and timer decide when each stage starts and stops.
Understanding how these parts work together helps determine what’s wrong when your washer isn’t working. For example, if the drum isn’t spinning, the issue could be with the motor, drive belt, or timer. Knowing these connections means identifying the right part to fix without guessing.
Essential Washing Machine Parts and Their Functions
Here are the key parts of a washing machine, grouped by what they do:
Water-Related Parts
- Water Inlet Valves: These let water into the machine. If they break, the machine might not fill properly.
- Drain Pump: Removes water after each cycle. A broken pump leaves water in the drum.
- Drain Hose: Carries water out of the washer. If blocked, water won’t drain properly.
Movement and Agitation Parts
- Drive Belt: This belt connects the motor to the drum. If it wears out, the drum won’t spin.
- Motor Coupling: Helps the motor move the drum. If it breaks, the drum stops moving.
- Agitator/Impeller: Moves the clothes for cleaning. If damaged, clothes won’t get cleaned properly.
Control and Power Parts
- Control Panel: Lets you choose washing settings.
- Timer: Makes sure each stage happens in the right order.
- Motor: Powers the drum’s spinning and agitation.
Sealing and Protection Parts
- Door Seal/Gasket: Keeps water from leaking during a cycle.
- Shock Absorbers: Reduce noise and keep the machine stable during use.
Pro Tip: Check these parts regularly to avoid unexpected problems.
Diagnosing Common Washing Machine Problems
If your washer isn’t working right, here’s how to match problems with possible broken parts:
- Won’t Start: The lid switch or control board may be broken.
- Water Leaks: Check the door seal, pump, and hoses for cracks or loose parts.
- No Spinning: The drive belt or motor might need replacing.
- Loud Noises or Shaking: The shock absorbers or drum bearings could be worn out.
- Water Won’t Drain: The drain pump or hose might be blocked.
- Wrong Water Temperature: The water inlet valves or heating element could be faulty.
Quick Tip: Always look at parts first. If they seem fine, test them with diagnostic tools.
How to Identify and Buy the Right Spare Parts
Start by finding your machine’s model and serial numbers. You’ll usually find them behind the door, on the back, or under the lid. This information helps you buy the correct parts.
There are two main types of parts:
- OEM (Original Equipment Manufacturer) Parts: are made by the original manufacturer. They cost more but fit perfectly.
- Aftermarket Parts: Cheaper but may not fit as well or last as long.
Always check reviews and return policies before buying parts. Buying from trusted sellers will save you time and hassle.
Must-Have Tools for Repairs
These tools will help you fix your washer safely and efficiently:
Basic Tools
- Screwdrivers (Flathead and Phillips)
- Adjustable Wrenches
- Needle-nose and Standard Pliers
Diagnostic Tools
- Multimeter: Tests electrical components.
- Continuity Tester: Checks if circuits are working.
Specialized Tools
- Spanner Wrench: For drum removal.
- Spring Expansion Tool: For suspension adjustments.
Pro Tip: Buy quality tools. Cheap tools may break or cause injury.
Safety Precautions
Safety is the most important part of any repair. Always unplug the washer and turn off the water supply before starting. Wear gloves to protect your hands and ensure your work area is dry to avoid electrical shocks.
Safety Highlight: Never work on the washer while it’s plugged in. It’s dangerous and can cause serious harm.
Step-by-Step Repair Process
Follow these steps for a successful repair:
- Preparation: Collect tools and make sure you have the correct replacement parts.
- Diagnosis: Confirm which part is broken using visual inspections and diagnostic tools.
- Disassembly: Carefully open the necessary parts of the washer without forcing anything.
- Replacement: Install the new part, making sure everything is secured properly.
- Testing: Run a full wash cycle to make sure everything works.
Common Mistake: Don’t rush testing. It’s better to catch a mistake early than to redo the repair.
Maintenance Tips to Prolong Washer Life
To avoid future repairs, follow these maintenance tips:
- Clean the drum, filters, and detergent trays regularly.
- Balance the laundry load to reduce stress on belts and shock absorbers.
- Inspect hoses and seals monthly to catch small issues early.
Frequently Asked Questions
Can I use generic parts?
Yes, but always check if they’re compatible.
How do I check if a part is broken without tools?
Often, obvious damage can be seen during an inspection.
How long do washing machine parts last?
Depending on use and care, most parts last 5–10 years.
Conclusion
With the right knowledge, tools, and safety precautions, fixing your washing machine can be simple and rewarding. Now that you’ve learned how to identify and replace key parts, you can take on repairs yourself. With regular maintenance and the tips in this guide, you’ll keep your washing machine running smoothly for years. Happy repairing!